Dashboard
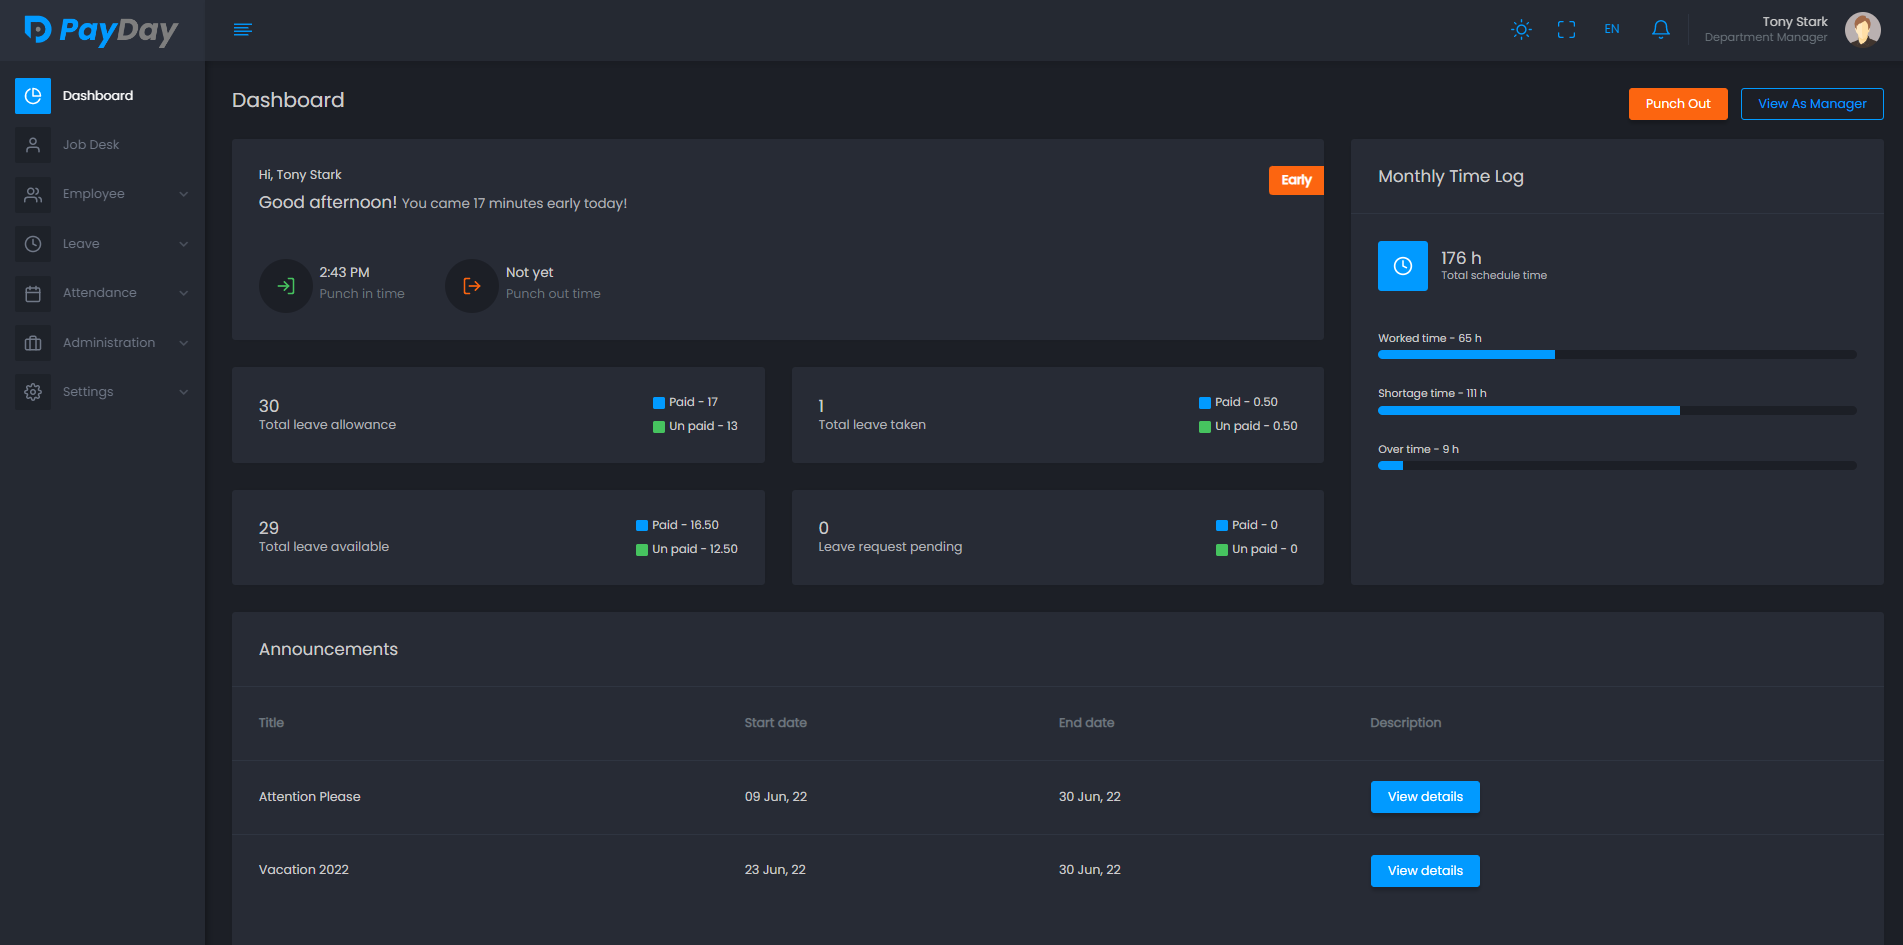
View an overview of your application here. You can find two different dashboard from admin view and general employee view,
In Employee Dashboard
- View your Punch In and Punch Out summery.
- View your monthly time log.
- View your available leave and total summery of it.
- View any important announcement from manager or admin.
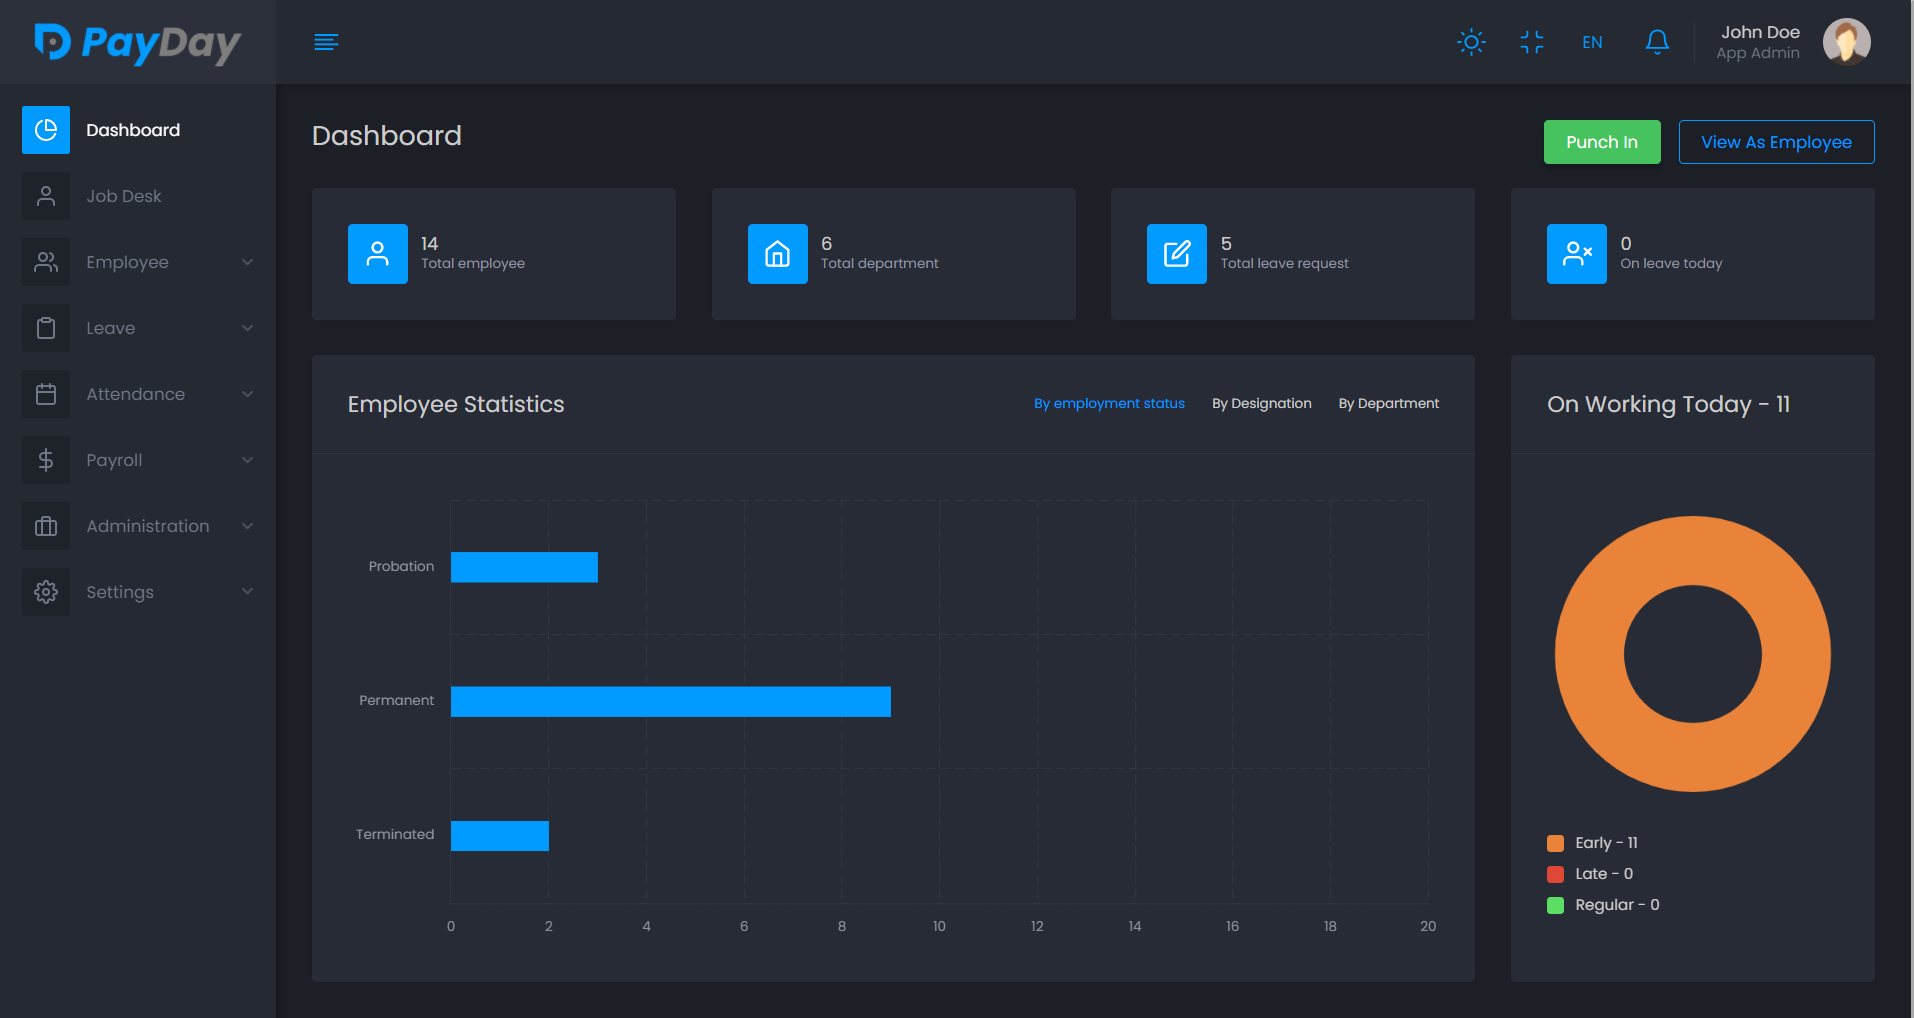
In Admin Dashboard
- View total employee number, total department, leave request and on leave employee number
- View your employee statistics based on their statuses
- View how many employees are working and their attendance behavior in one chart
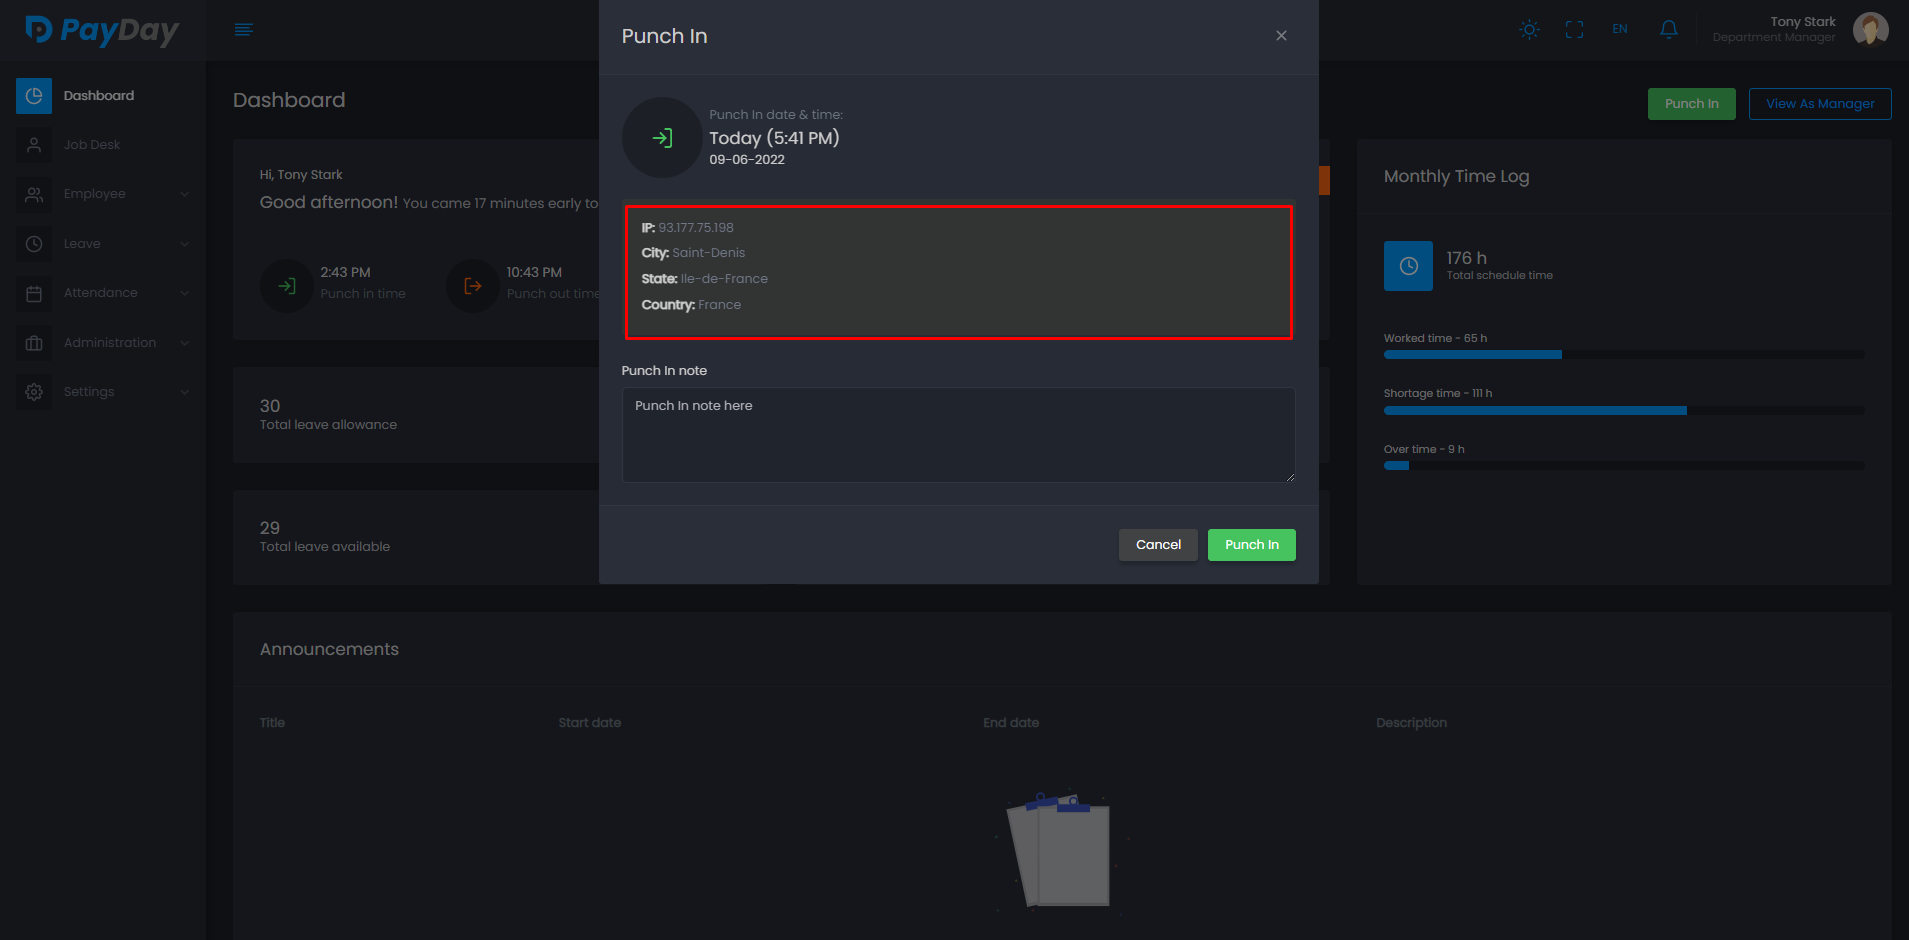
Punch In
Here employee can give attendance by just clicking Punch In button.
Punch Out
By clicking Punch Out button employee exits his attendance.
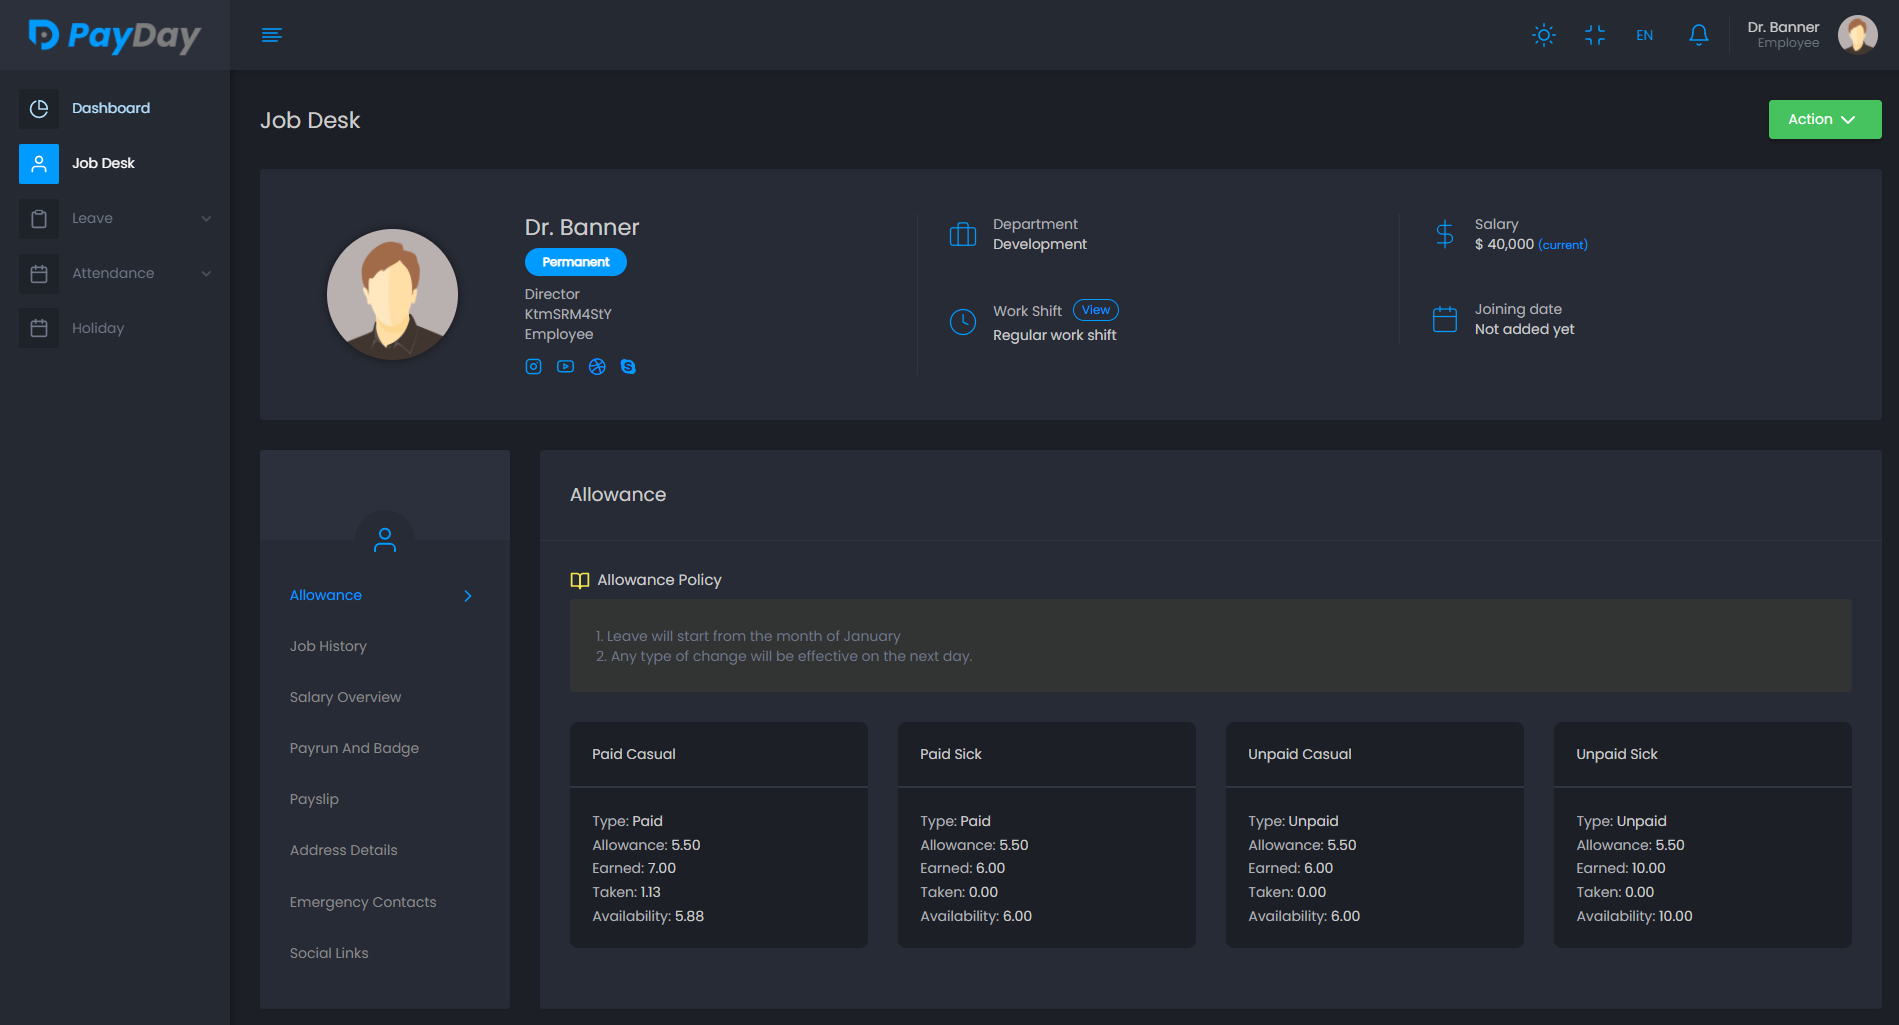
Job Desk
Here you can find all of job related in formation and summery in just one place. In short this is a job profile for every employee.
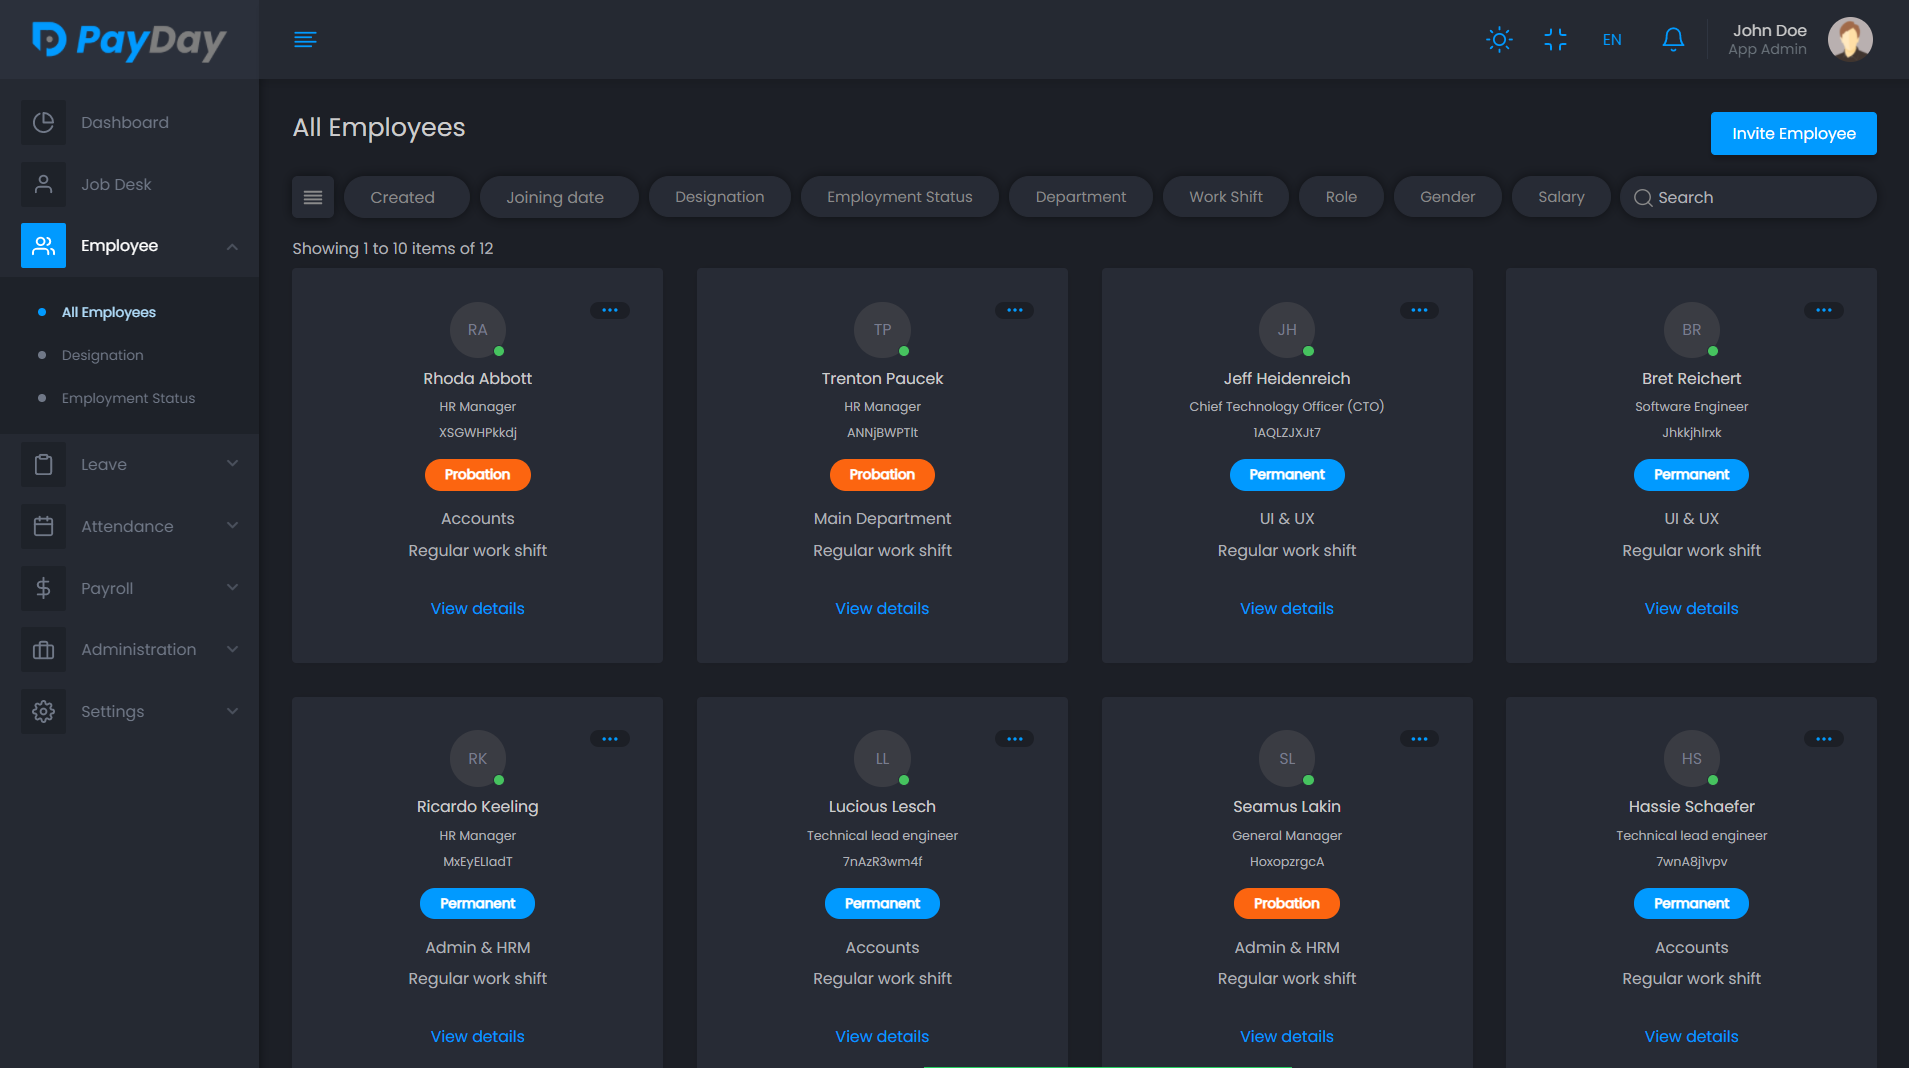
Employee
You can manage all your employees here. You can view details of them and do different actions like assign leave or attendance, add salary, joining date and much more.
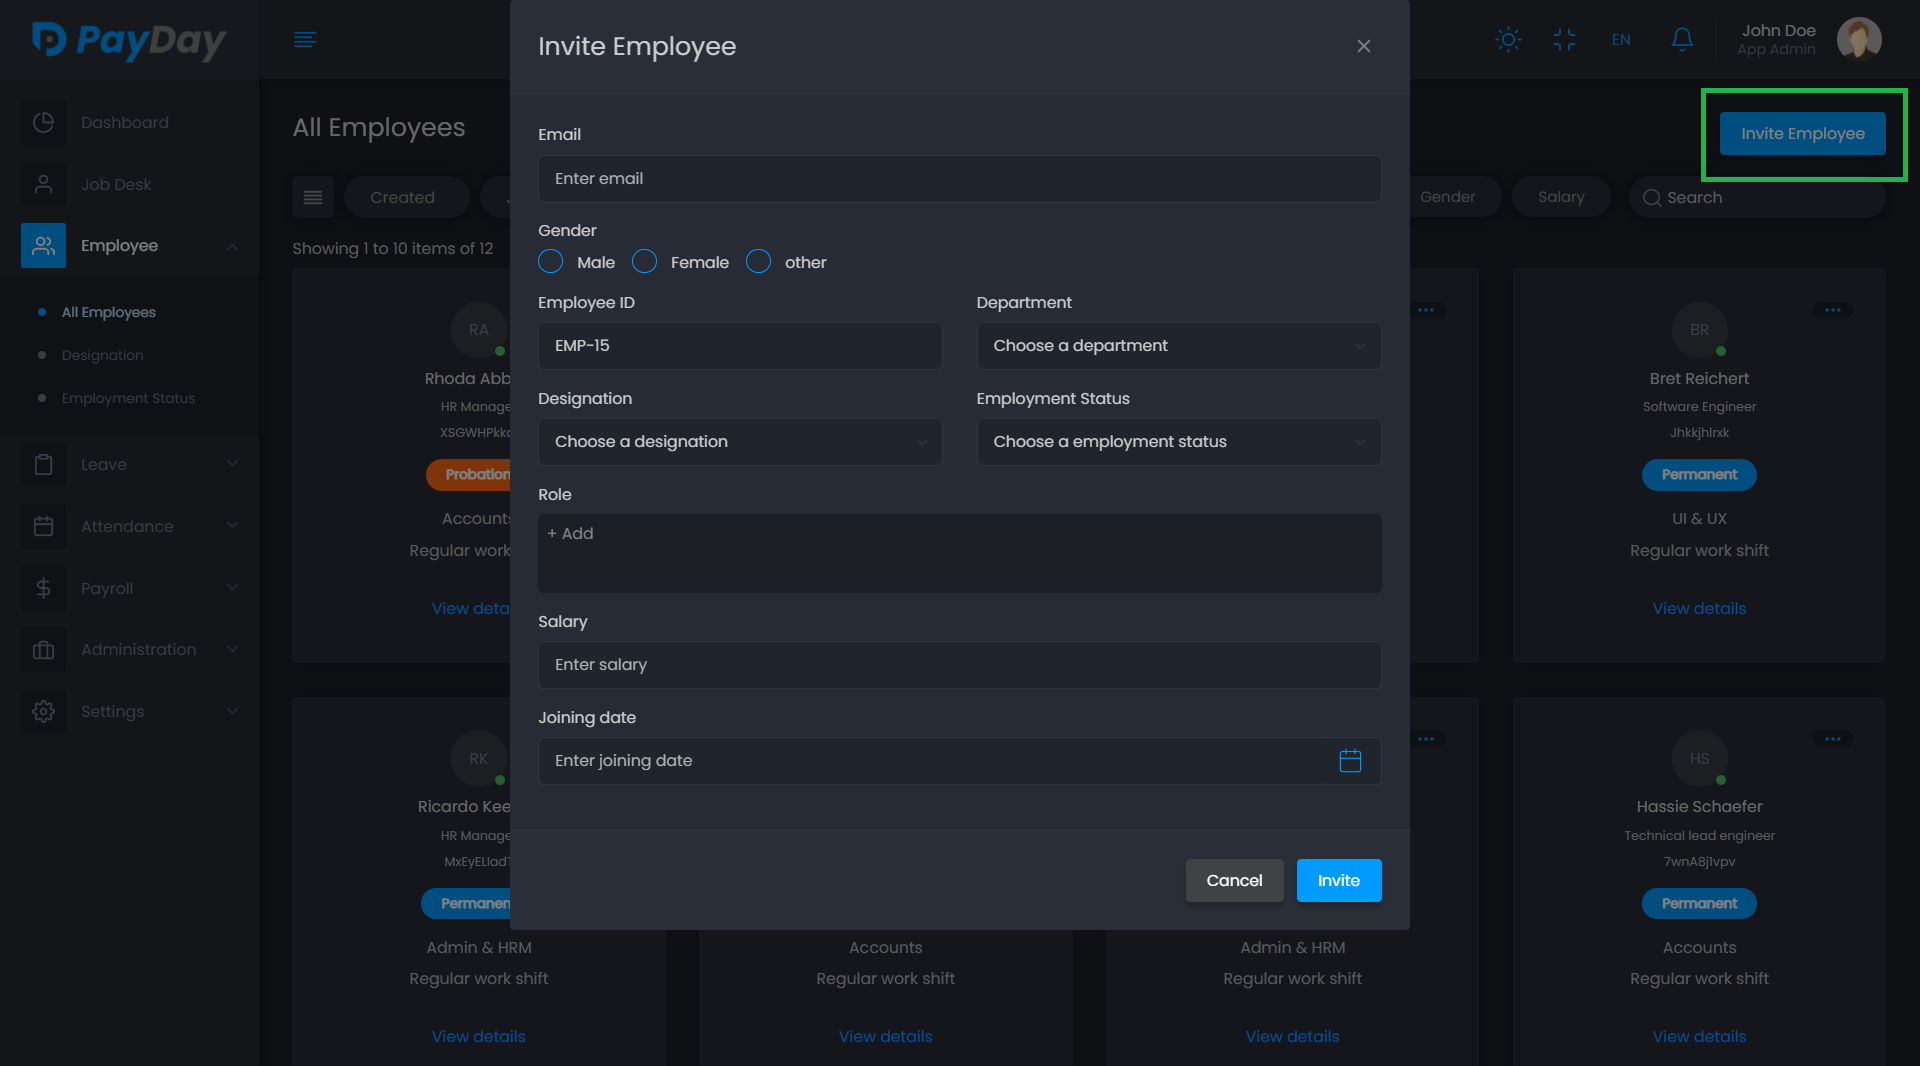
From the Invite Employee button right corner of the screen you can invite any employee.
In the View Details option you can find every details of an employee. You can also view different module's summery and do related action on that employee right this place.
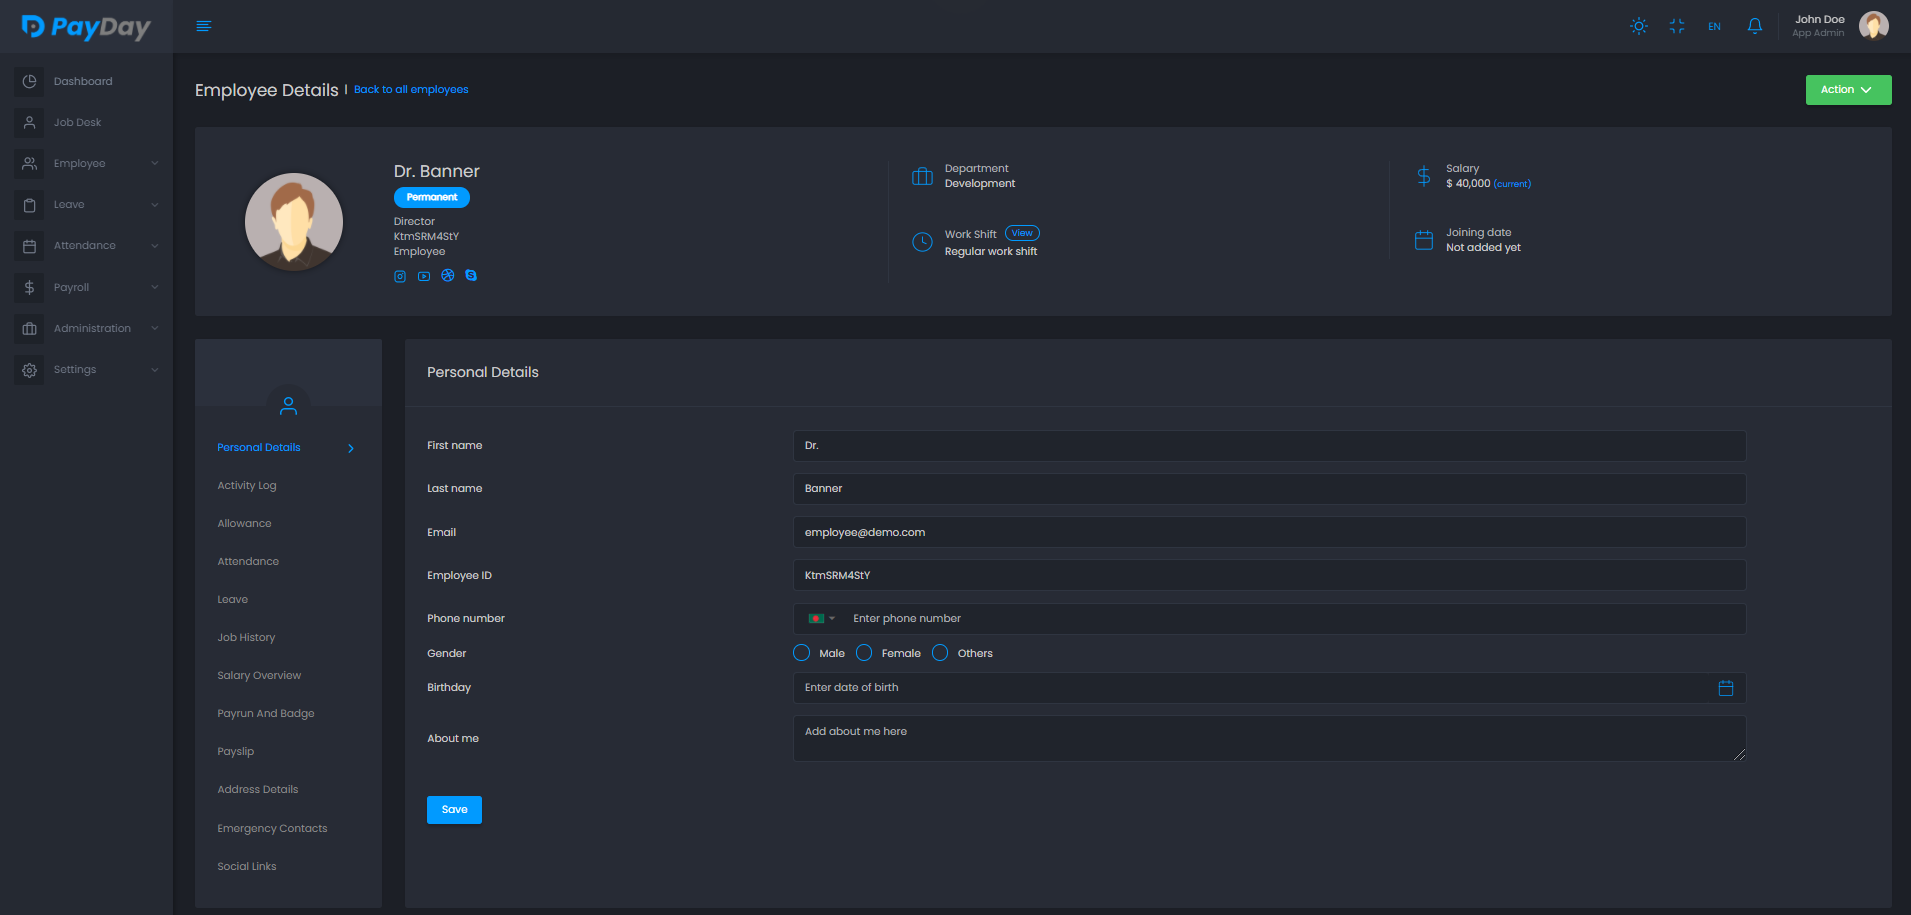
There are also two submodule Designation and employment Status to help labeled the employees.
Leave
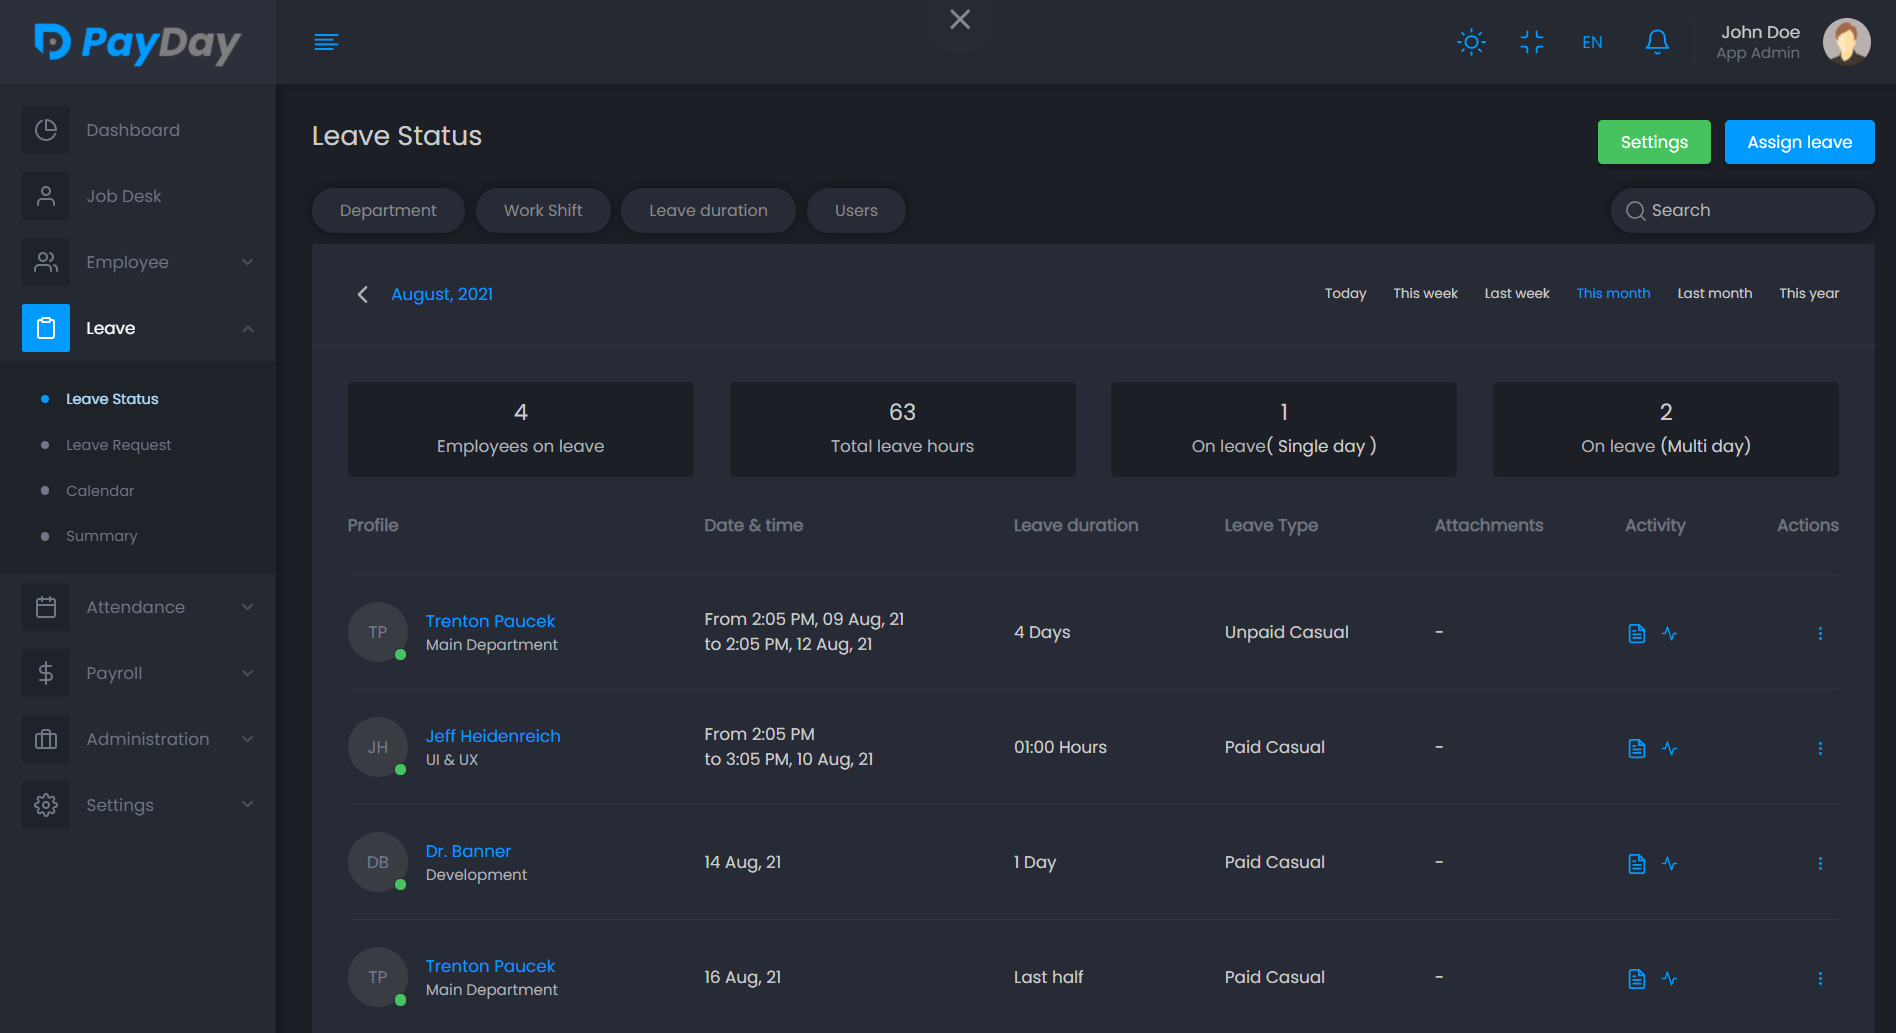
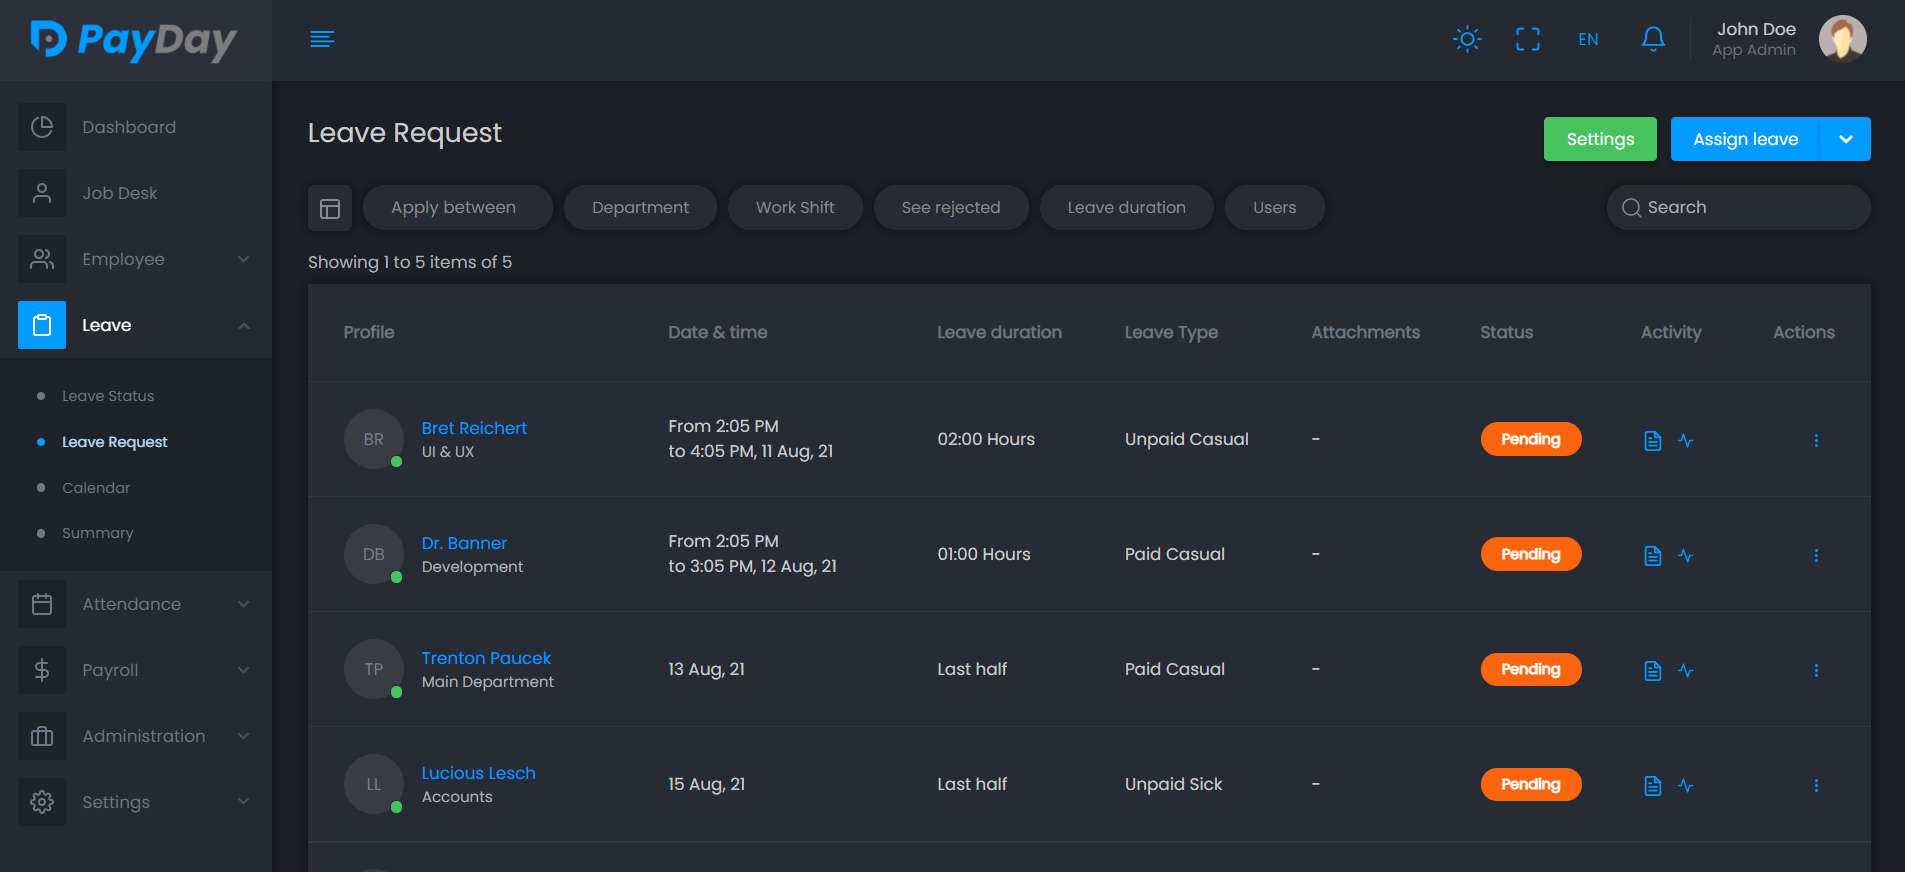
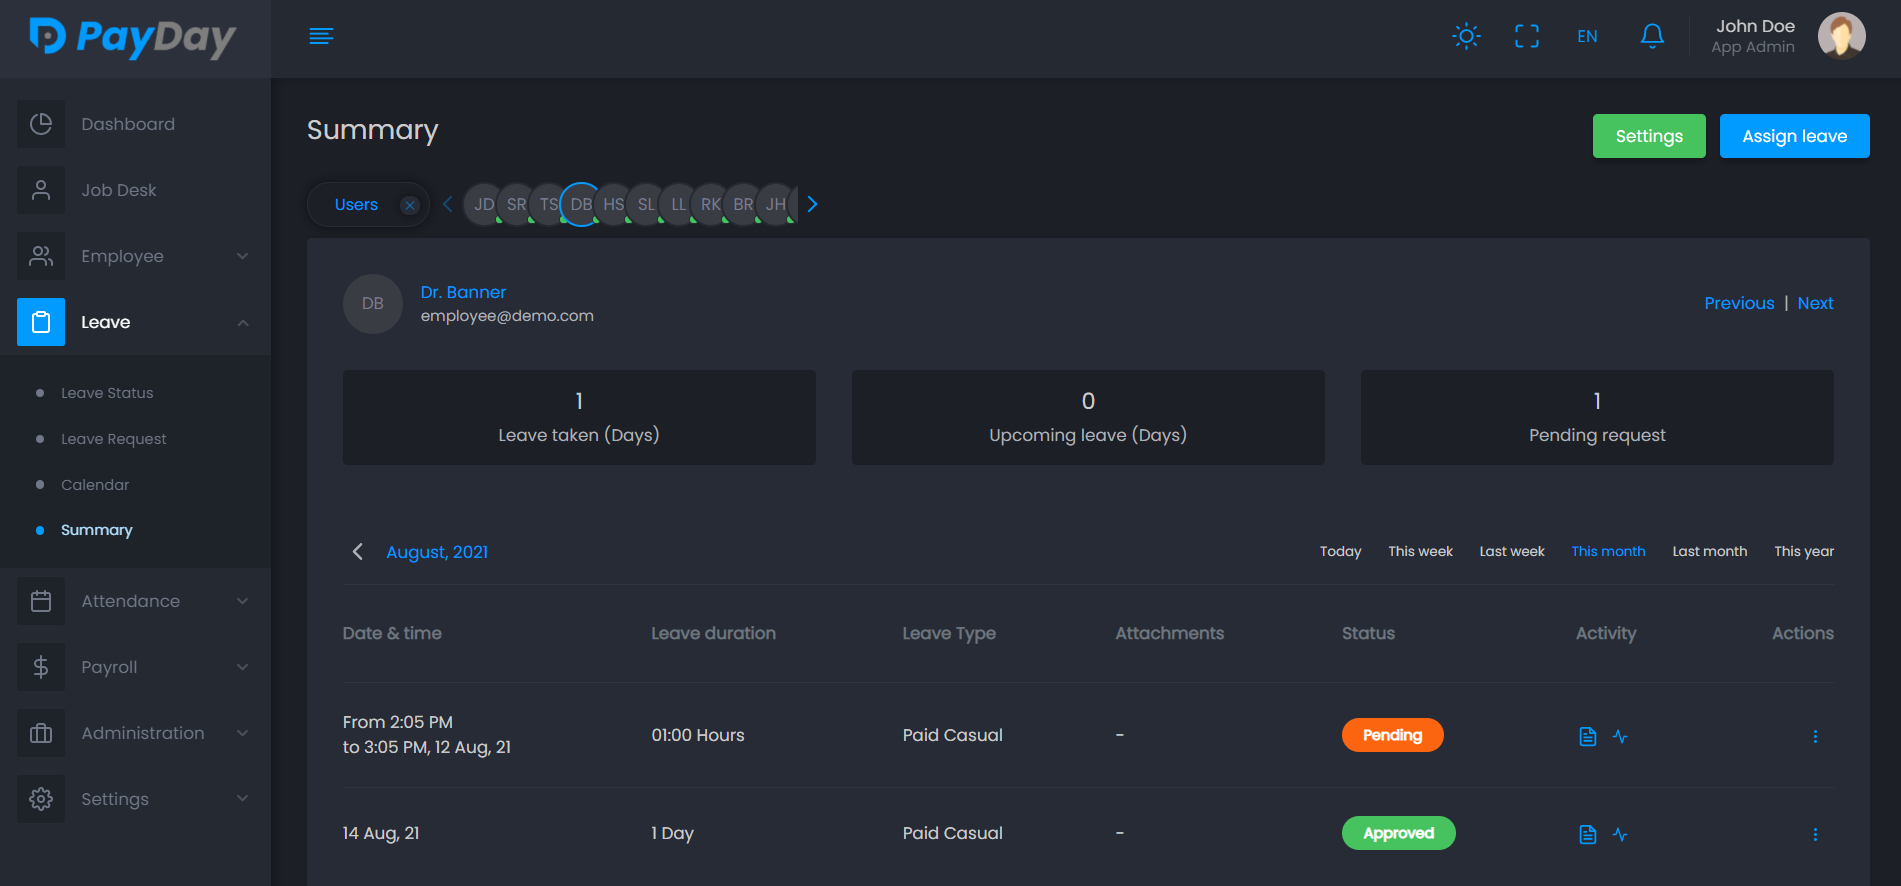
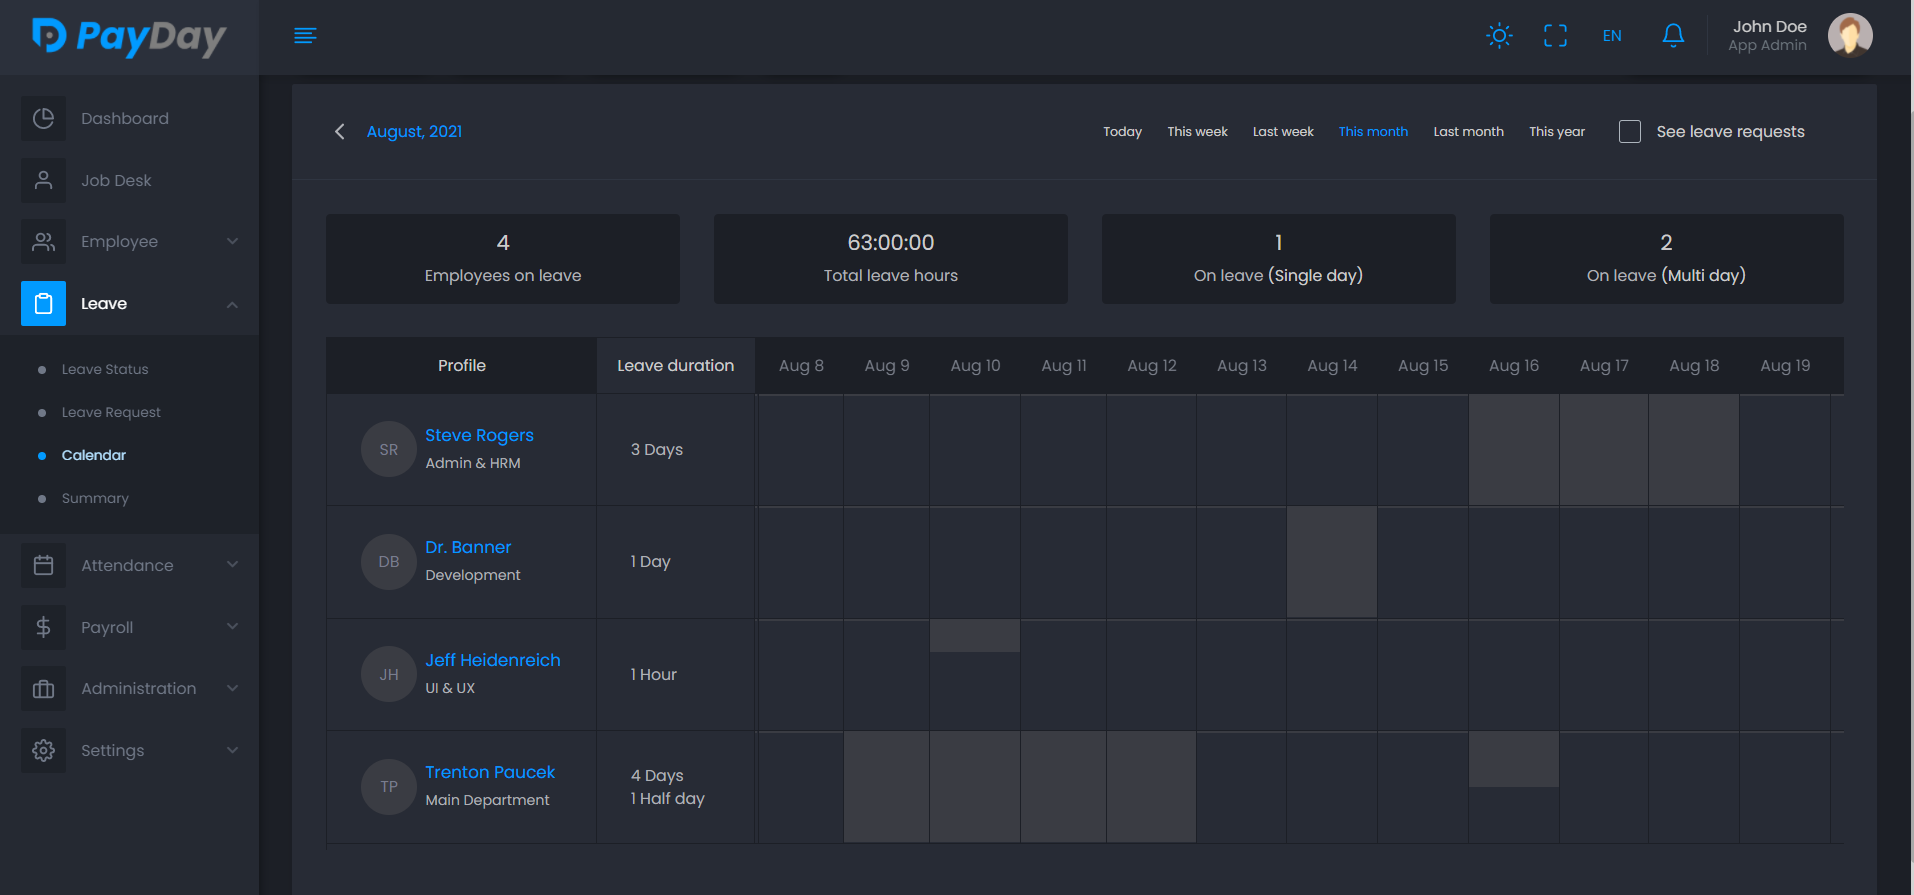
In this option you can view the current leave status, leave request, leave summery and calendar view. An employee can apply for leave based on the available leave he/she has. And according to permission you can accept or reject leave requests. You can also assign leave to an employee in this module.
How Leave Works:
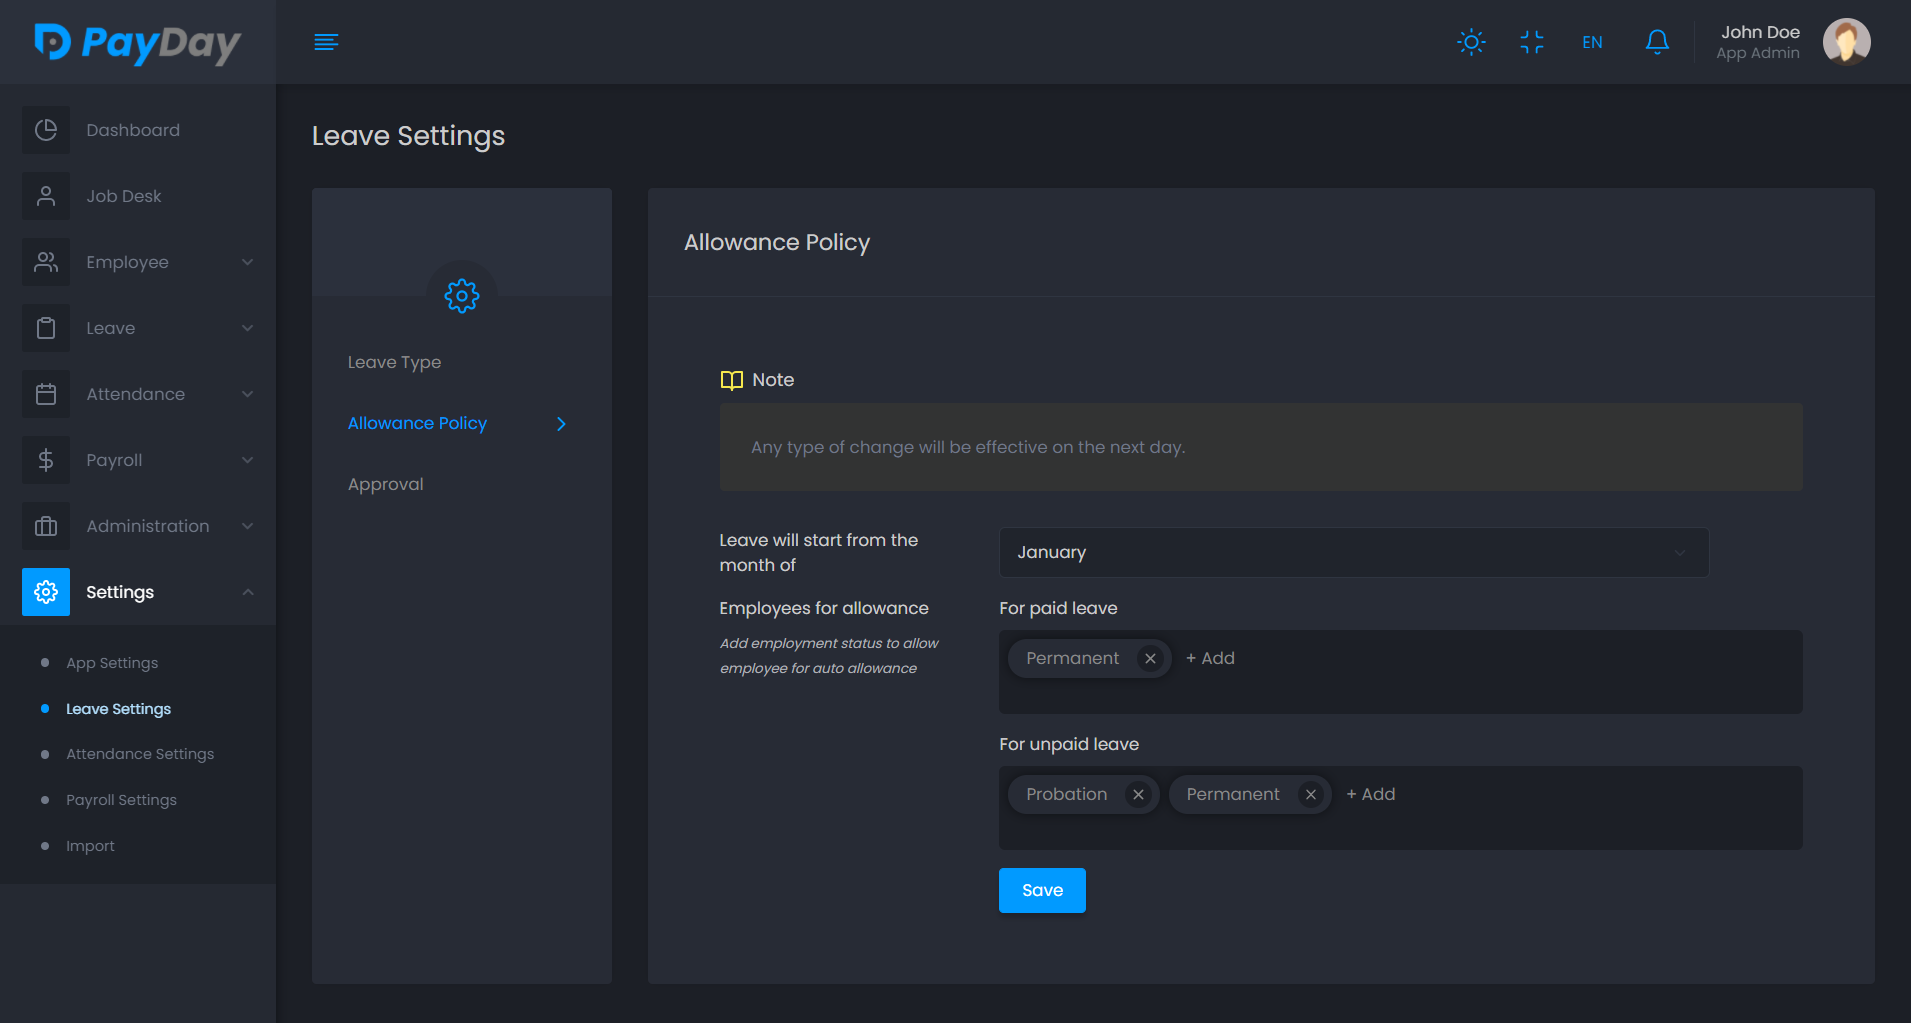
By default, Leave will start from the month of January and end in December of each year. You can change the "leave start month" from the Leave Settings > Allowance Policy.
You have 12 days of leave allowance per year. It will count from the month of January. That means leave per month you have got: 12 days/12 months = 1 day/month.
Example: If you have installed the application in November month and set 12 days leave allowance in this year. So 2 months left of this 2021 year, employees will get 2 months (November and December) leave days. So 1 x 2 months = 2 days leave will get for the 2 (November and December) months.
About allow monthly earning leave, if you enable the allow monthly earning from Leave settings, then employees who have to earn leave per month and get a earning rate field in the leave allowance.
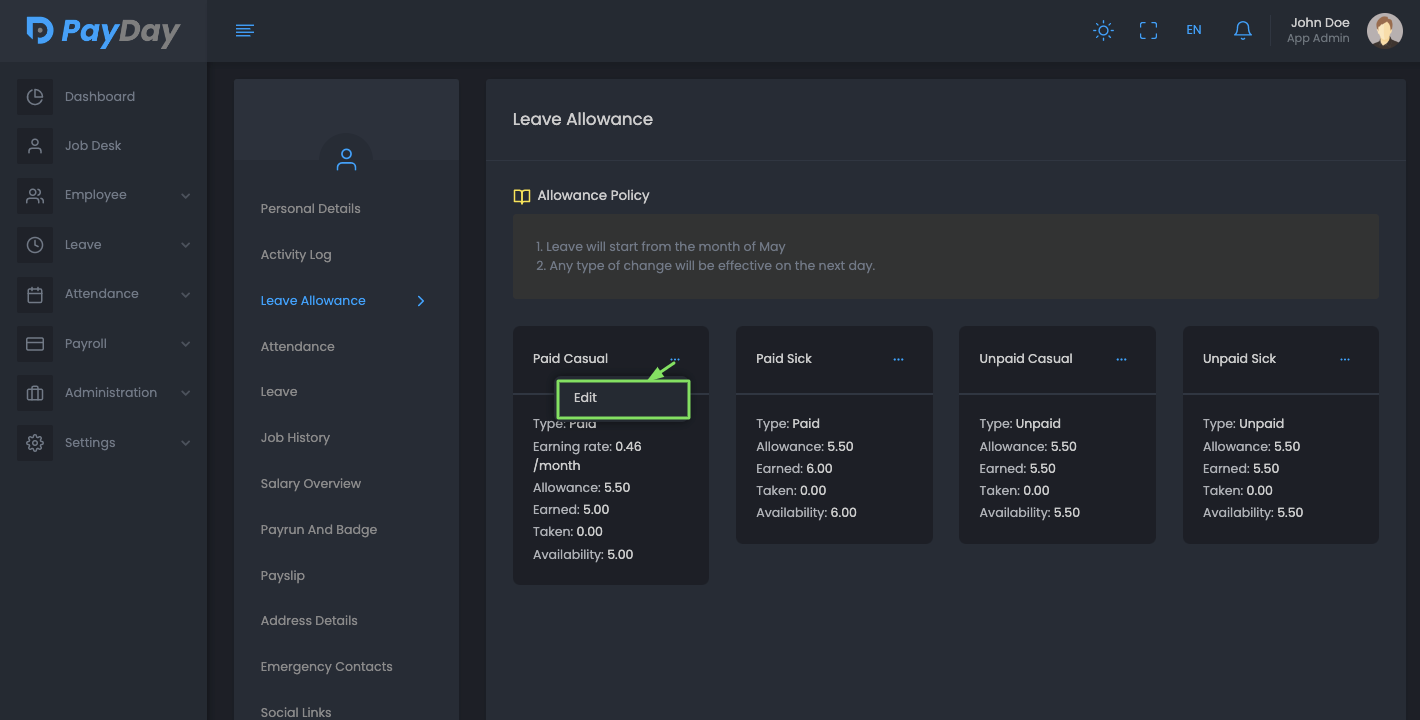
Leave Module
-
Assign leave
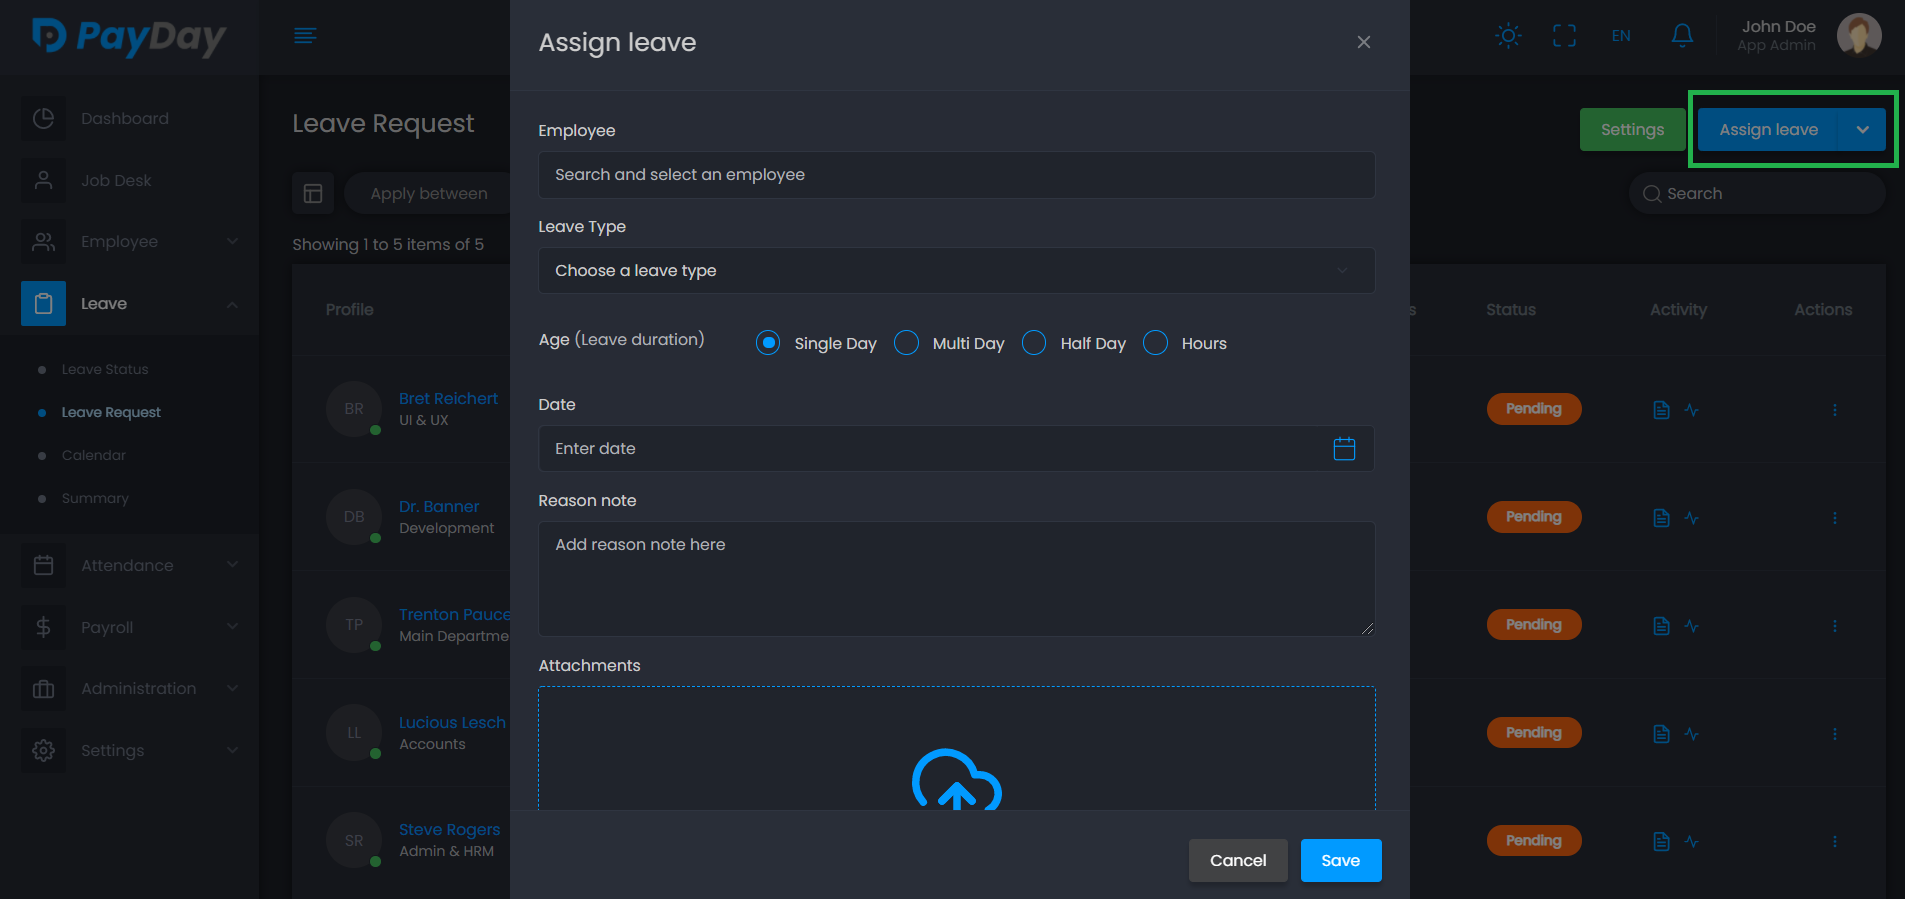
-
Request leave
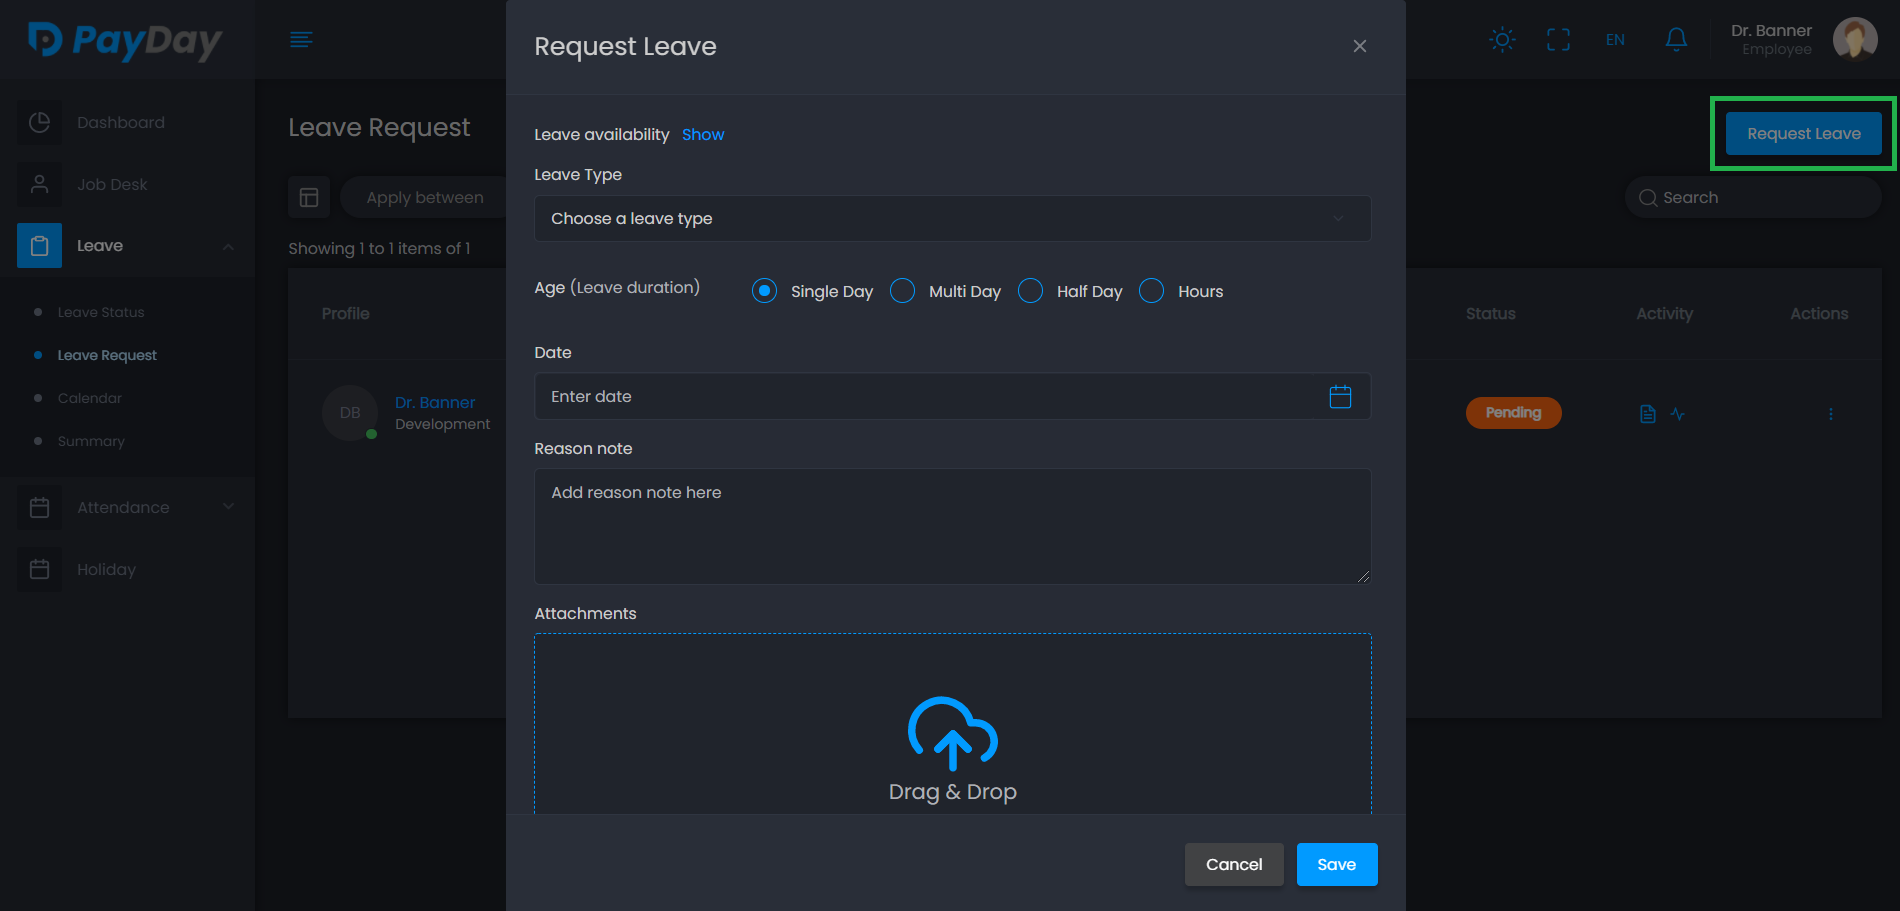
-
View leave status
-
View leave request
-
View leave summery
-
View leave calendar
Attendance
This is one of the most important feature of the application. As the app tracks every employee's attendance based on Punch In and Punch Out, here you can find the daily attendance log of the employees. You can request, accept or reject attendance and also can add attendance to a employee.
-
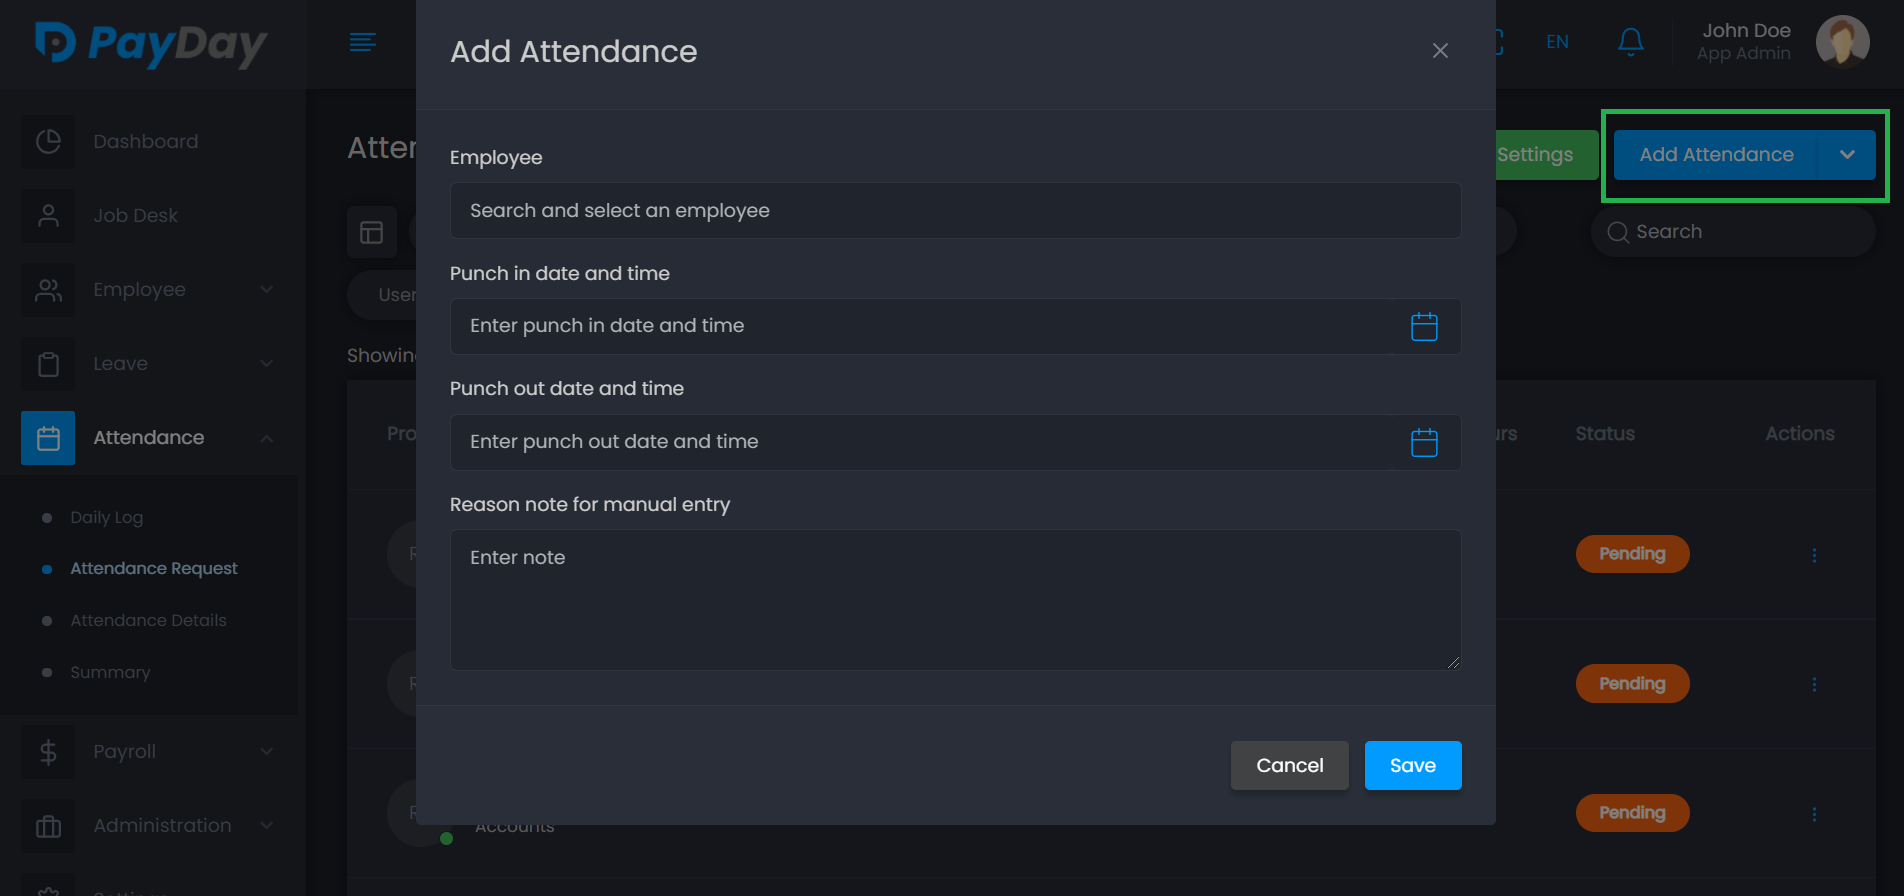
Add attendance
-
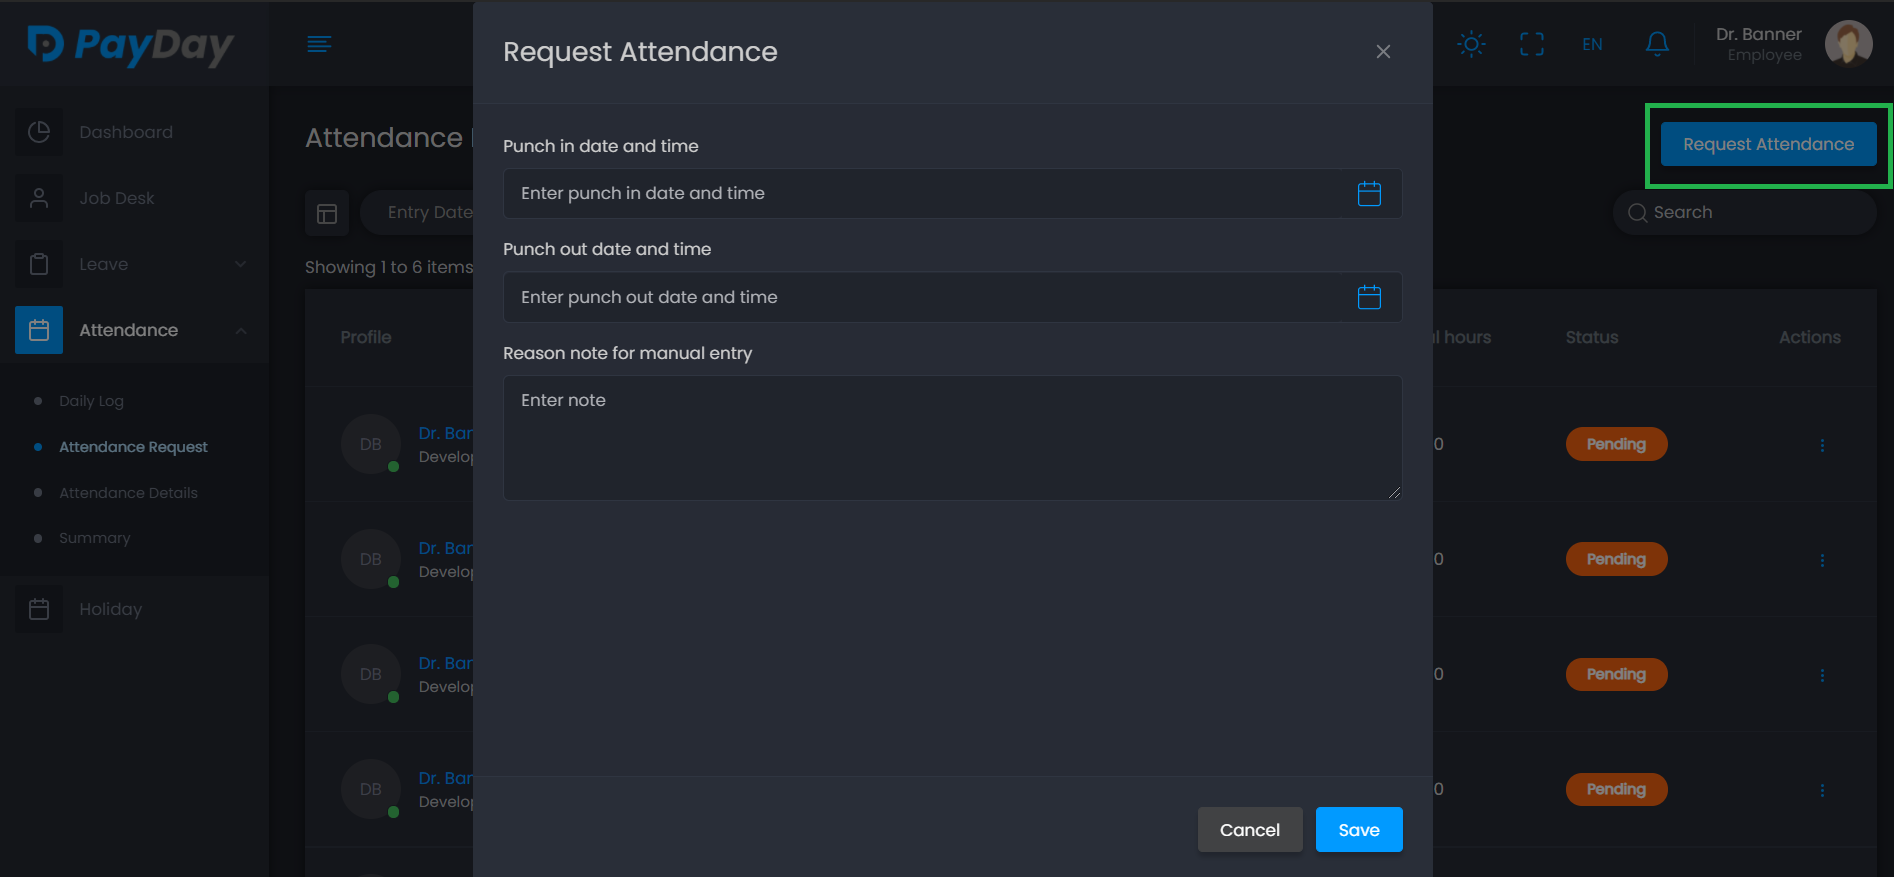
Request attendance
-
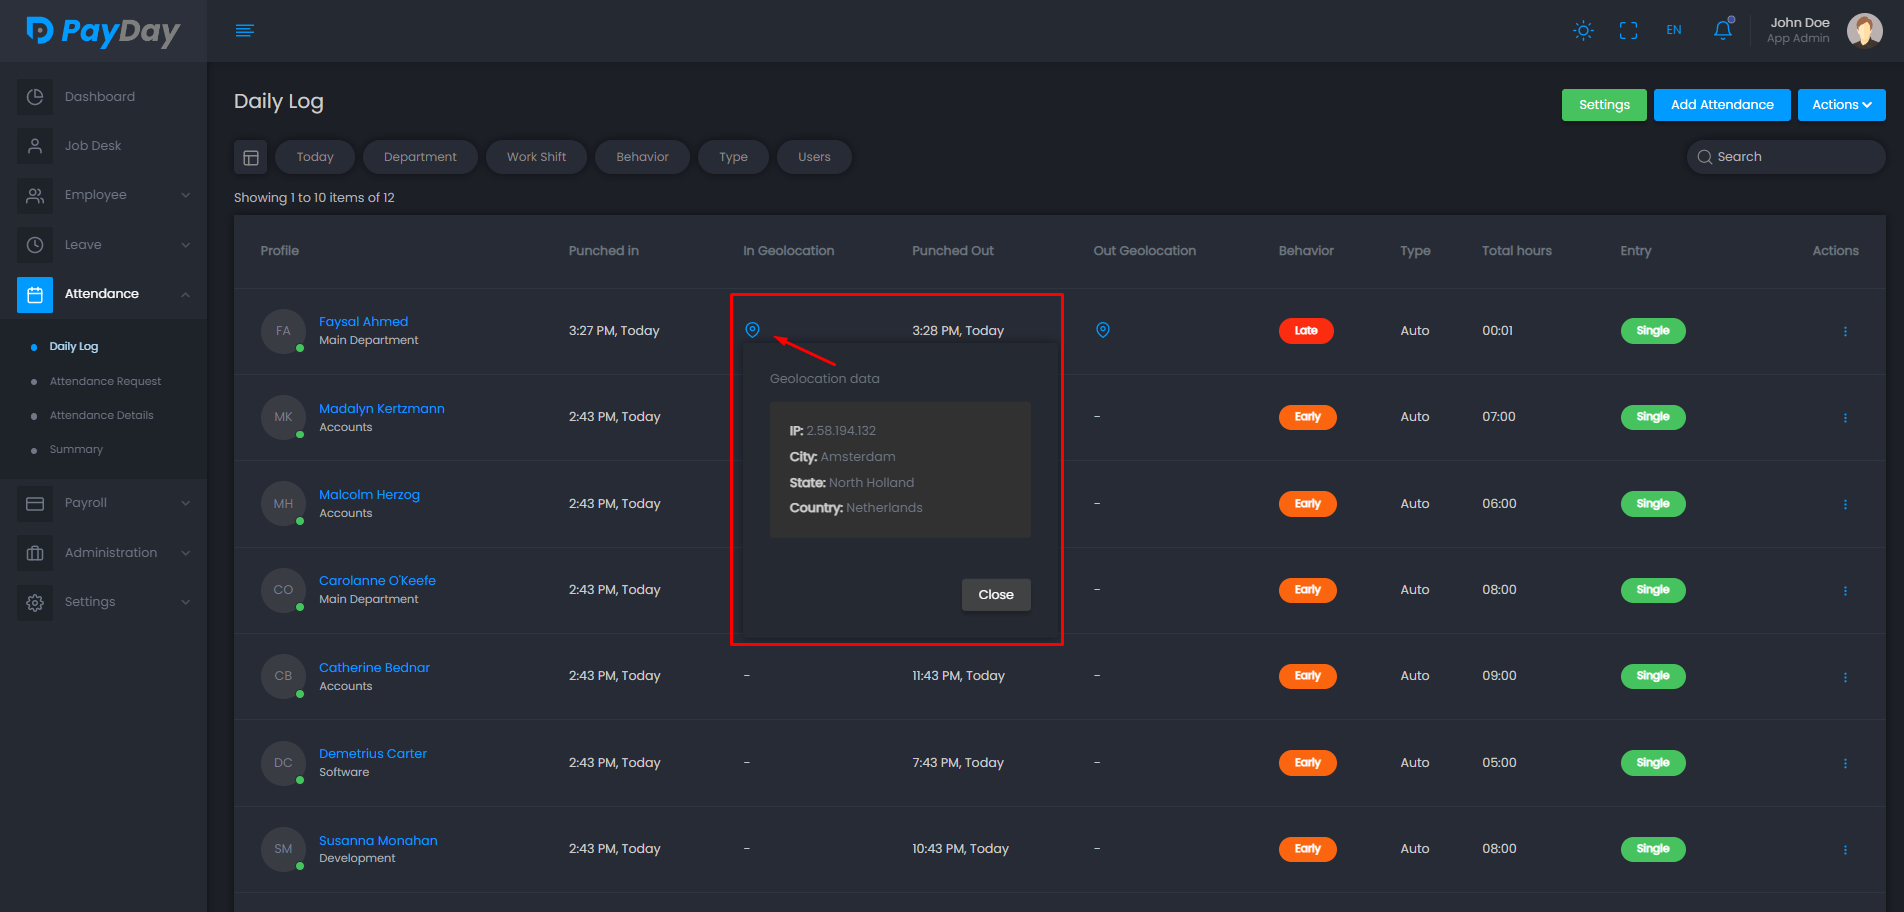
View daily log
-
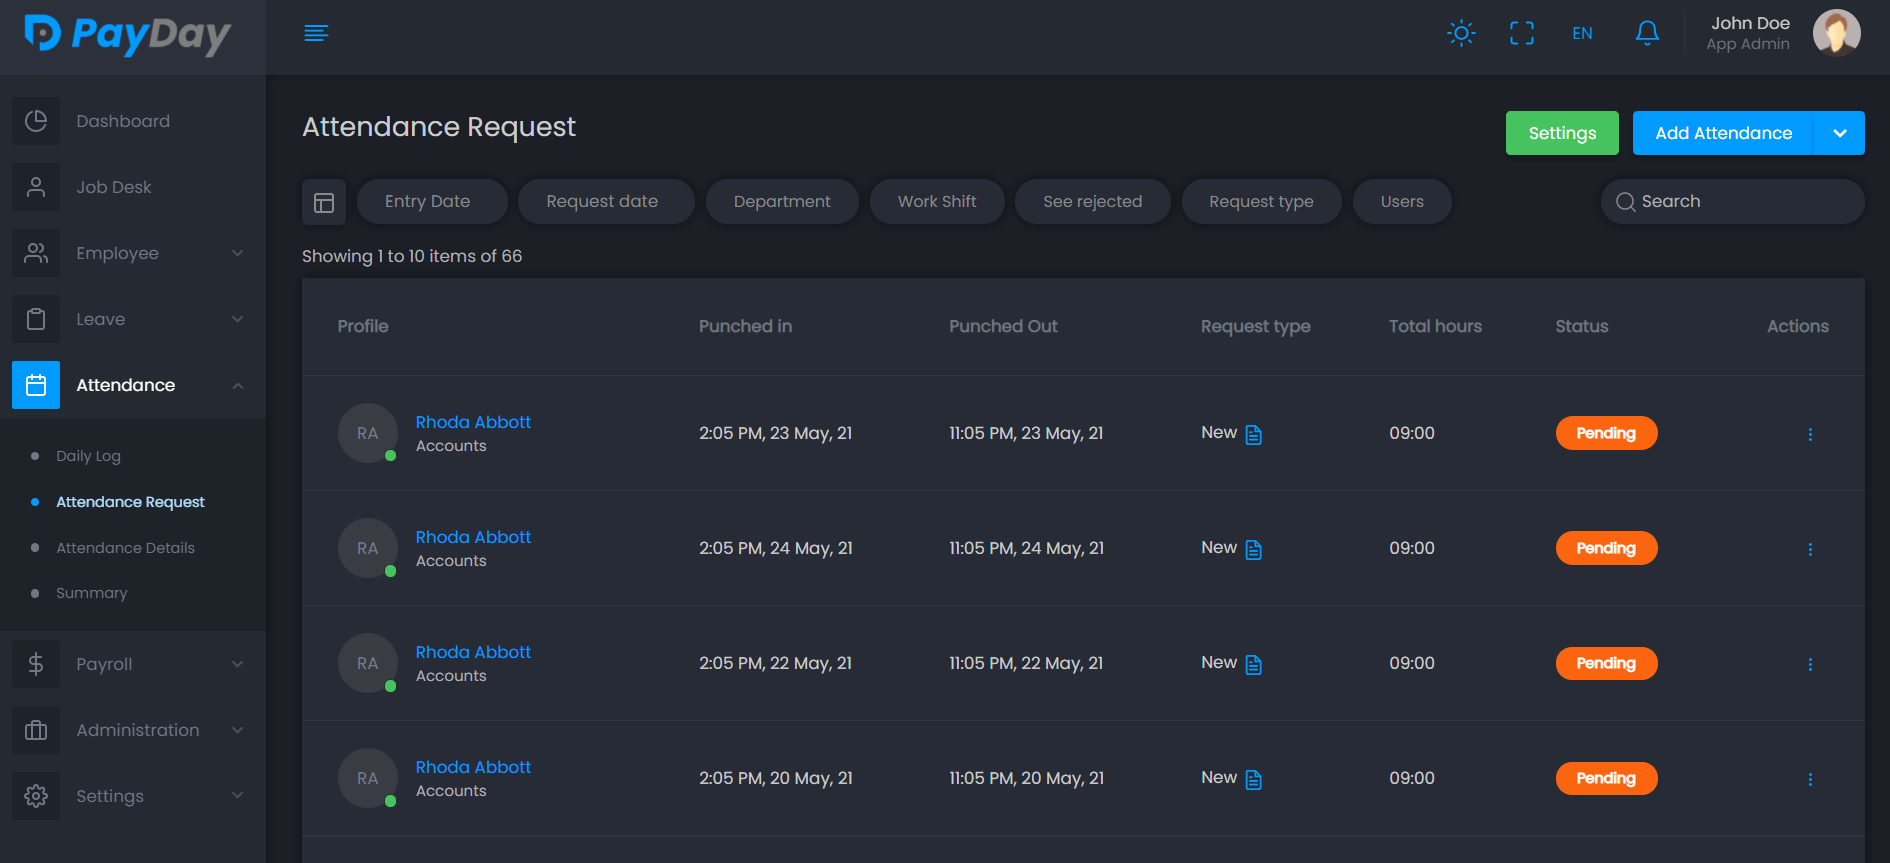
View attendance request
-
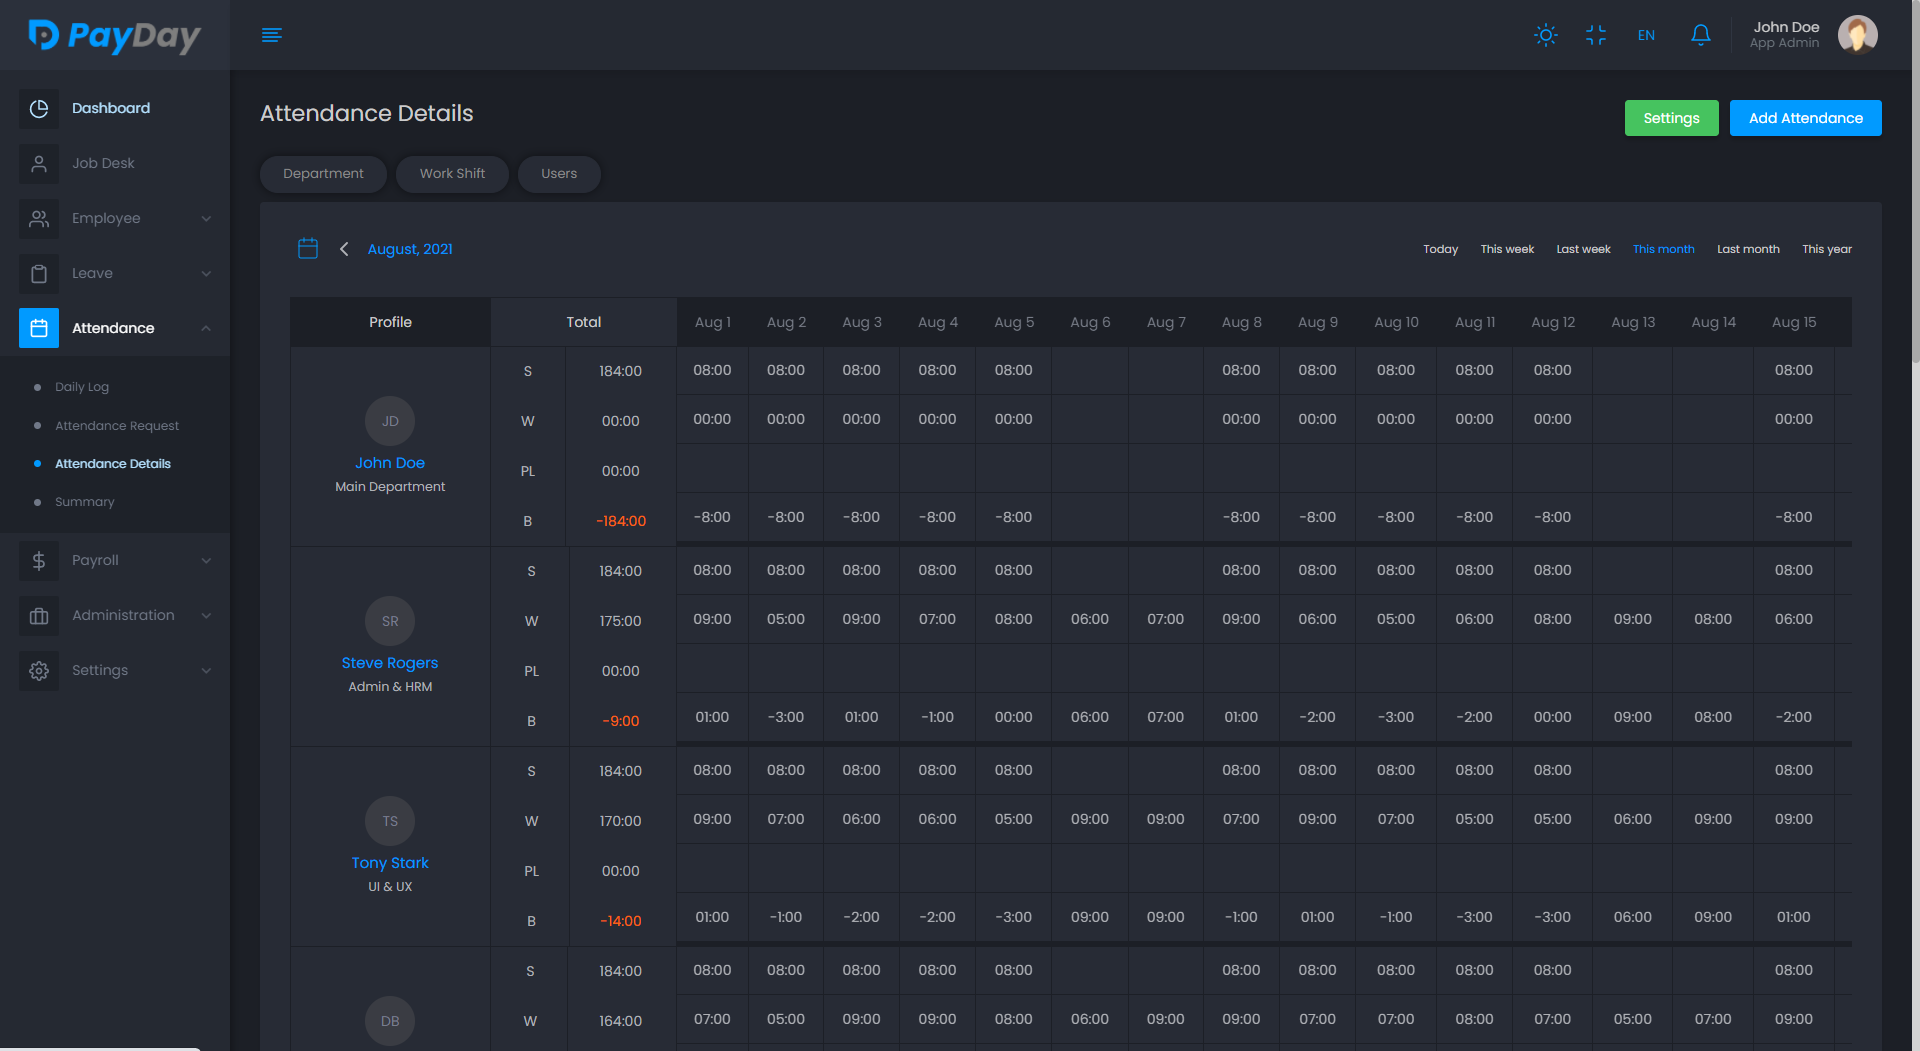
View attendance details
-
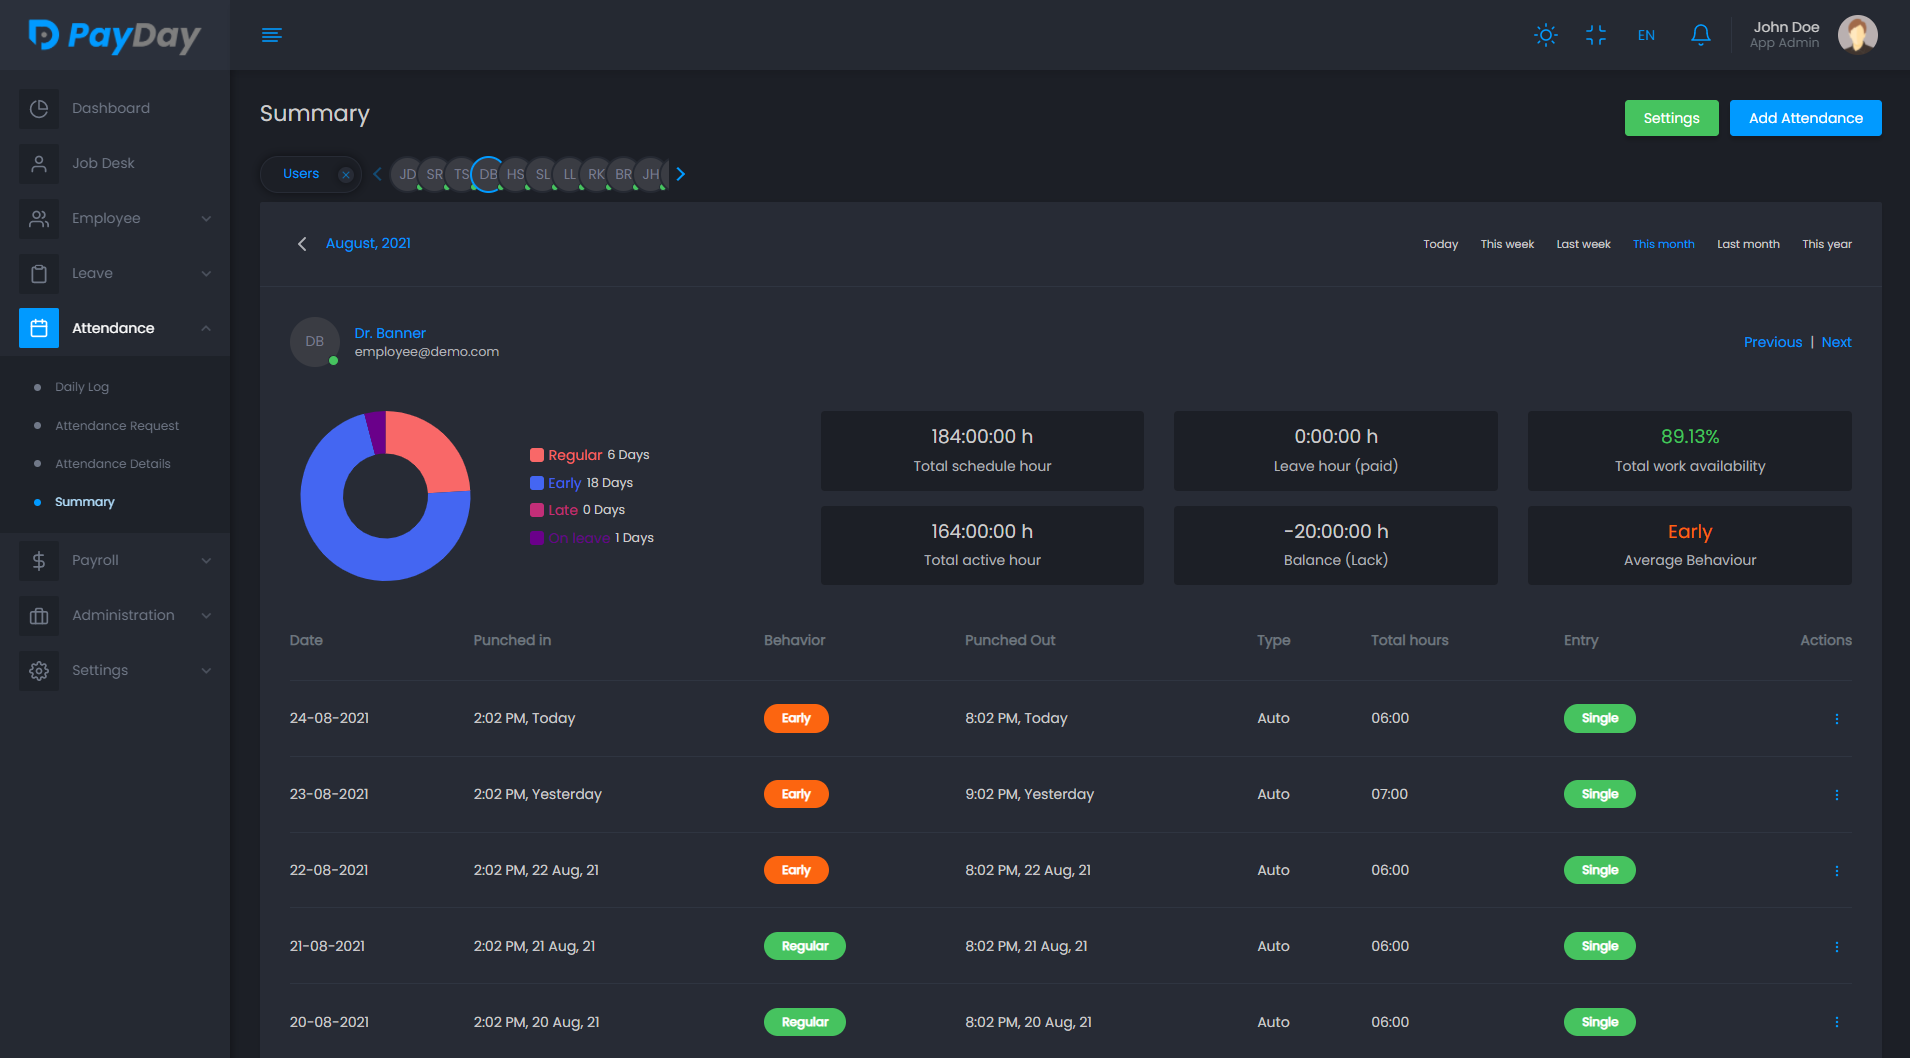
View attendance summery
Payroll
This is the most desired functionality of the app for any employee. Here you can calculate and generate a employee's payslip full dynamically. You can manage beneficiary for every employee and also can set the payrun setting on how you want to generate your payslip. You can run default payrun to generate monthly payslip or also can run manual payrun with customized date. After generate payslip you can send it to the employee as bulk action or can send individually. You can view the payslip and also can edit before you send.
-
Beneficiary
Create beneficiary badge in order to add it to employee's payslip.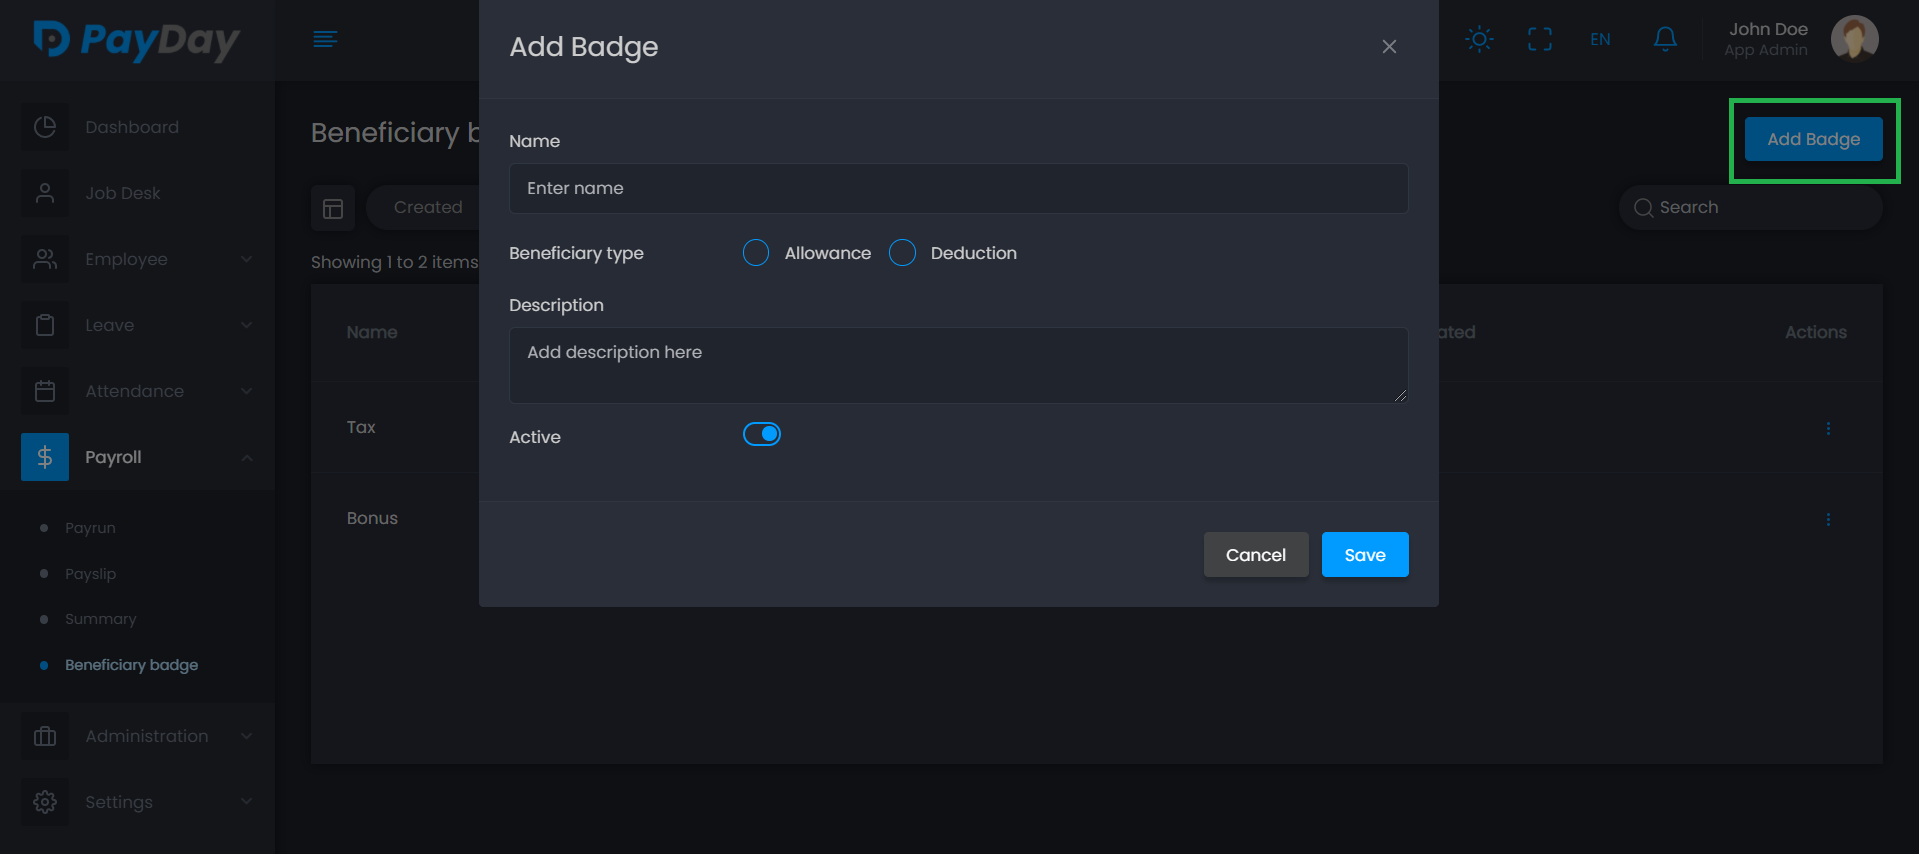
-
Payrun
Run default payrun which will automatically calculate and generate last month payslip according to the settings.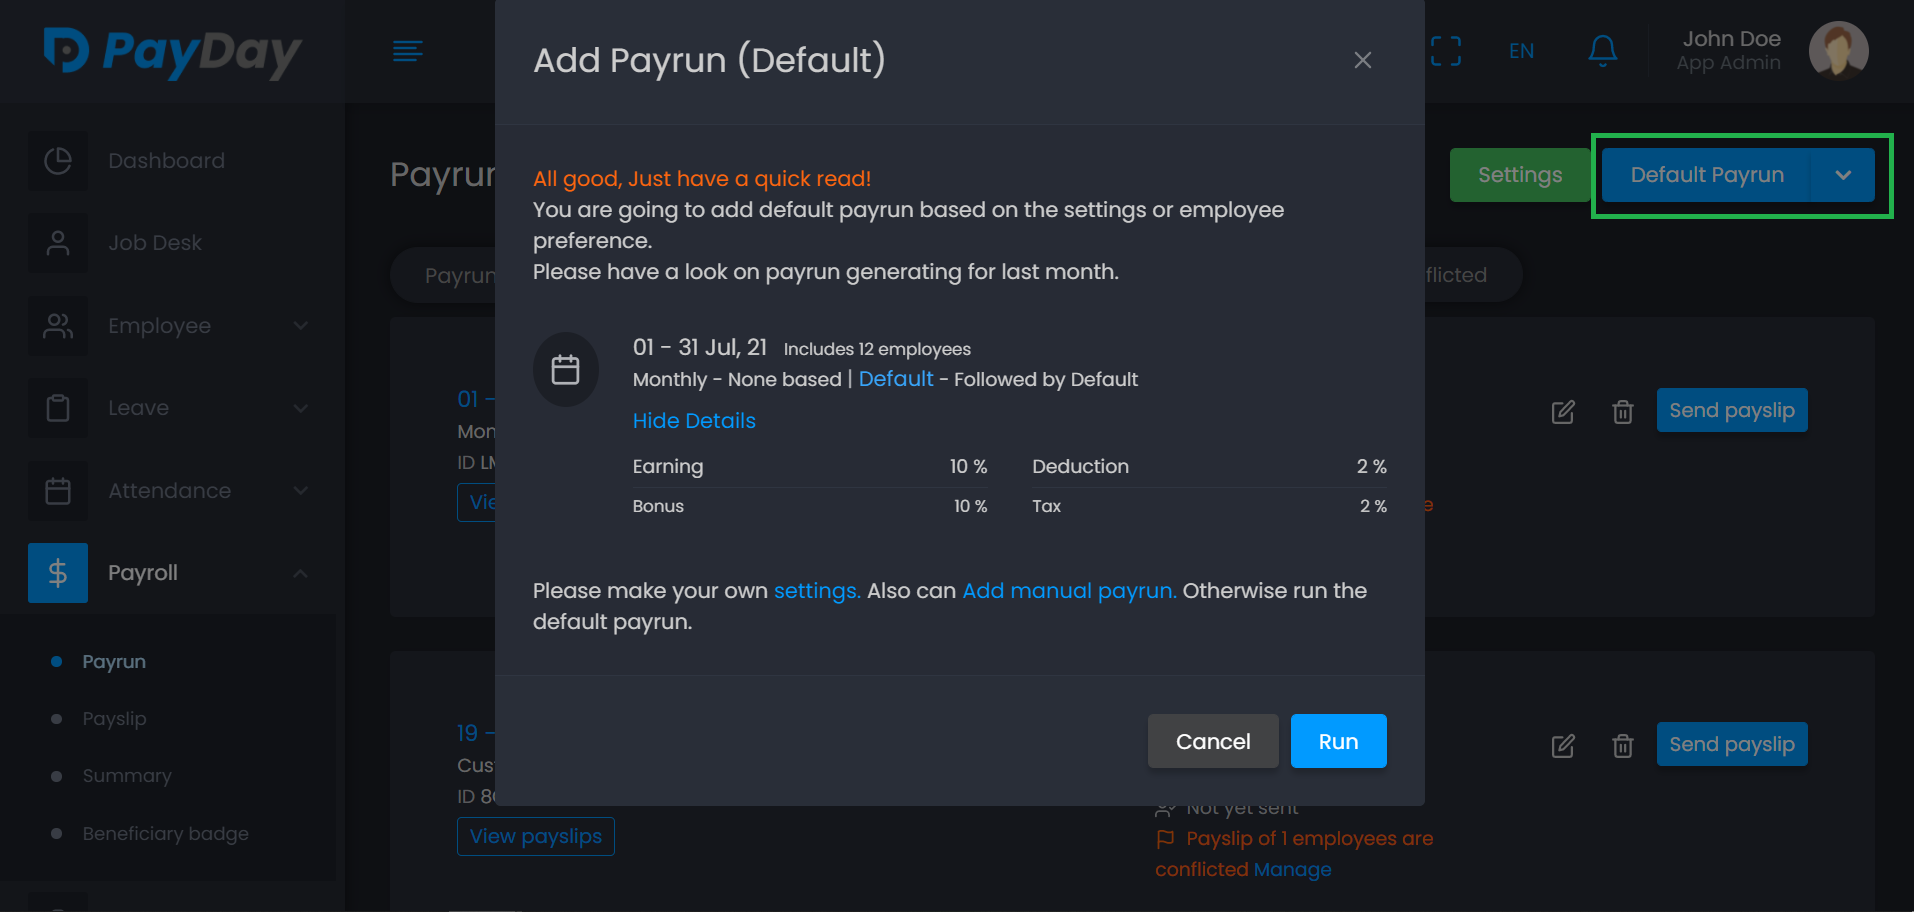 You can also run manual payrun to generate customized payslip for the employees.
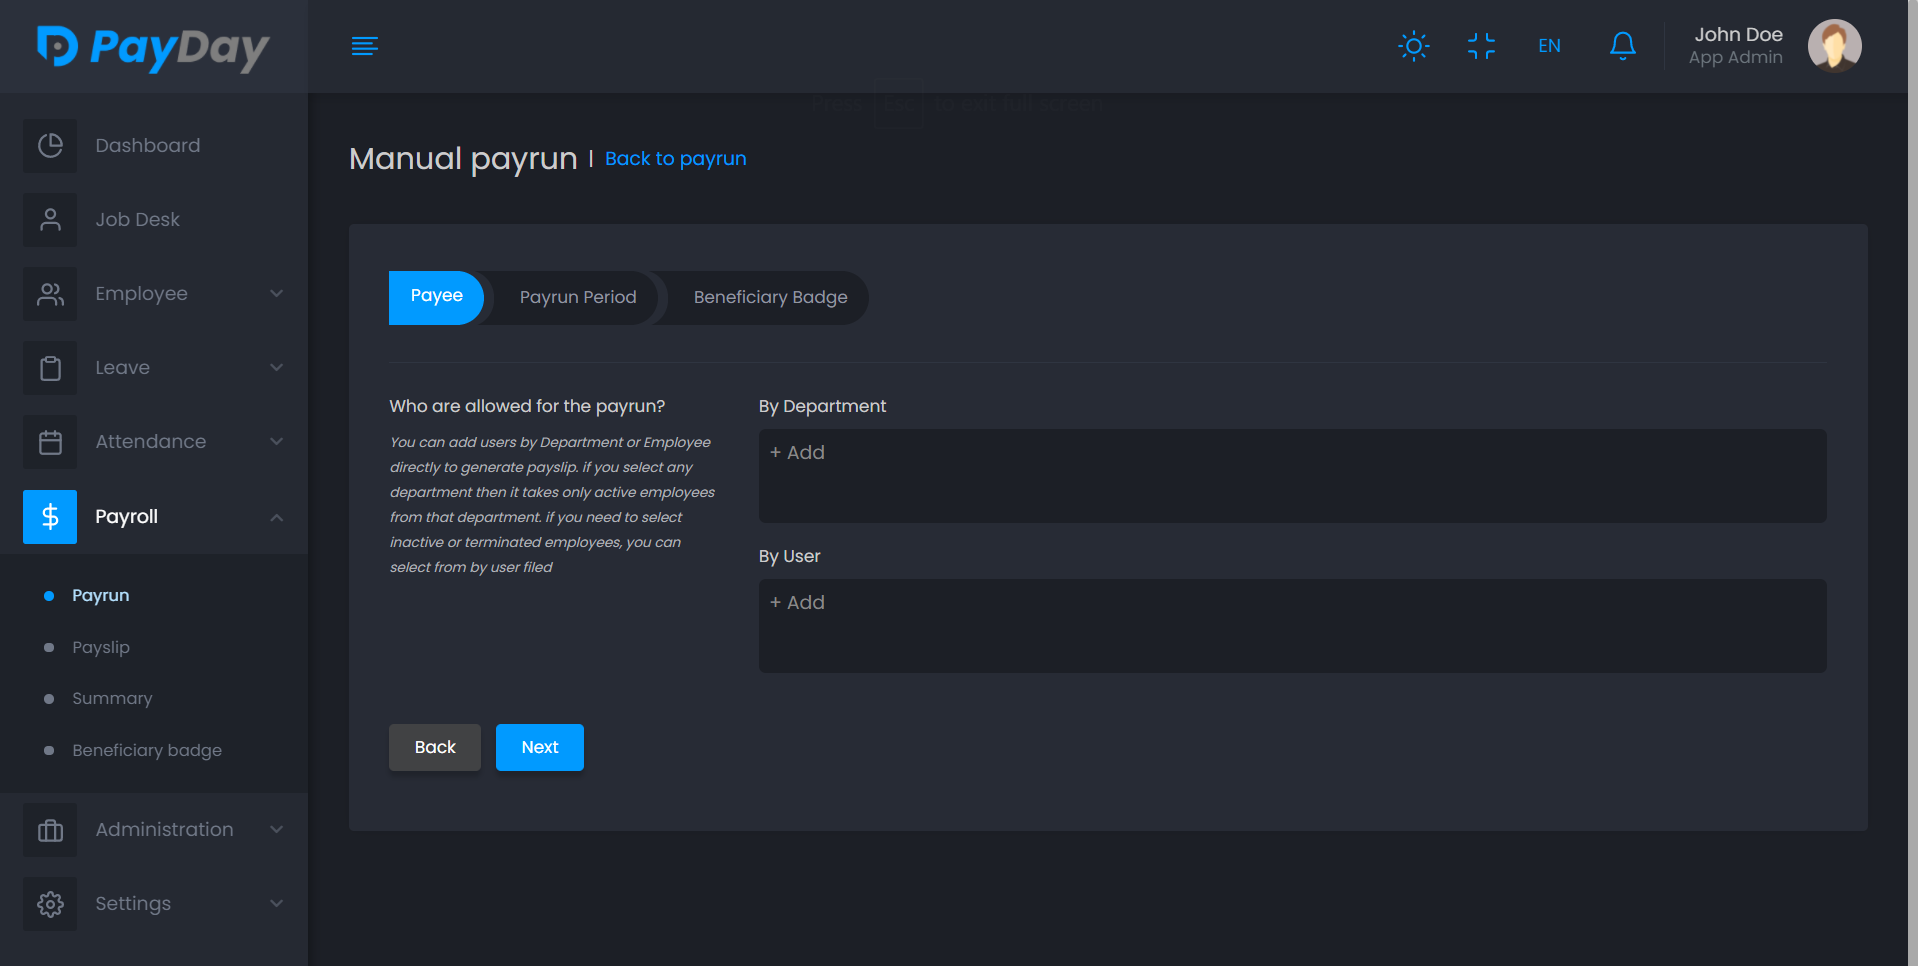
The salary will be calculated depending on generating type.
-
With Hour
First, Salary per hour (Working hour) = Total Salary / Total Working hour (scheduled hour of that month)
Then, Employee salary = Total working hour * Salary per hour -
With Daily Log
First, Salary per day (Working day) = Total Salary / Total Working day (scheduled day of that month)
Then, Employee salary = Total working day * Salary per day -
With None
Generates employee salary without checking any attendance and leave.
S.N: If the overtime is disabled from the payroll settings, then the system will ignore the extra working hour/day from the total working hour/day. And it won't count the total working hour/day more than scheduled hour/day.
-
-
Payslip
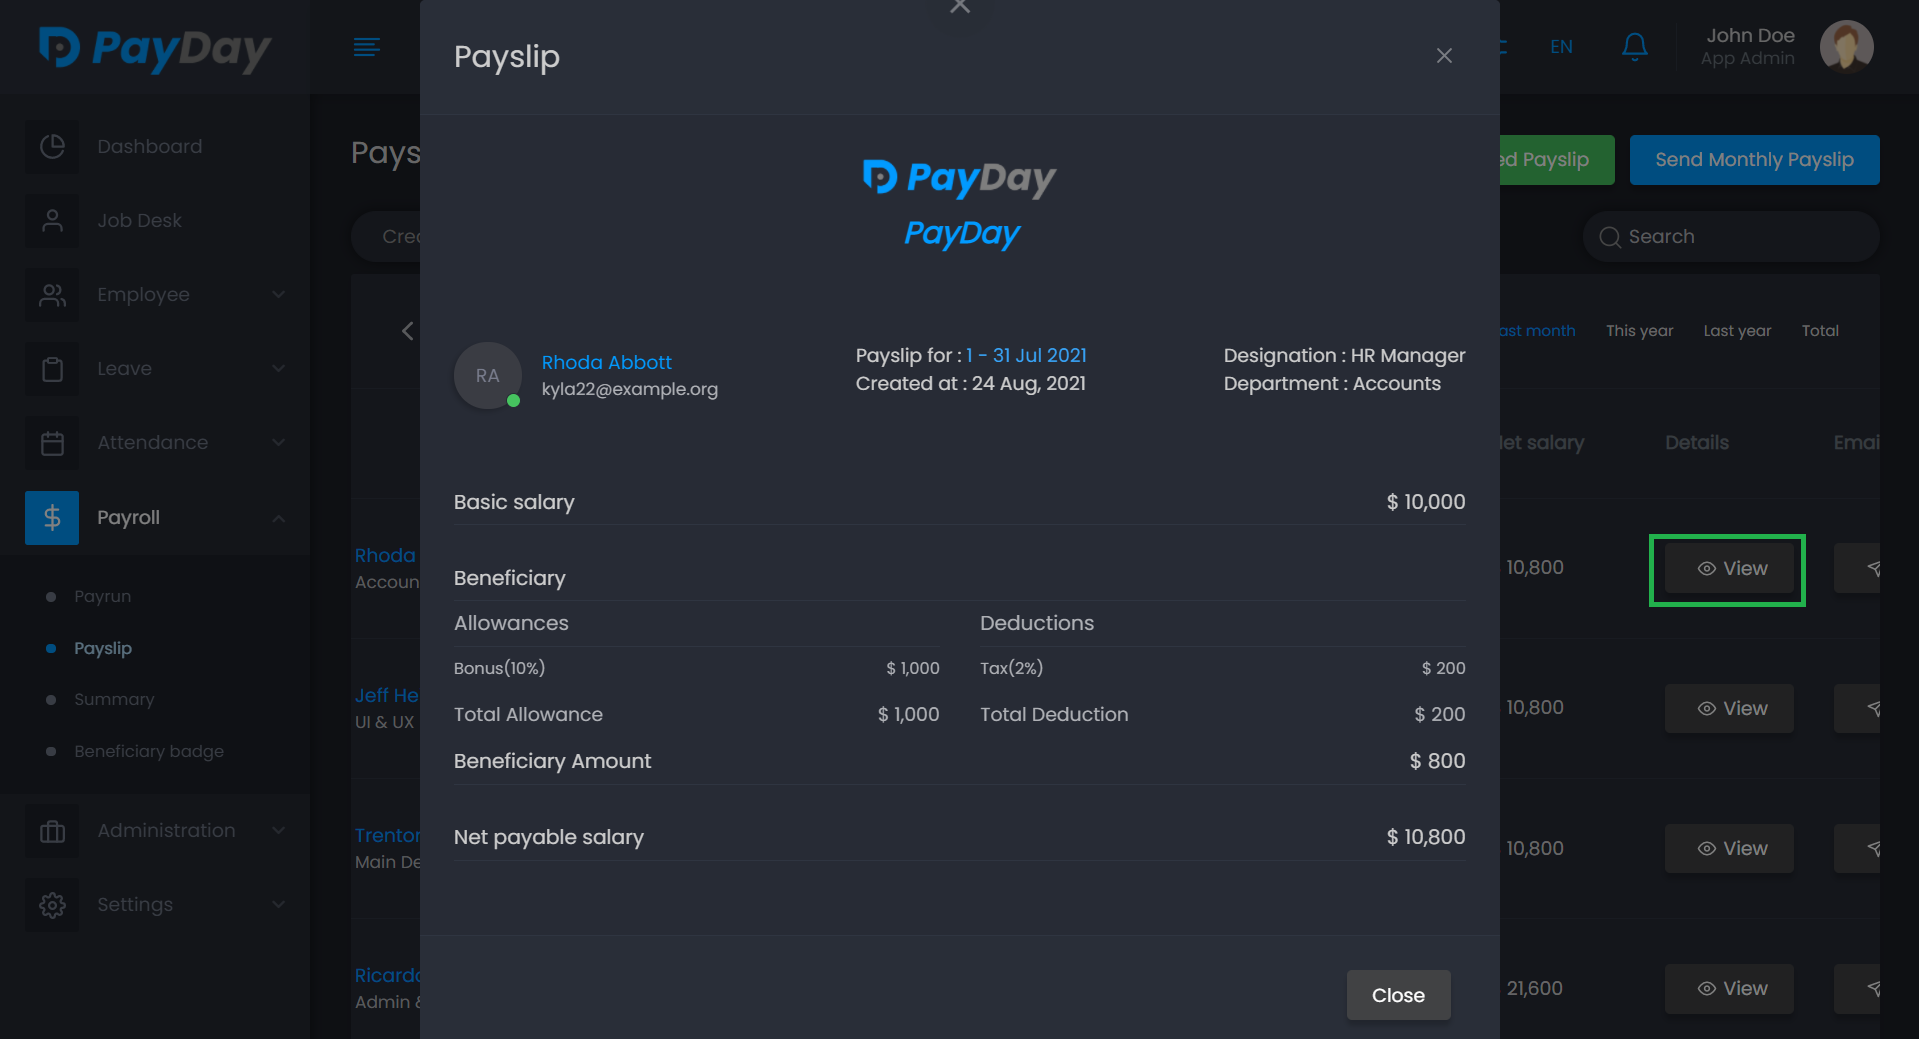
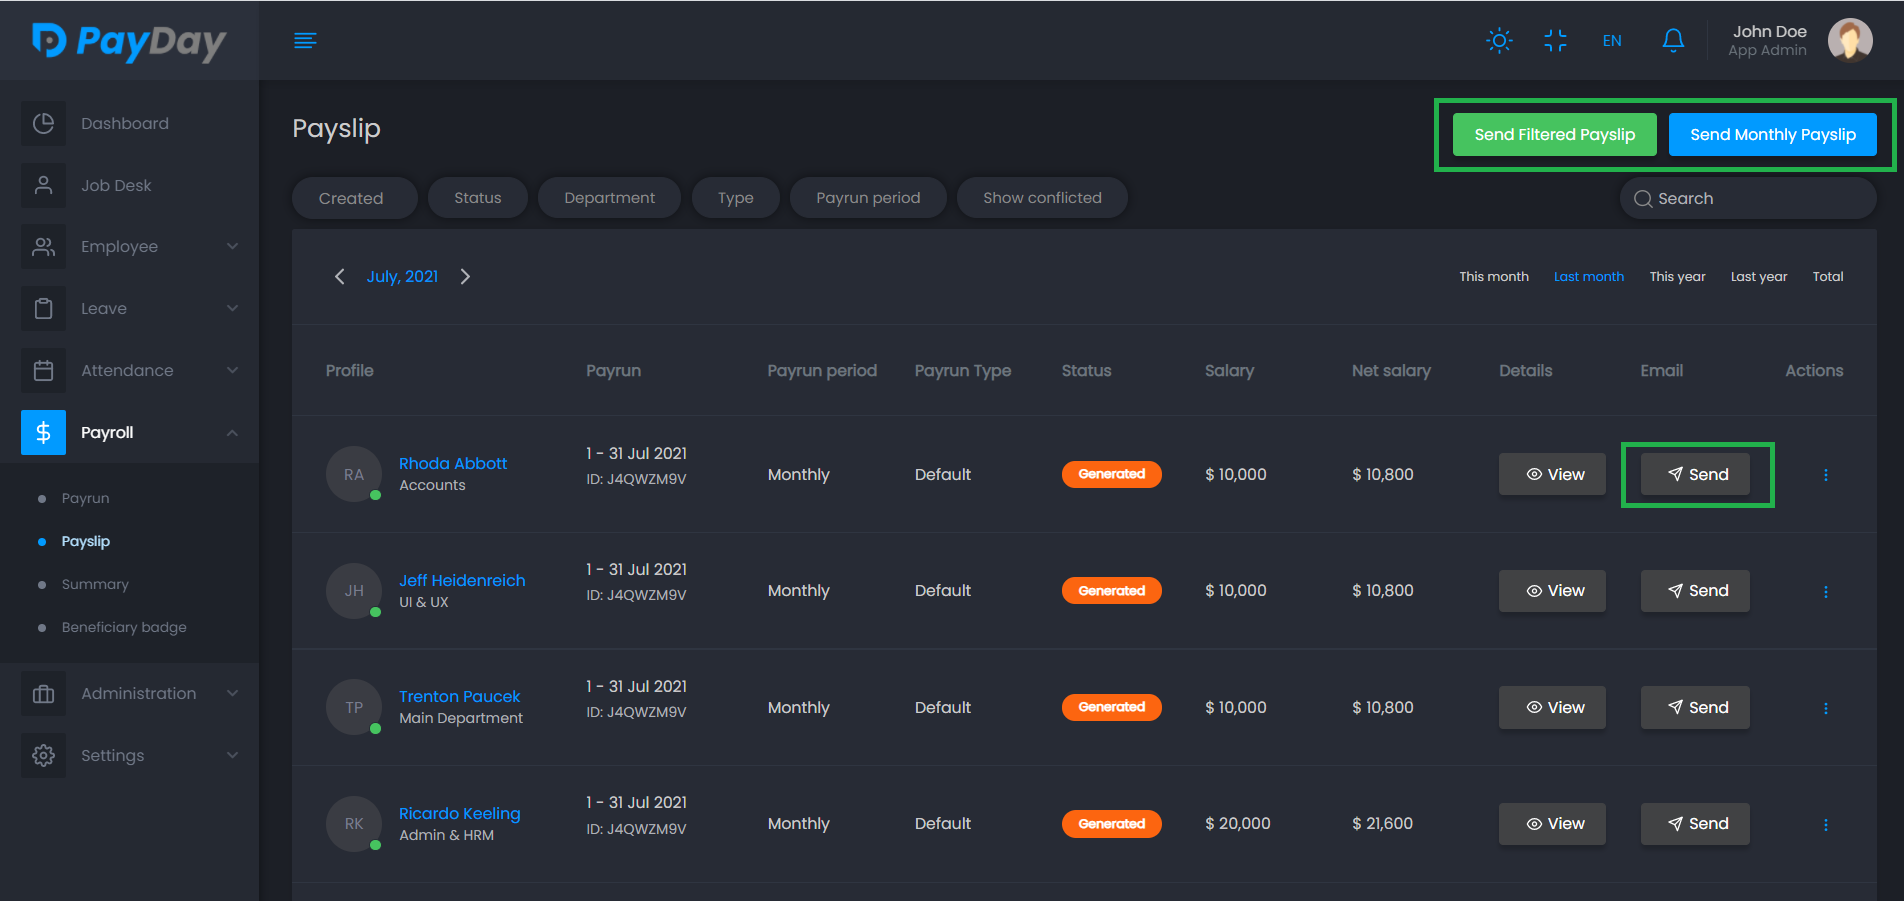
View all payslip, download PDF and do different actions.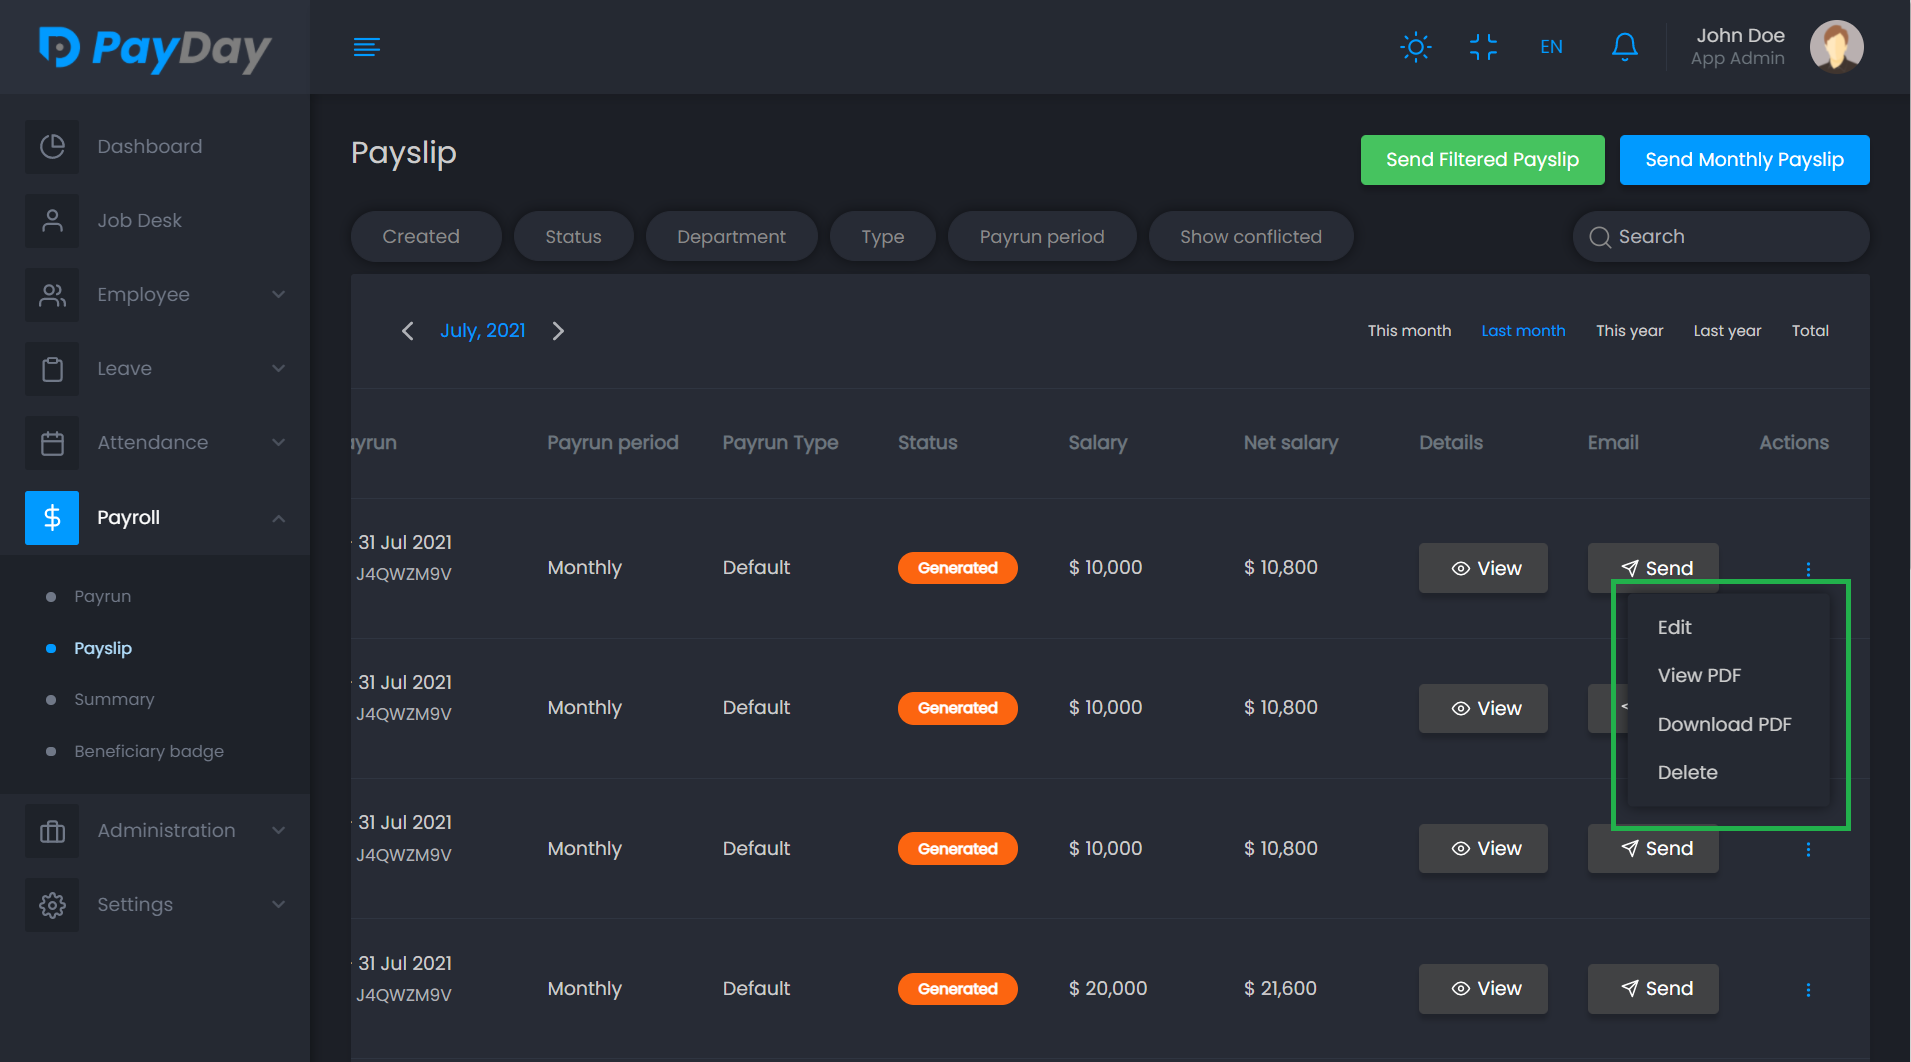 You can view the browser view as well as PDF view
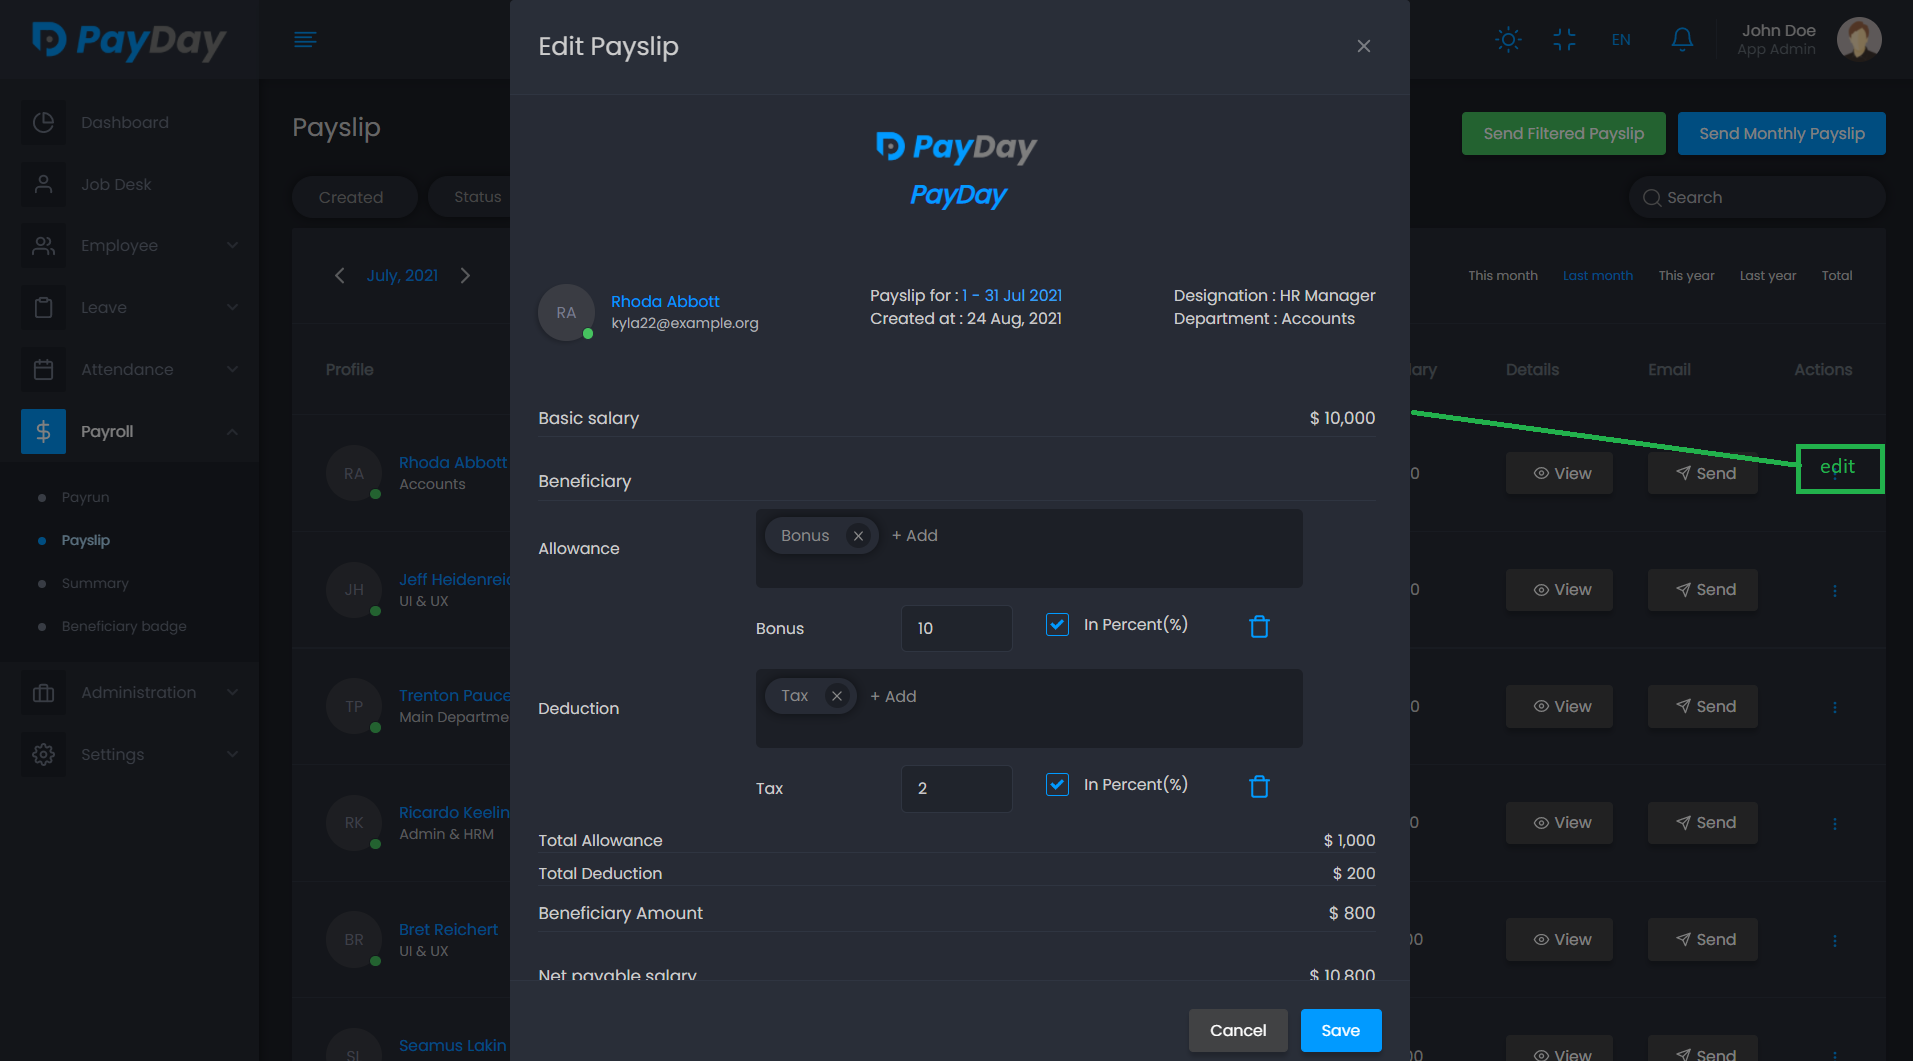
 You can also edit payslip form here
 Send individual or bulk payslip form here.
-
Summery
View payroll summery here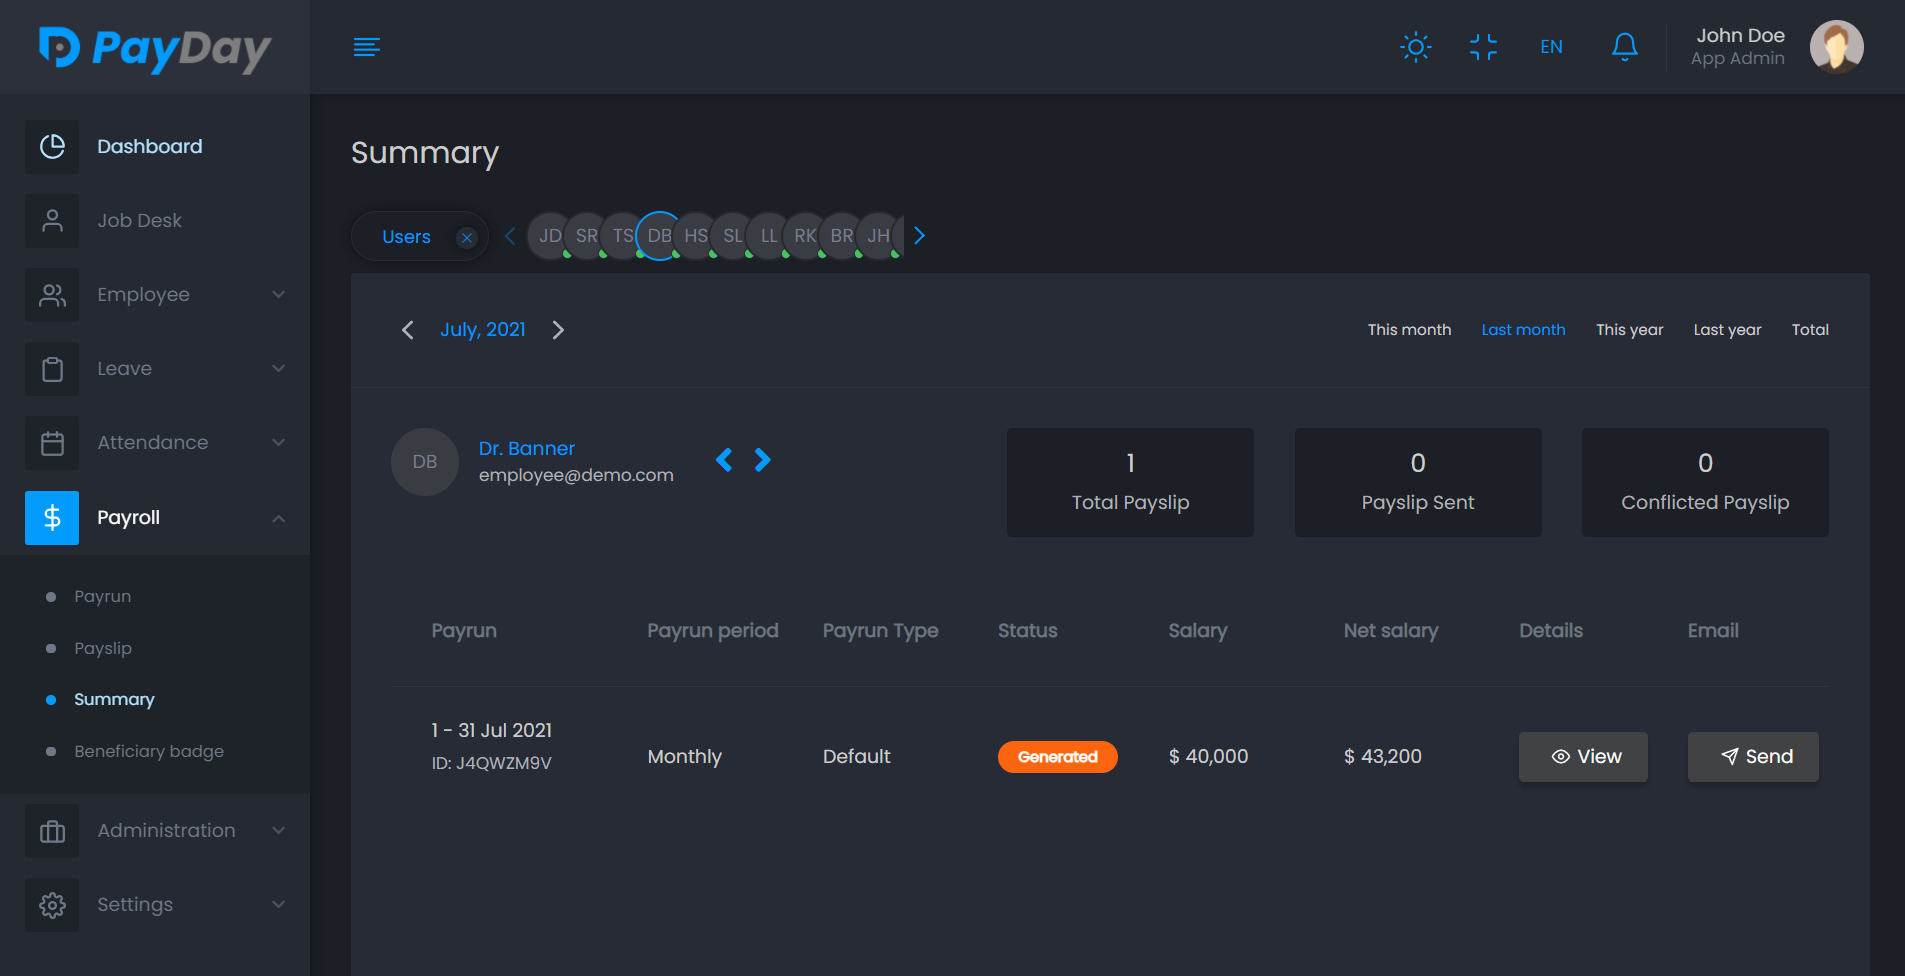
Administration
As the title describes, this part has some functionality which belongs to administration that helps to run the application more efficiently.
-
Users & Roles
-
Users and Roles is an important feature in any application. You may need different roles for different job.
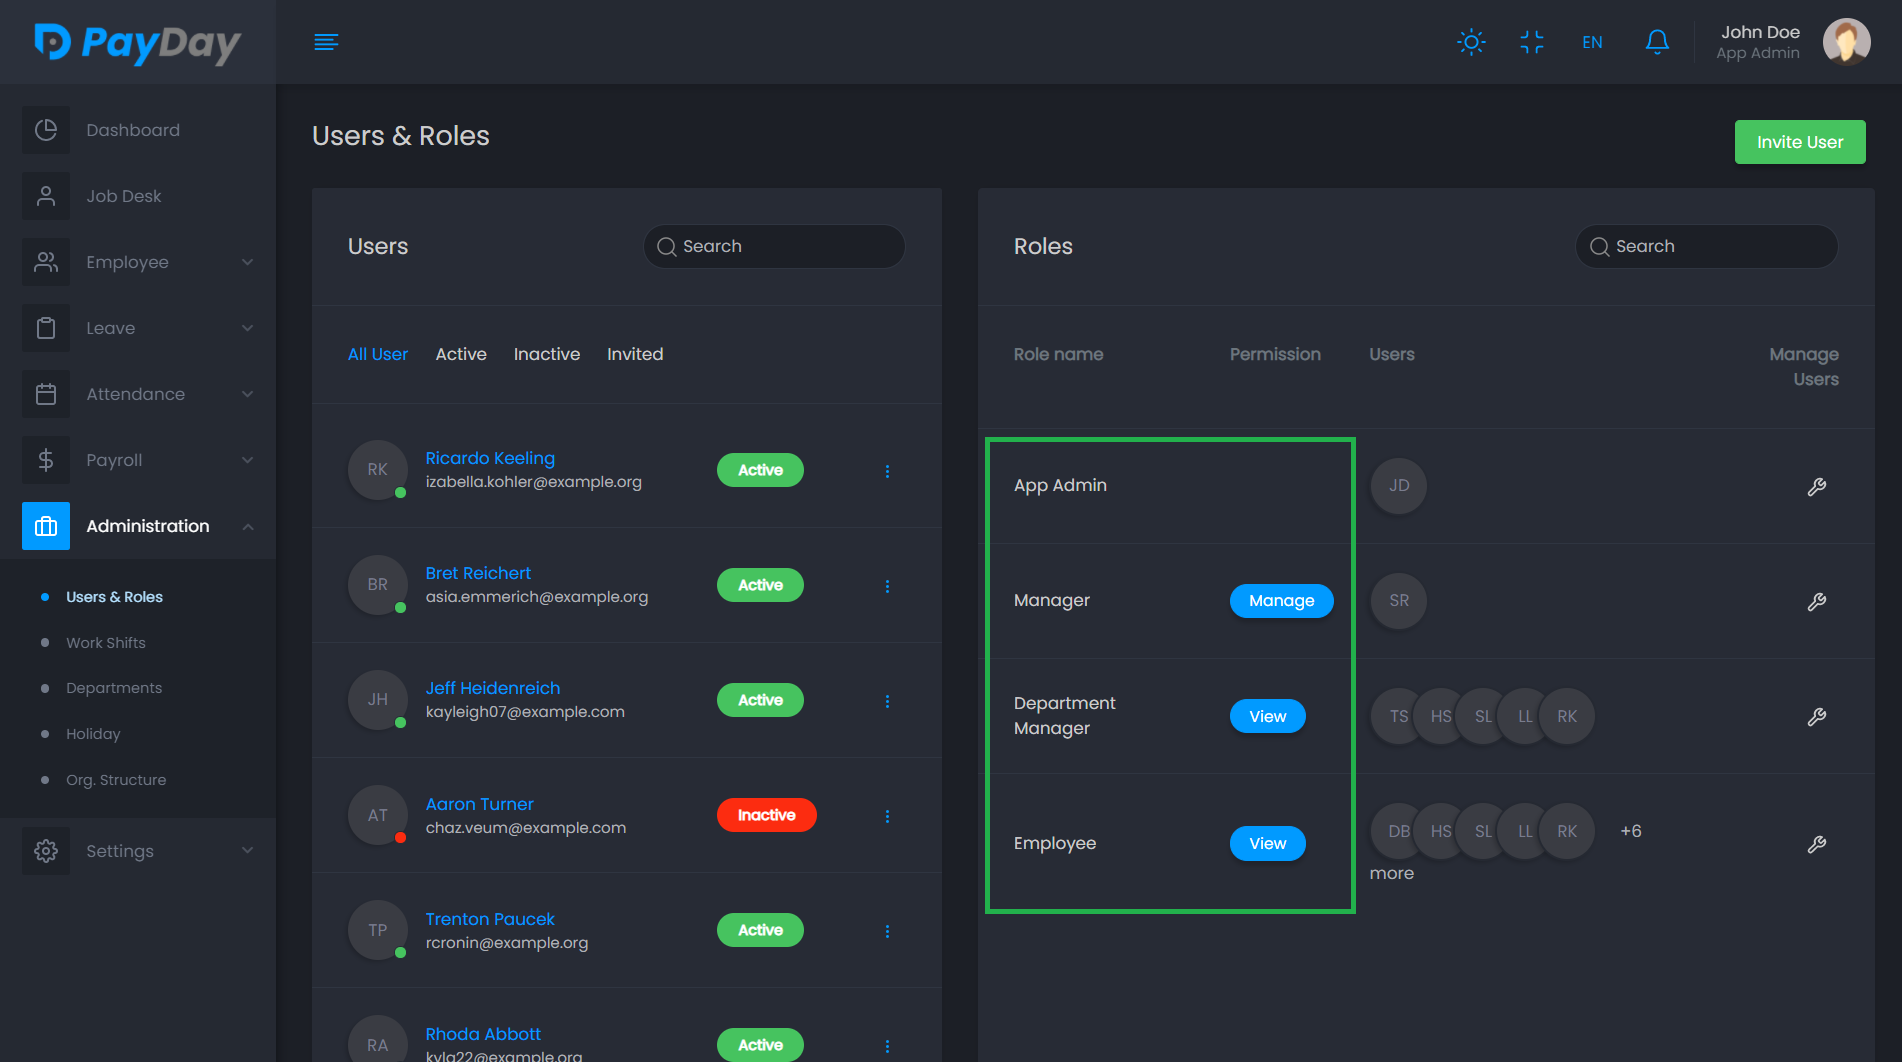
By default there are four role available to manage the app.
- App Admin: Can access and manage the whole app.
- Manager: Has all permission manage the whole app.
- Department Manager: Has permission to manage only his/her department of the app.
- Employee: Has limited permission to be an employee of the organization.
-
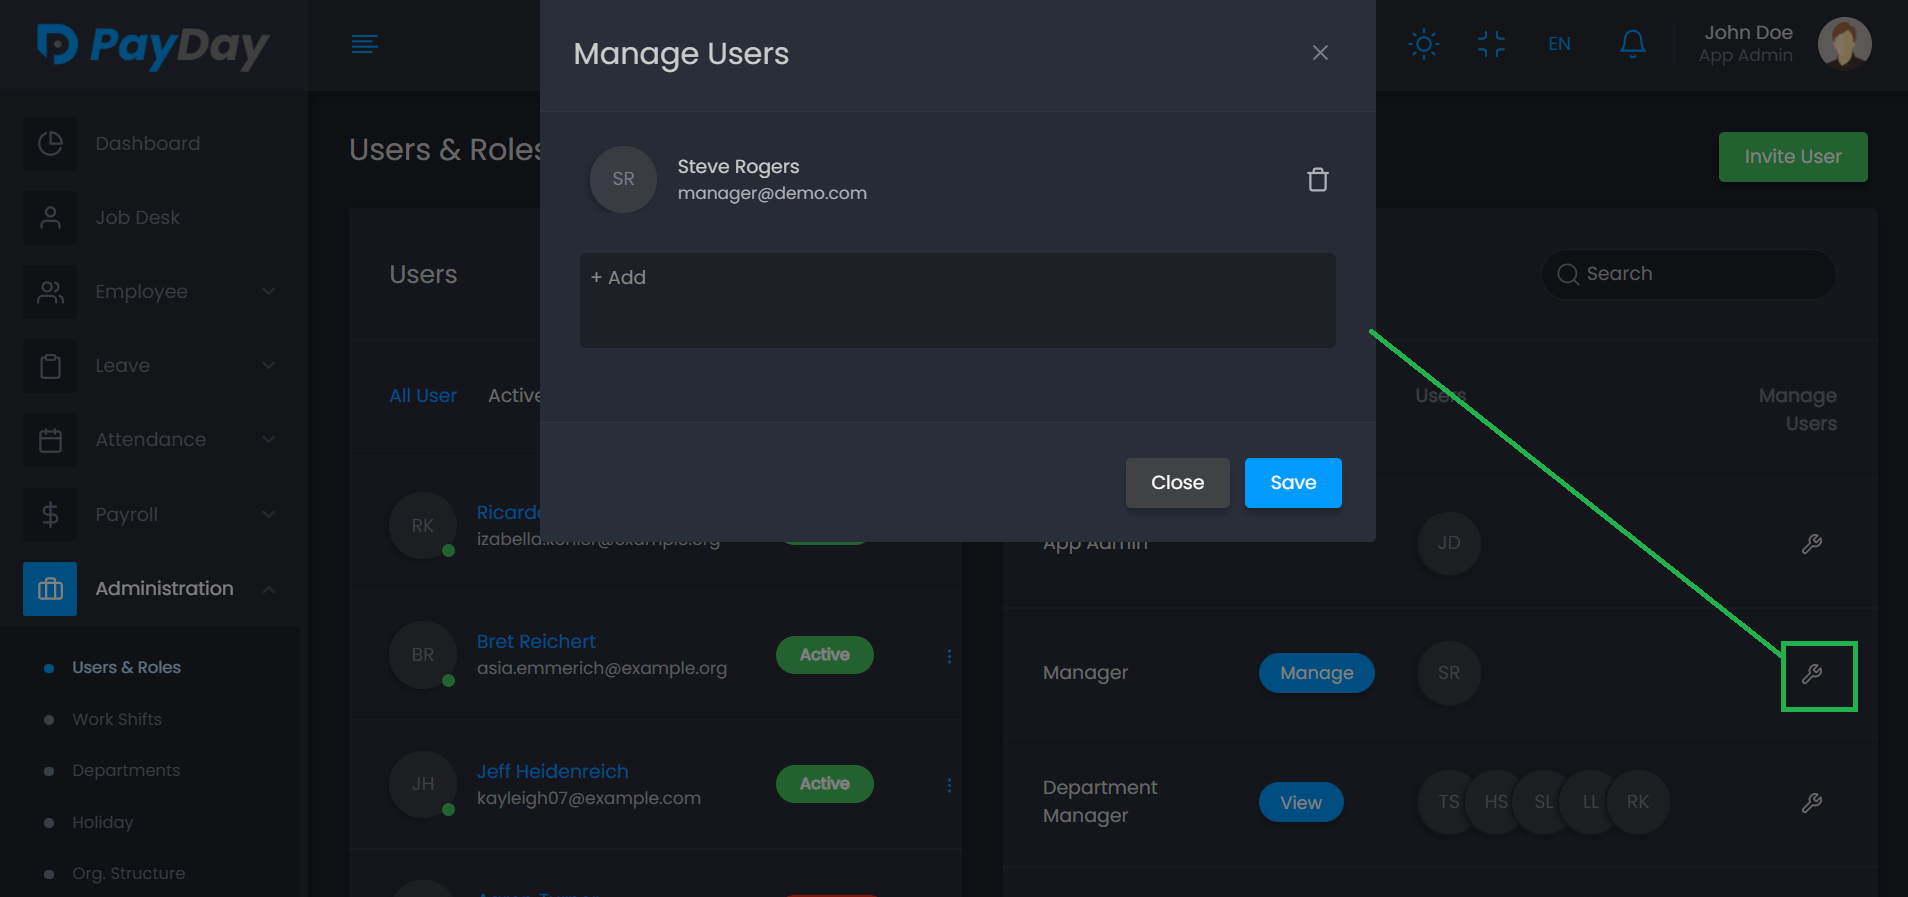
You can manage users of any role by clicking on Manage User of that specific role from Action column. Except Department Manager.
-
You can manage permissions of Manager role by clicking on Manage button from "Permission" column.
-
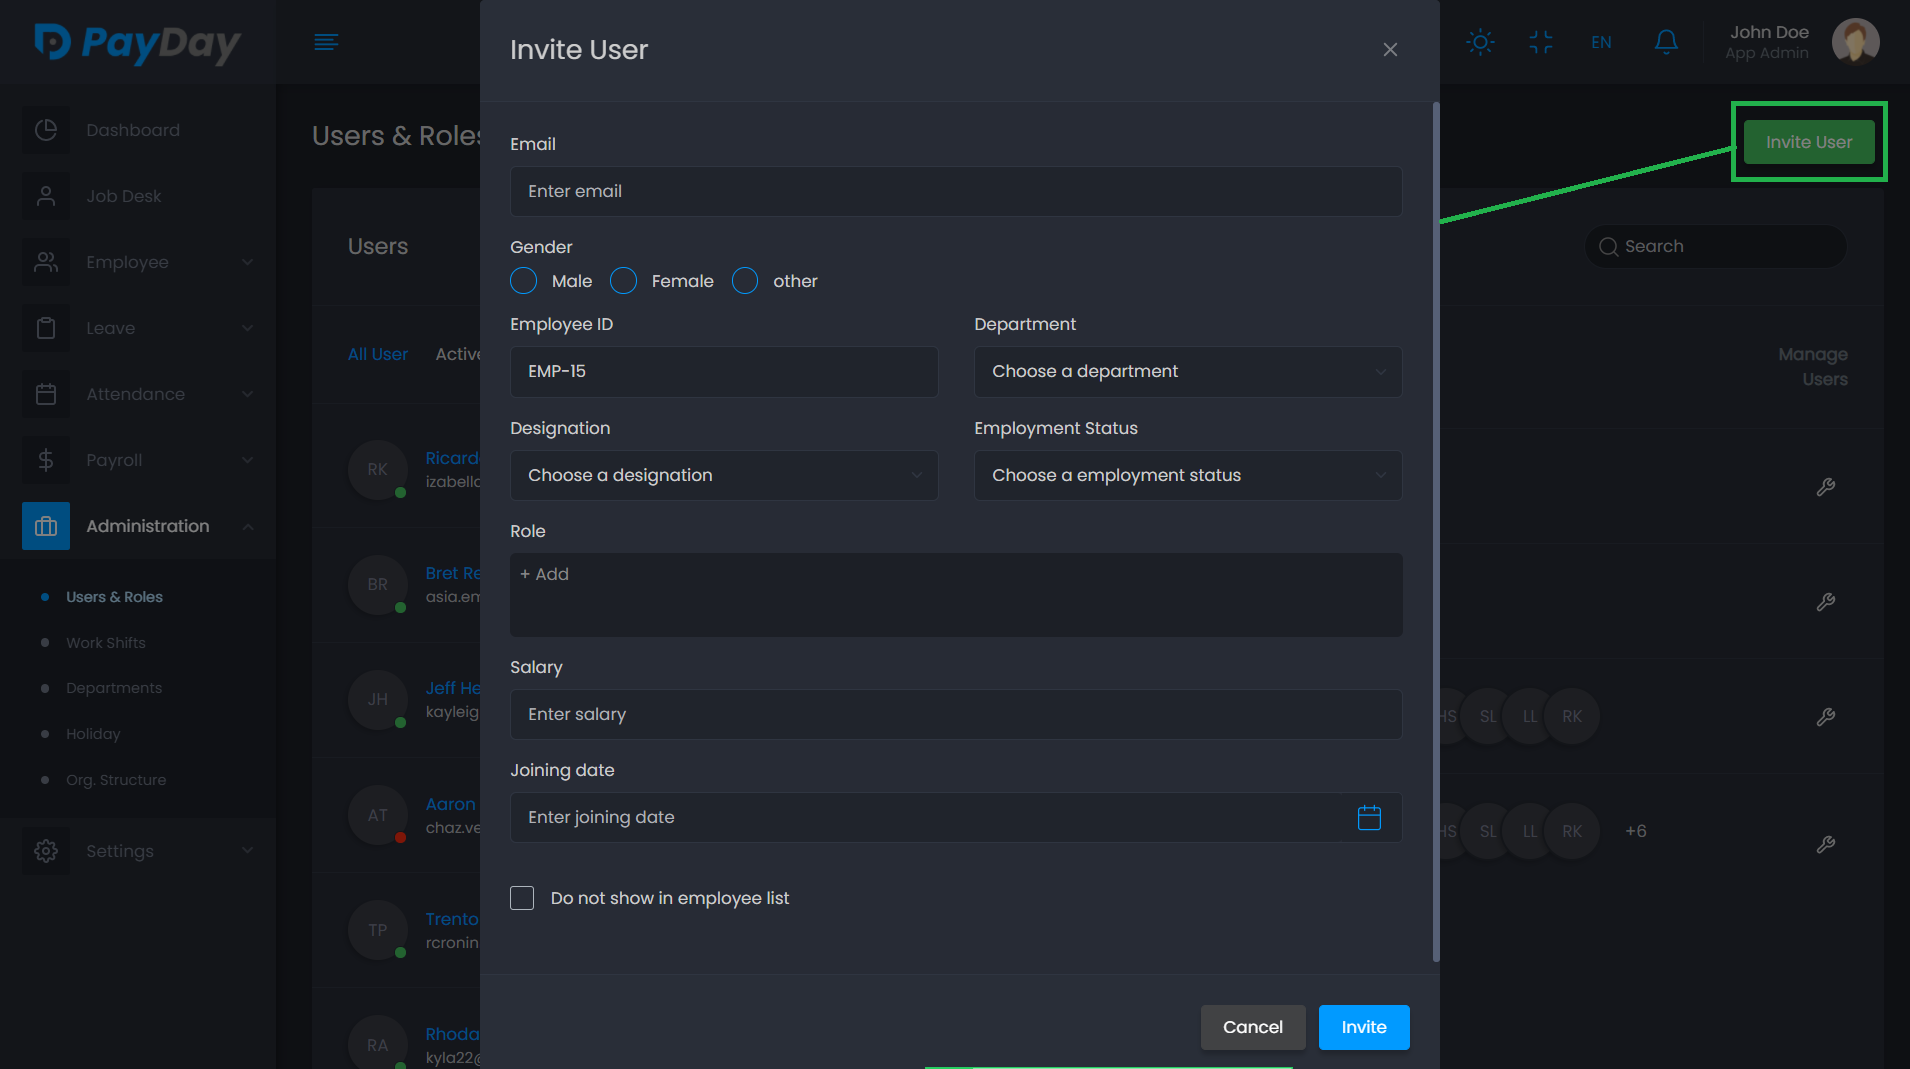
Click on Invite User, It will open a modal that requires user email, and role that will be assigned to that user. Invited user will get an confirmation email with a link. That link will redirect to a page where user can signup and set their basic information.
-
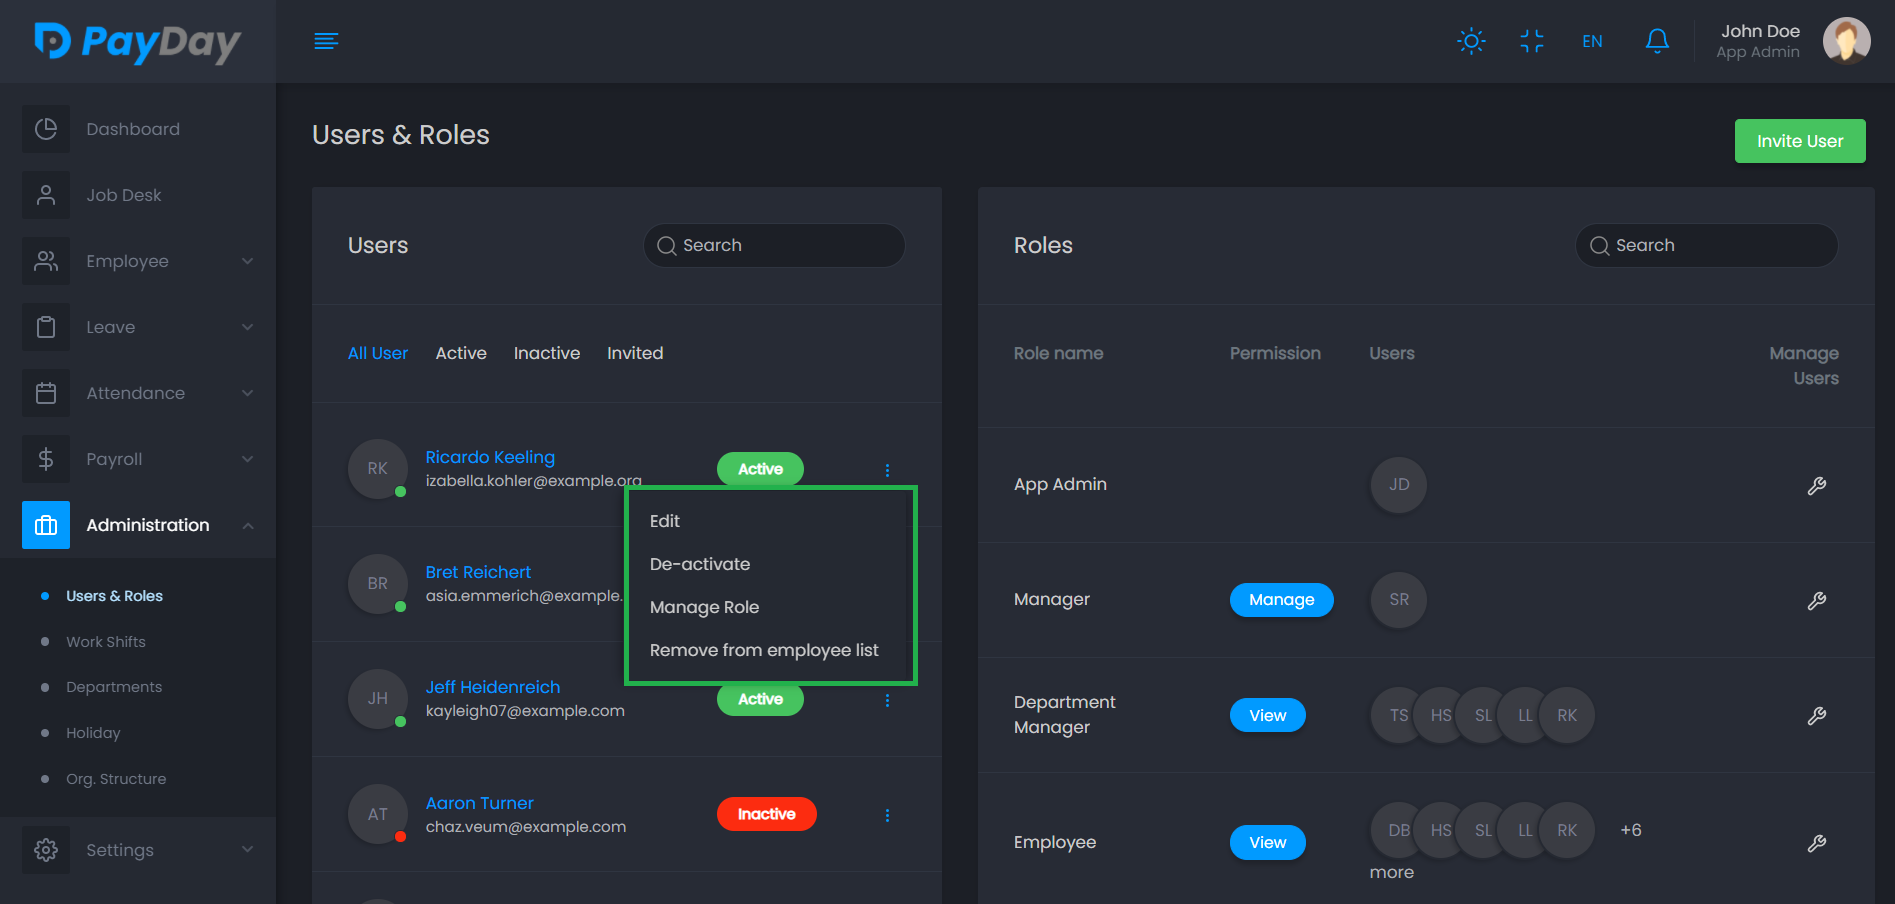
You can change user status, manage roles, edit and delete of specific users.
-
-
Work Shift
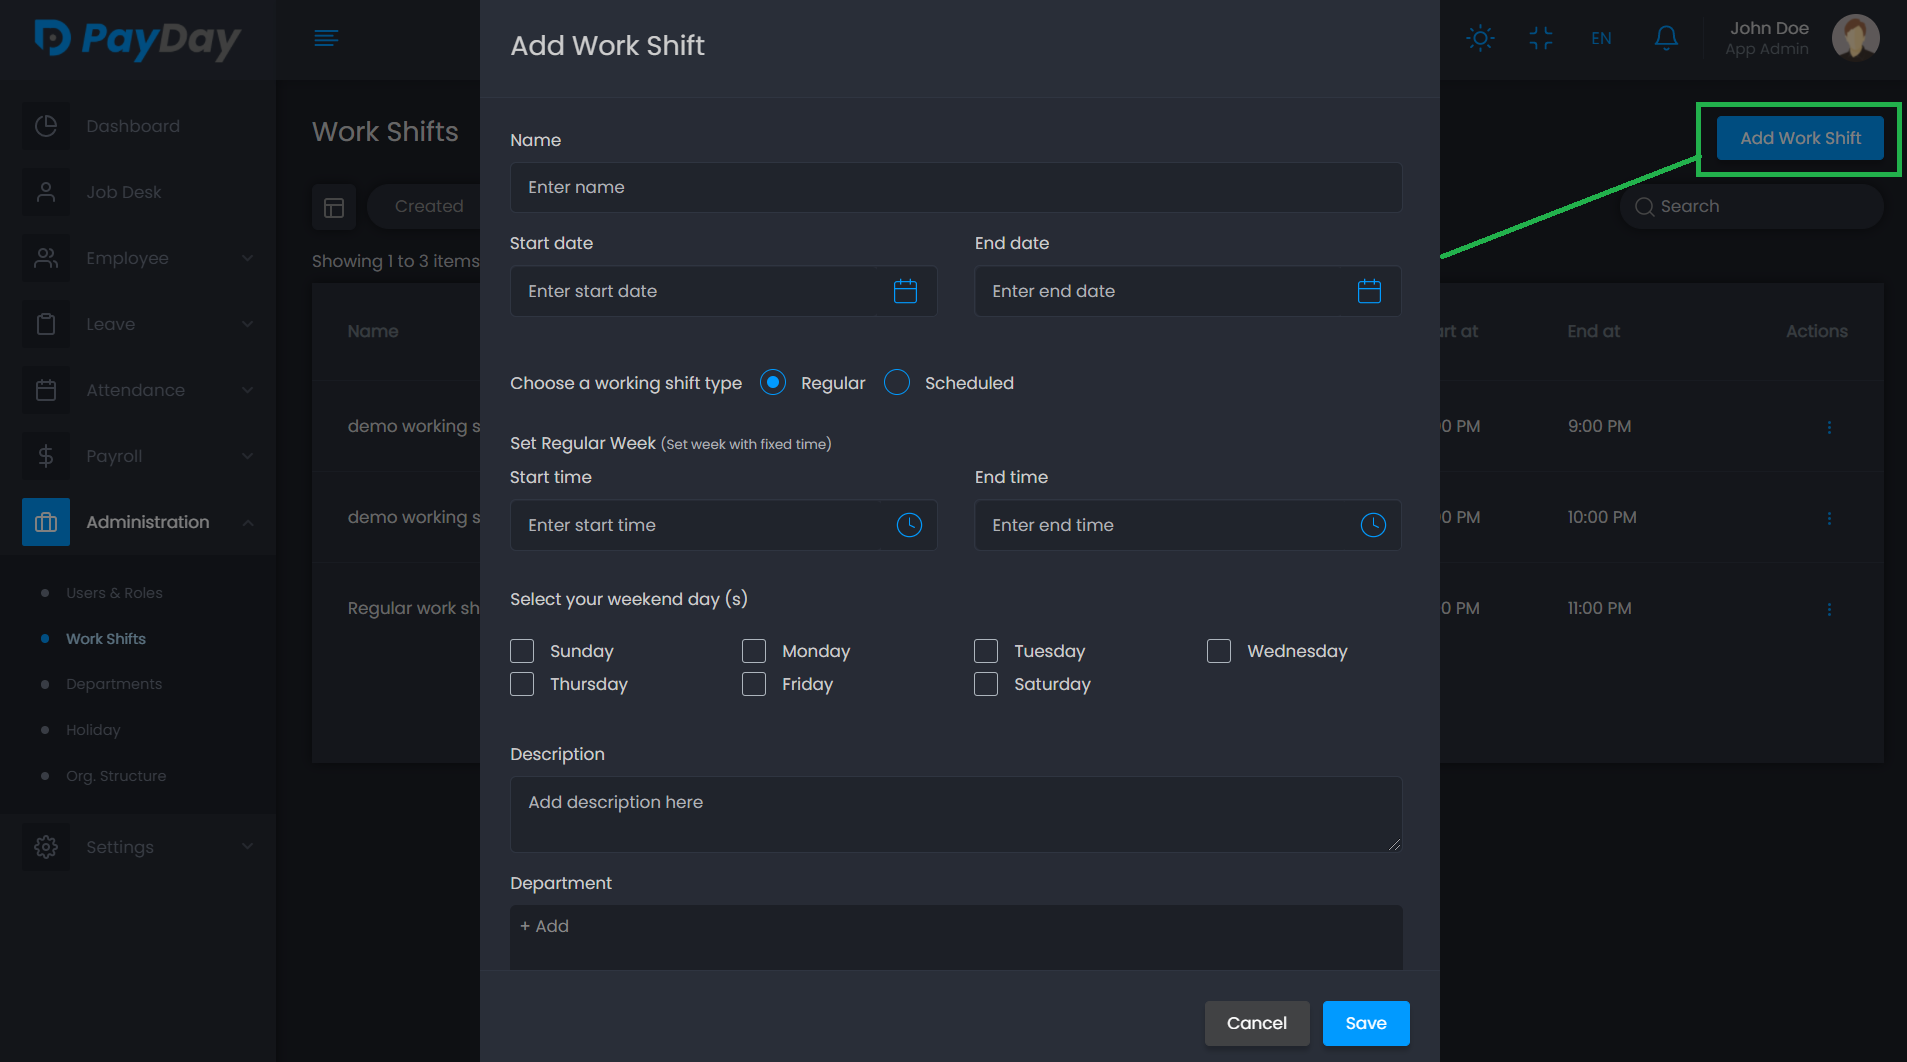
This is another important feature to manage your time-schedule and maintain your workflow. You can create several work-shifts and assign to any employees or departments. At the starting point of the app you must add a work shift and that will behave like the default work shift of the application.
-
Department
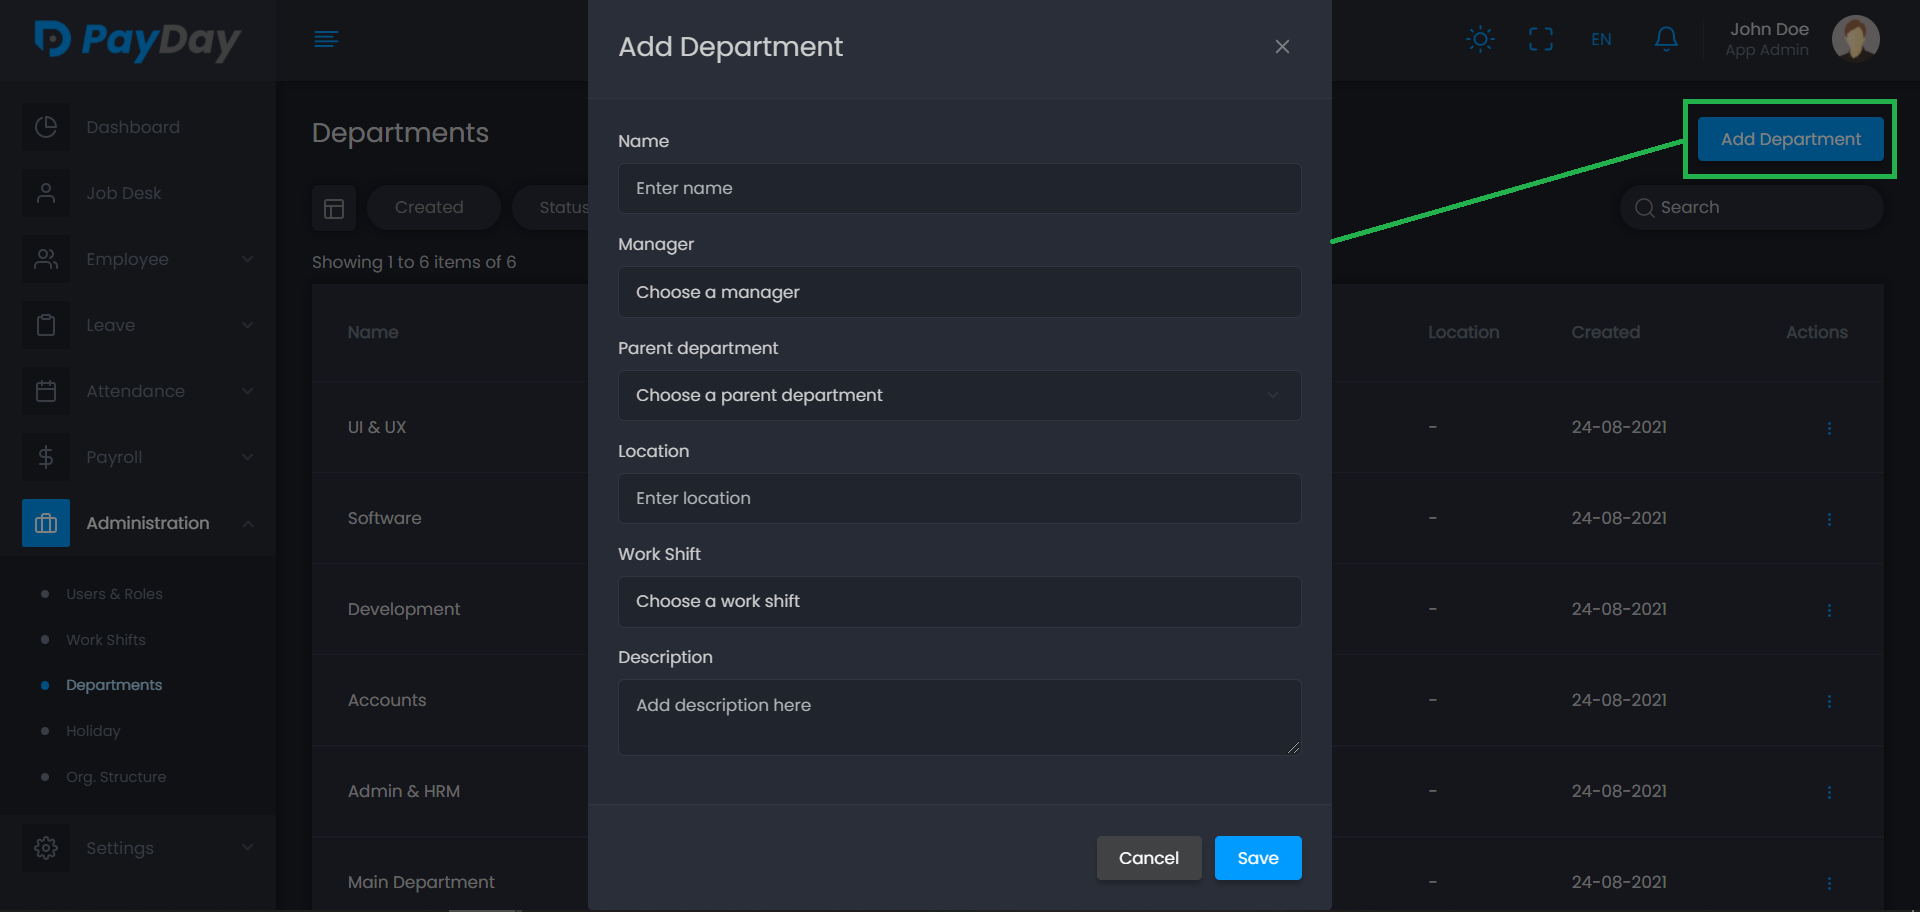
Like any other organization you might need several department to manage the work of your organization. So here you can create the departments as you need and assign a work shift and a manager to be in charge of that department.
-
Holiday
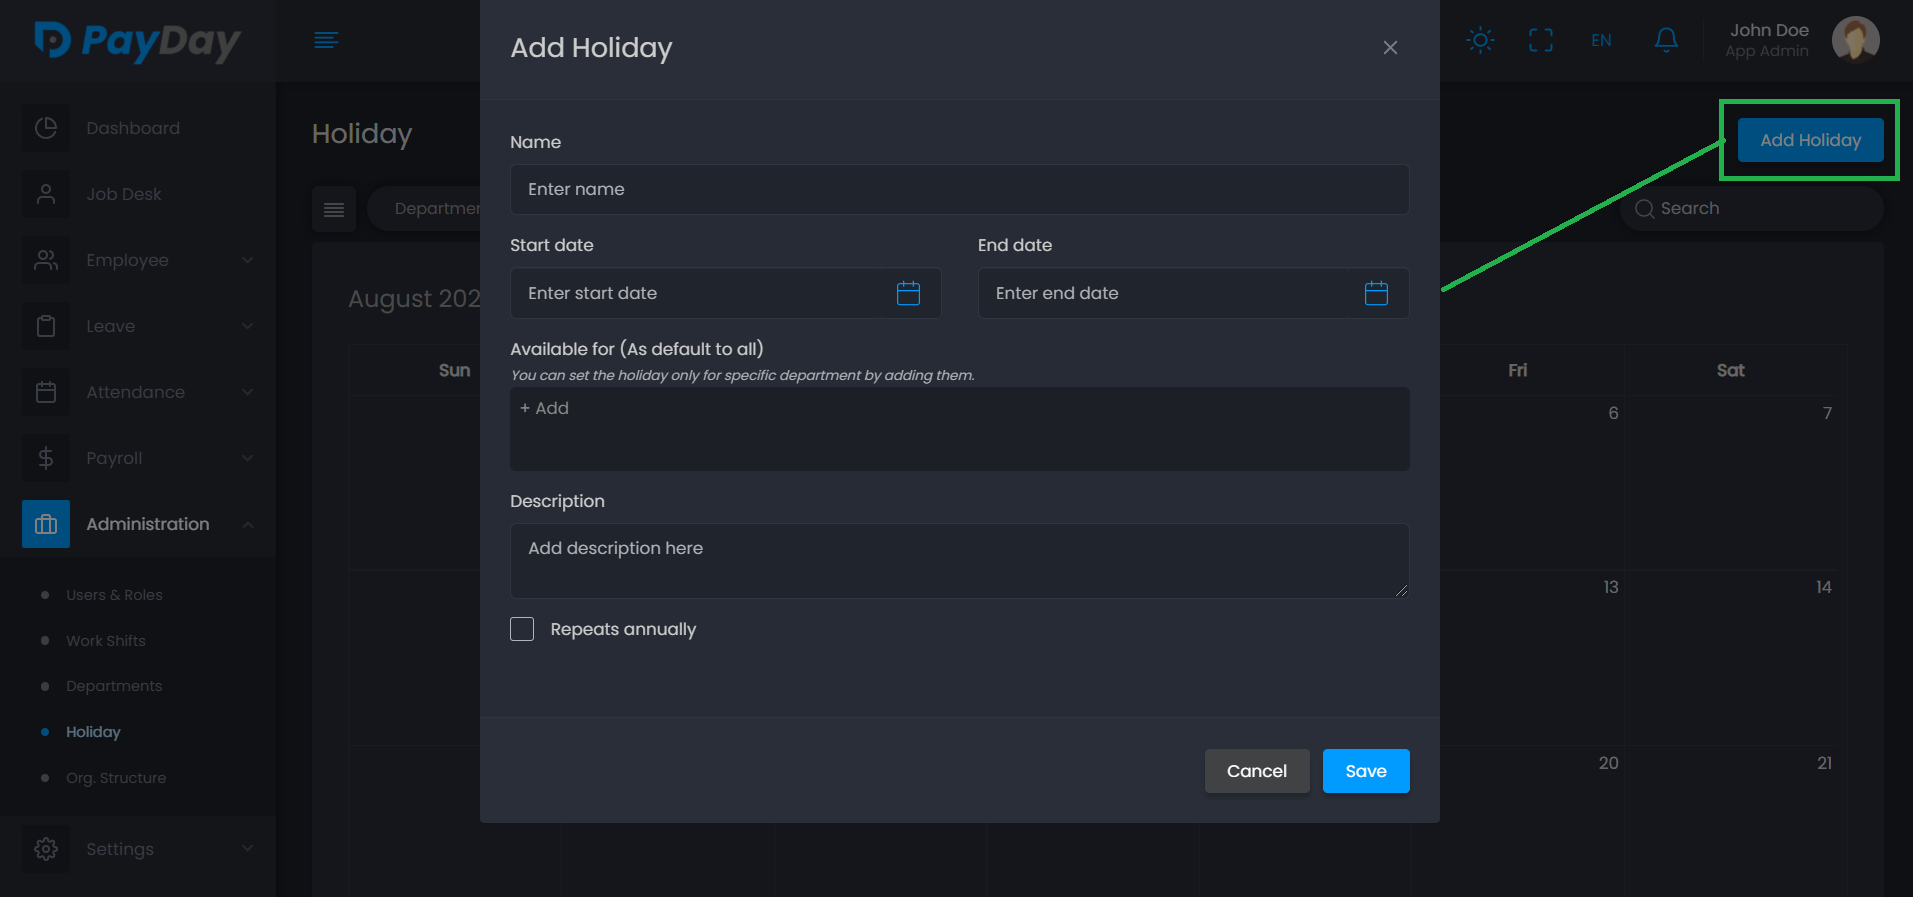
Here you can create the holidays. And that's it. You can make the holiday repeat annually when creating and it will automatic make the next year's same date as a holiday.
-
Announcement
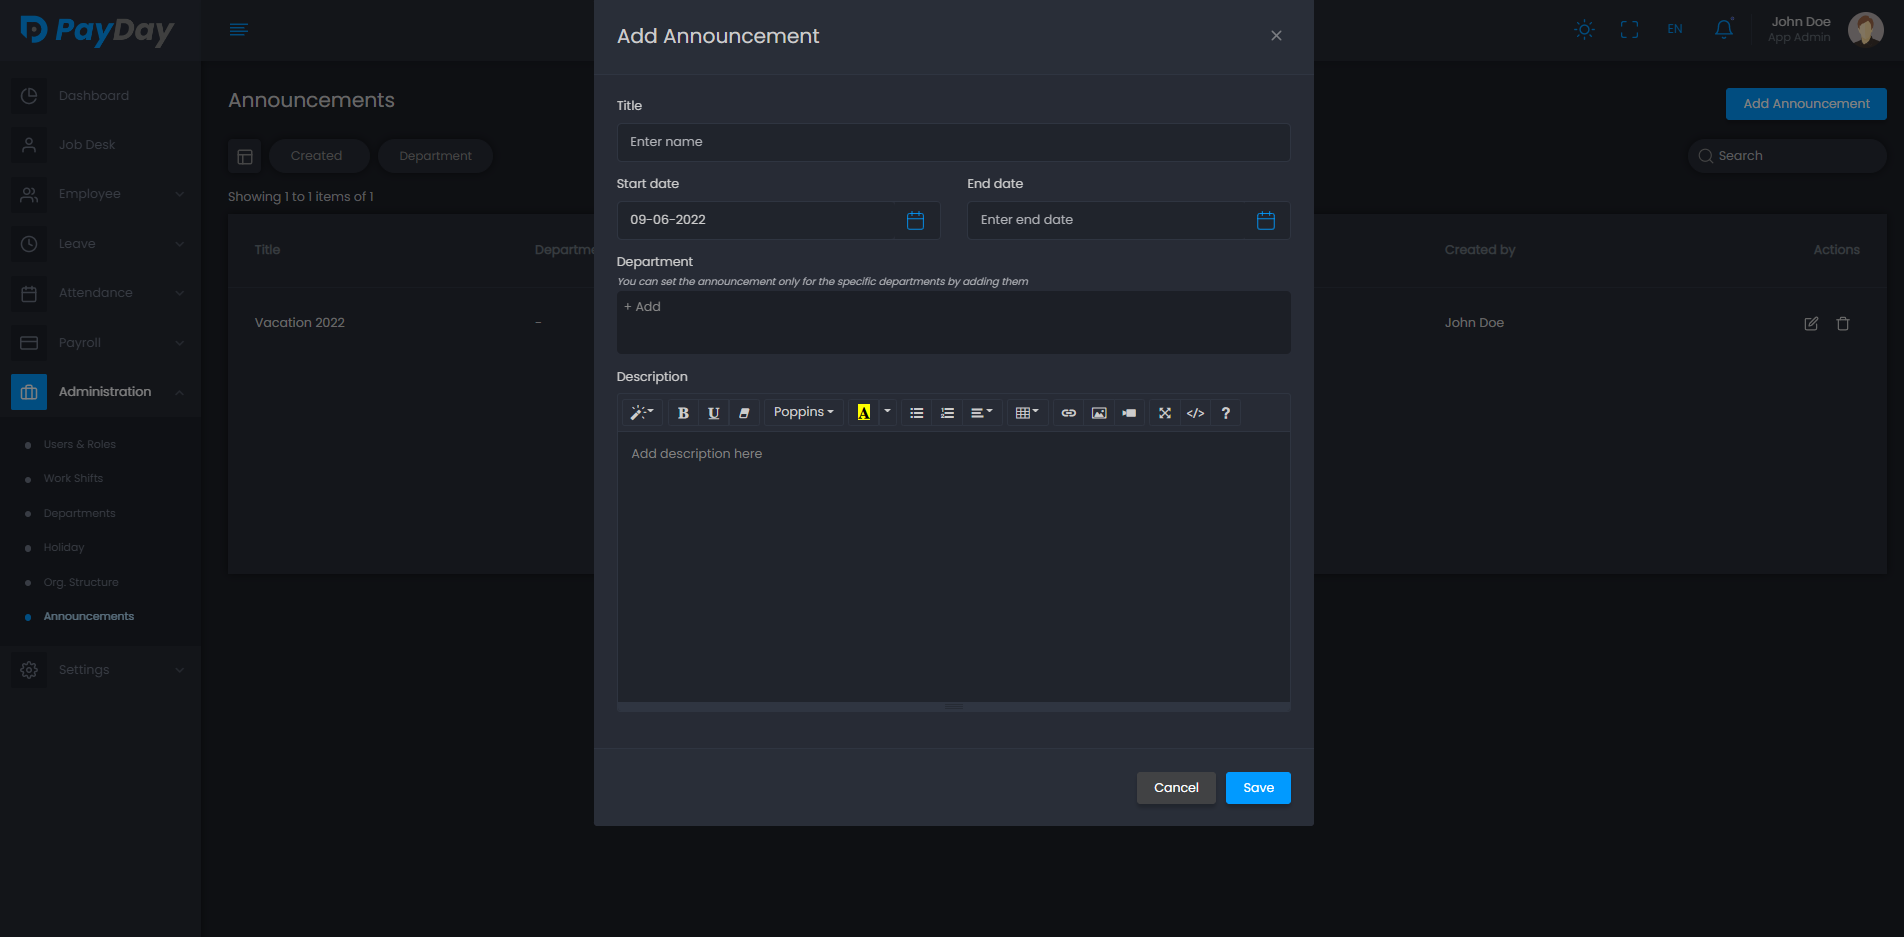
Here you can make any announcement for any specific department or for all employees.
Settings
For the efficiency and better user experience of the application we offer some custom settings options for the user. Here you can set different type of settings based on the need of your organization.
Application settings
Settings related settings are listed bellow
-
General settings
-
Go to "Settings" > "App Settings" > "General"
-
You can set your Company name.
-
Company logo is used in you application. Select image of your logo.
-
Upload an icon as Company icon of the application.
-
Upload your Company banner of the application.
-
Change suitable Language for application.
-
Set Address Details of your company
-
Set Date and Time format and Timezone the way you want to see date/time in your application.
-
Decimal separator, Thousand separator, Number of decimal also can be set.

-
-
Mail settings
App level configuration will be used for app related processing. For example inviting user, password reset email, Notification etc.
-
Go to "Settings" > "App Settings" > "Email Setup"

-
-
Notification settings
-
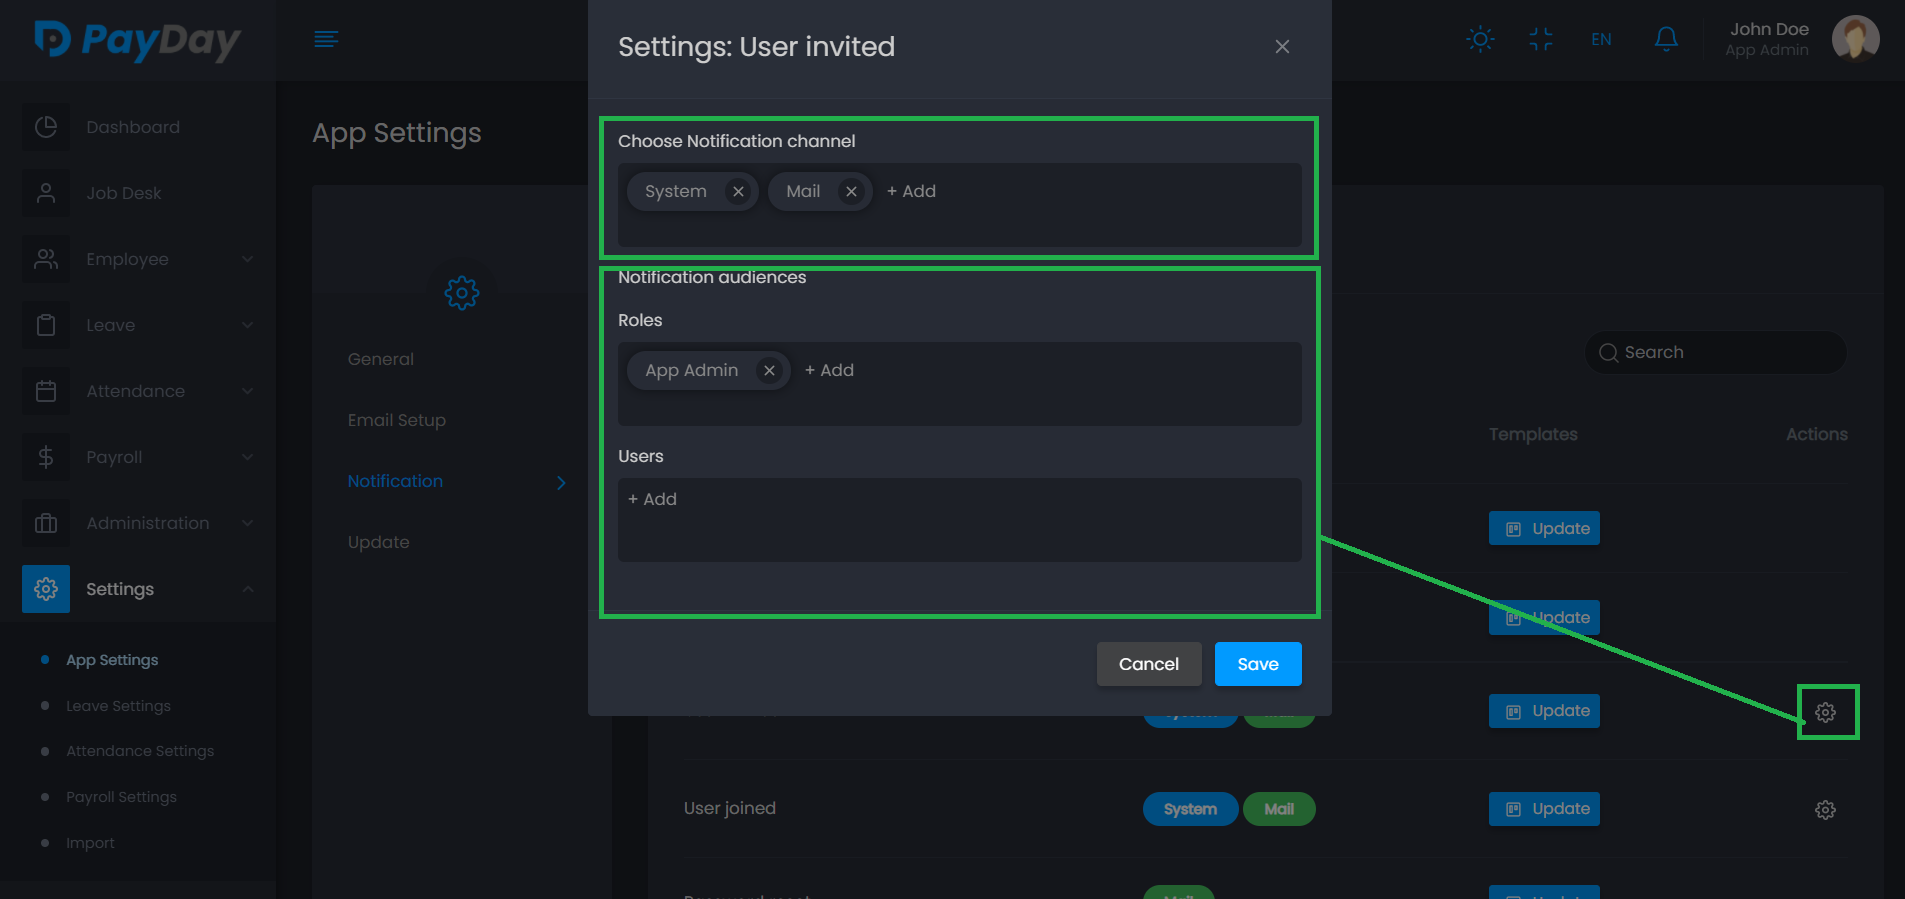
You can update settings from here and also can update the template of notification. You have the following options.
-
You can set channels where the notification will send.
-
You can set / choose users who will be notified on selected events.
-
You can set / choose roles to set these audiences under that roles to get notified.
-
You can set up the template for the notification by clicking the Update Button
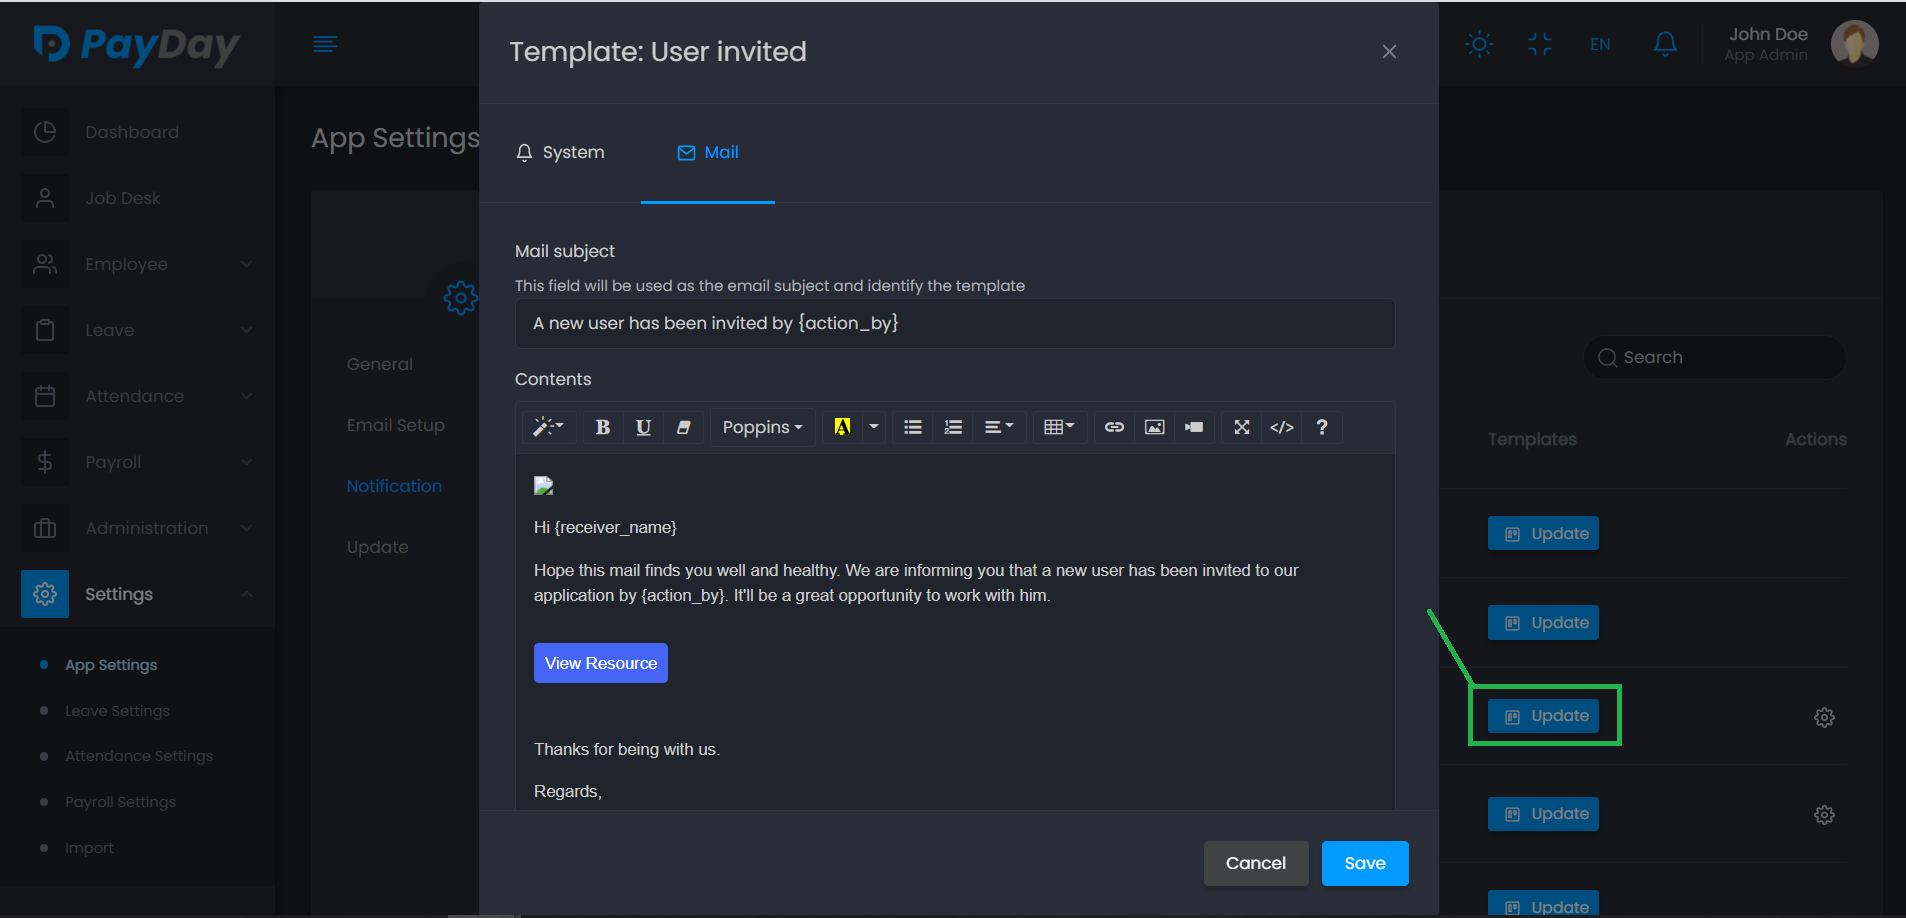
When updating template to insert tag into template you have to click on the tag to insert. But for something like url or image you have add them from editor menu. From above screenshot if you want to add the {resource_url} tag to the template. Click on the link option and add it in second input. Add your link header in first input. For {app_logo}, Click on picture from editor menu and add this to the input box
-
-
Leave settings
In order to manage the leaves of your organization we developed some leave setting so that you can specify how and what way you want to give leave to an employee.
-
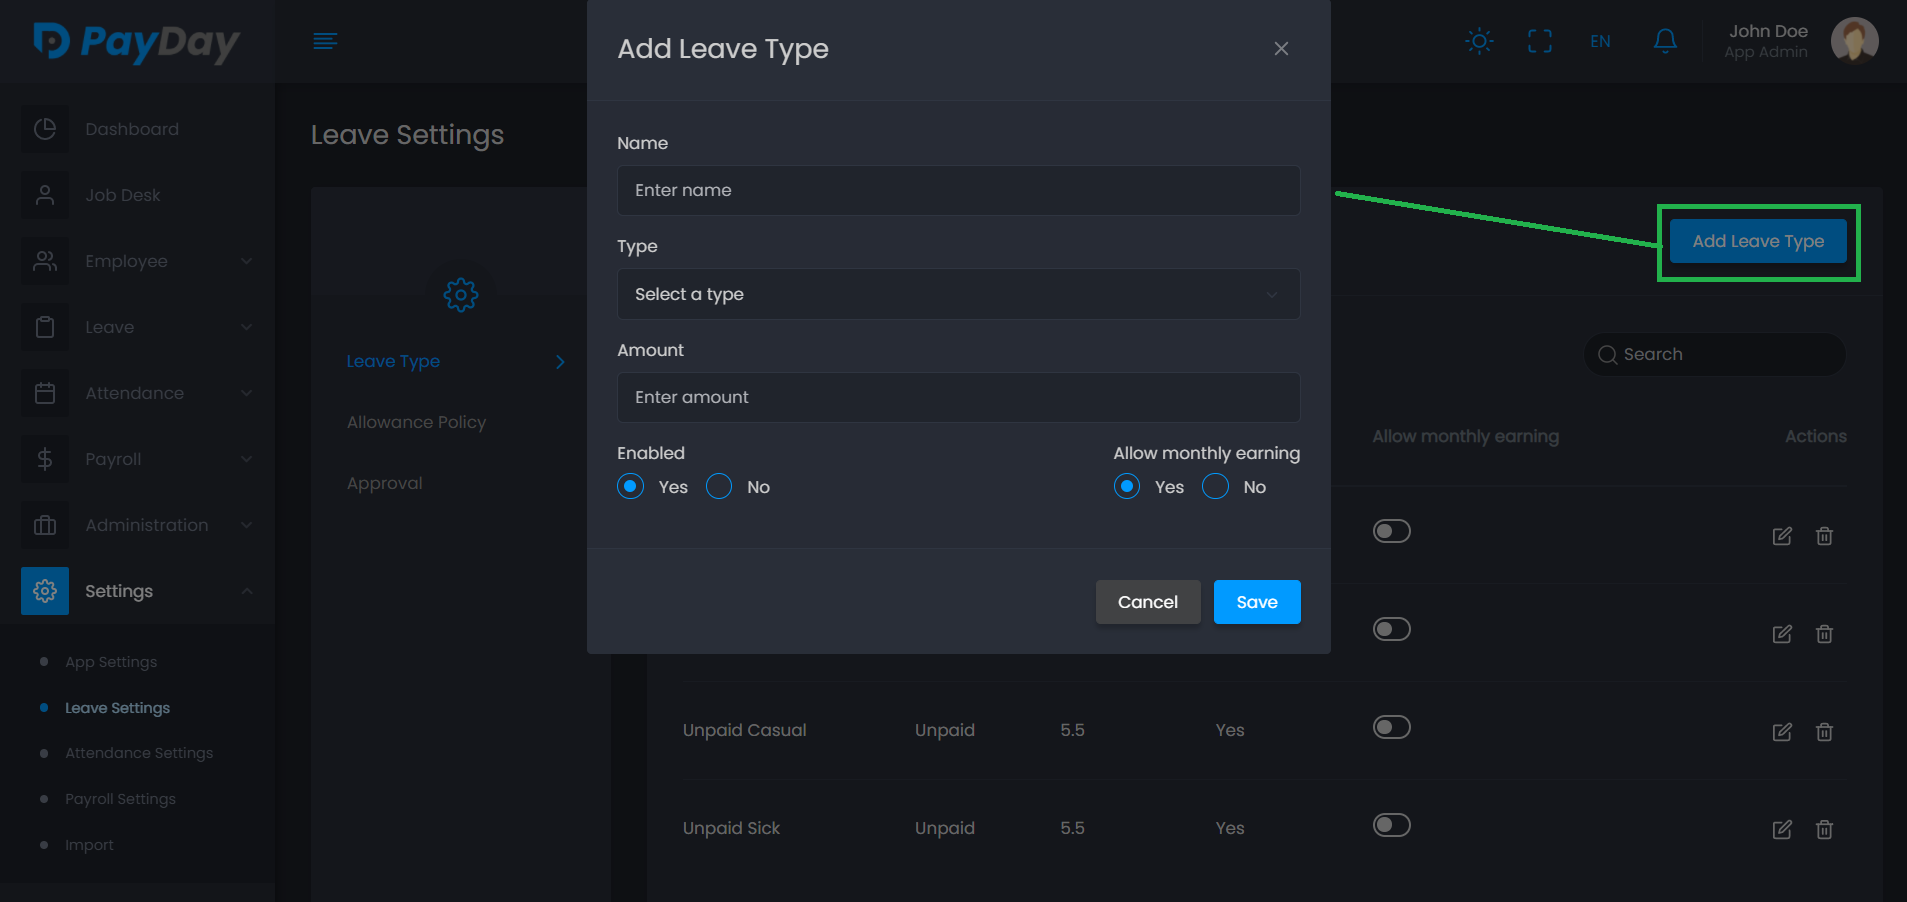
Lave Type
Here you can create leave type to specify the kind of leave the employees will get.
-
Allowance Policy
In this setting you can specify whoever will get leave allowance from which month.
-
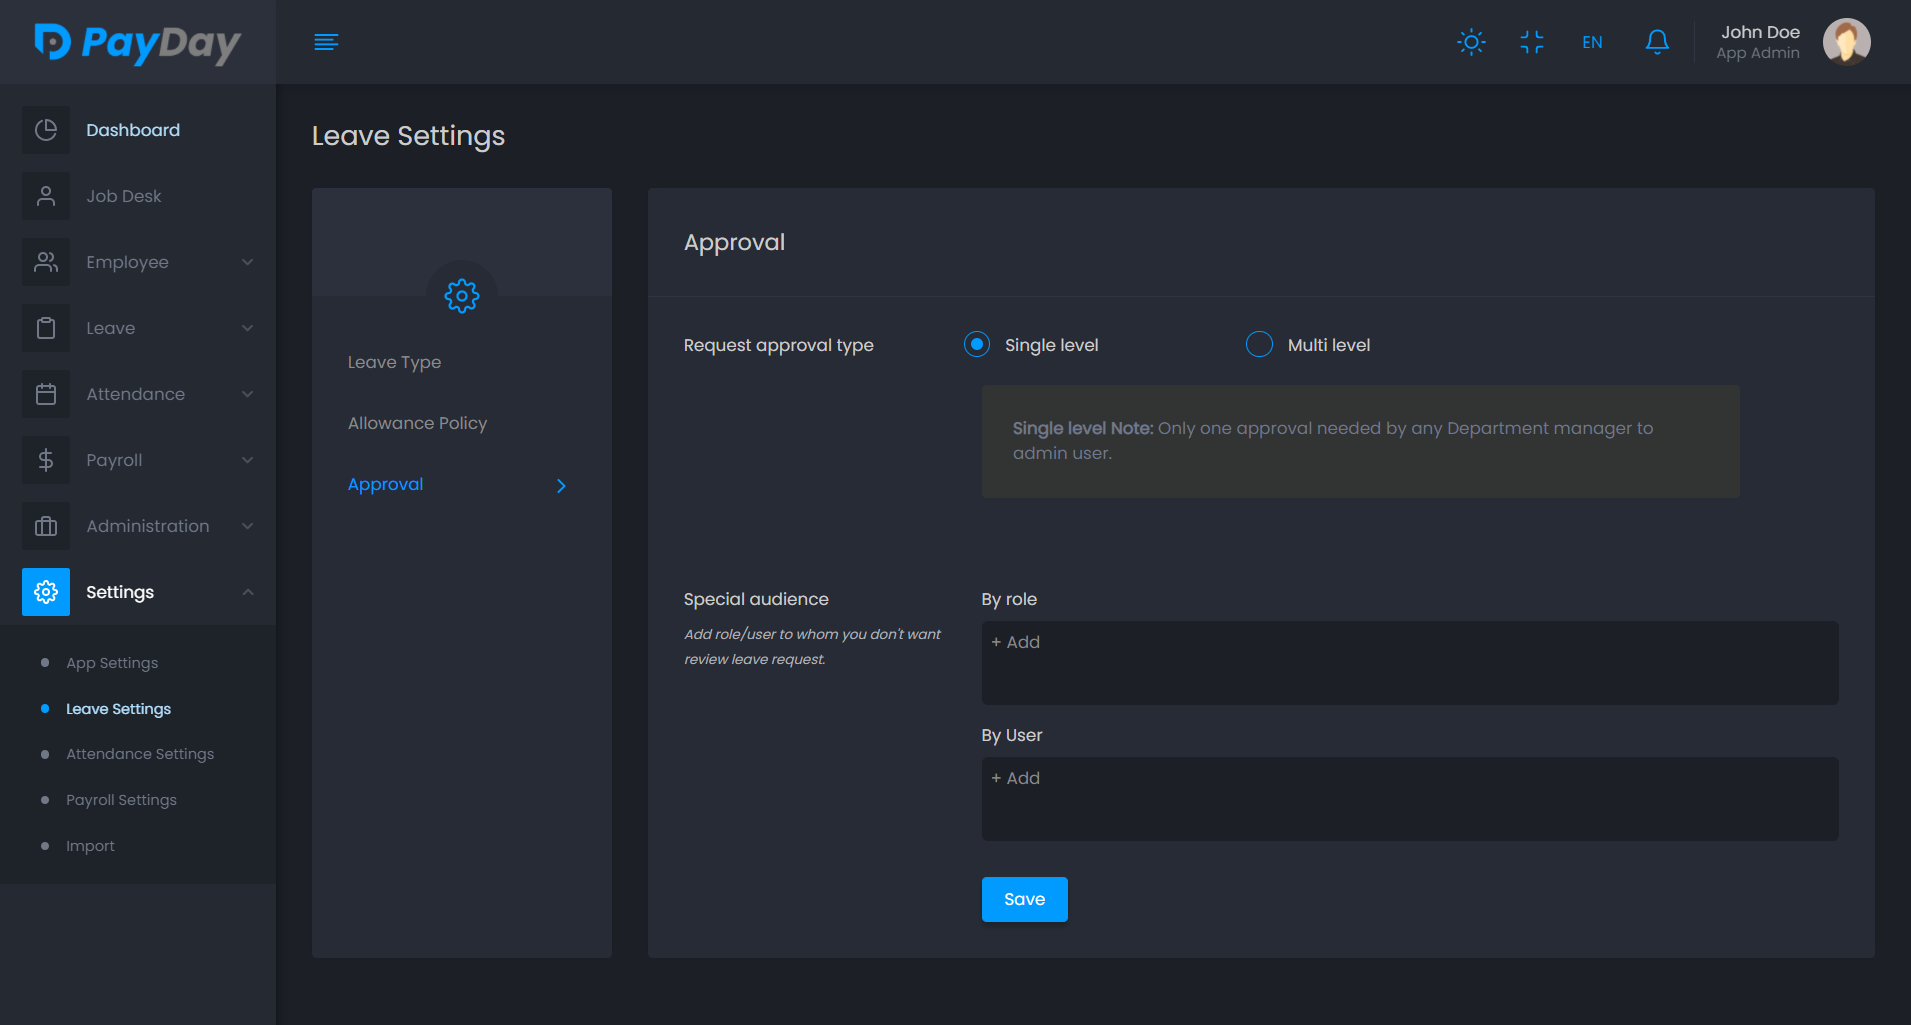
Approval
In this setting you can specify who and how can a employee's leave request will be reviewed.
Attendance settings
In order to mange the attendance request and put every employee's attendance in a group of behaviour we introduce some attendance setting.
-
Preferences
Here you can setup how you want to review an employee's attendance request.

-
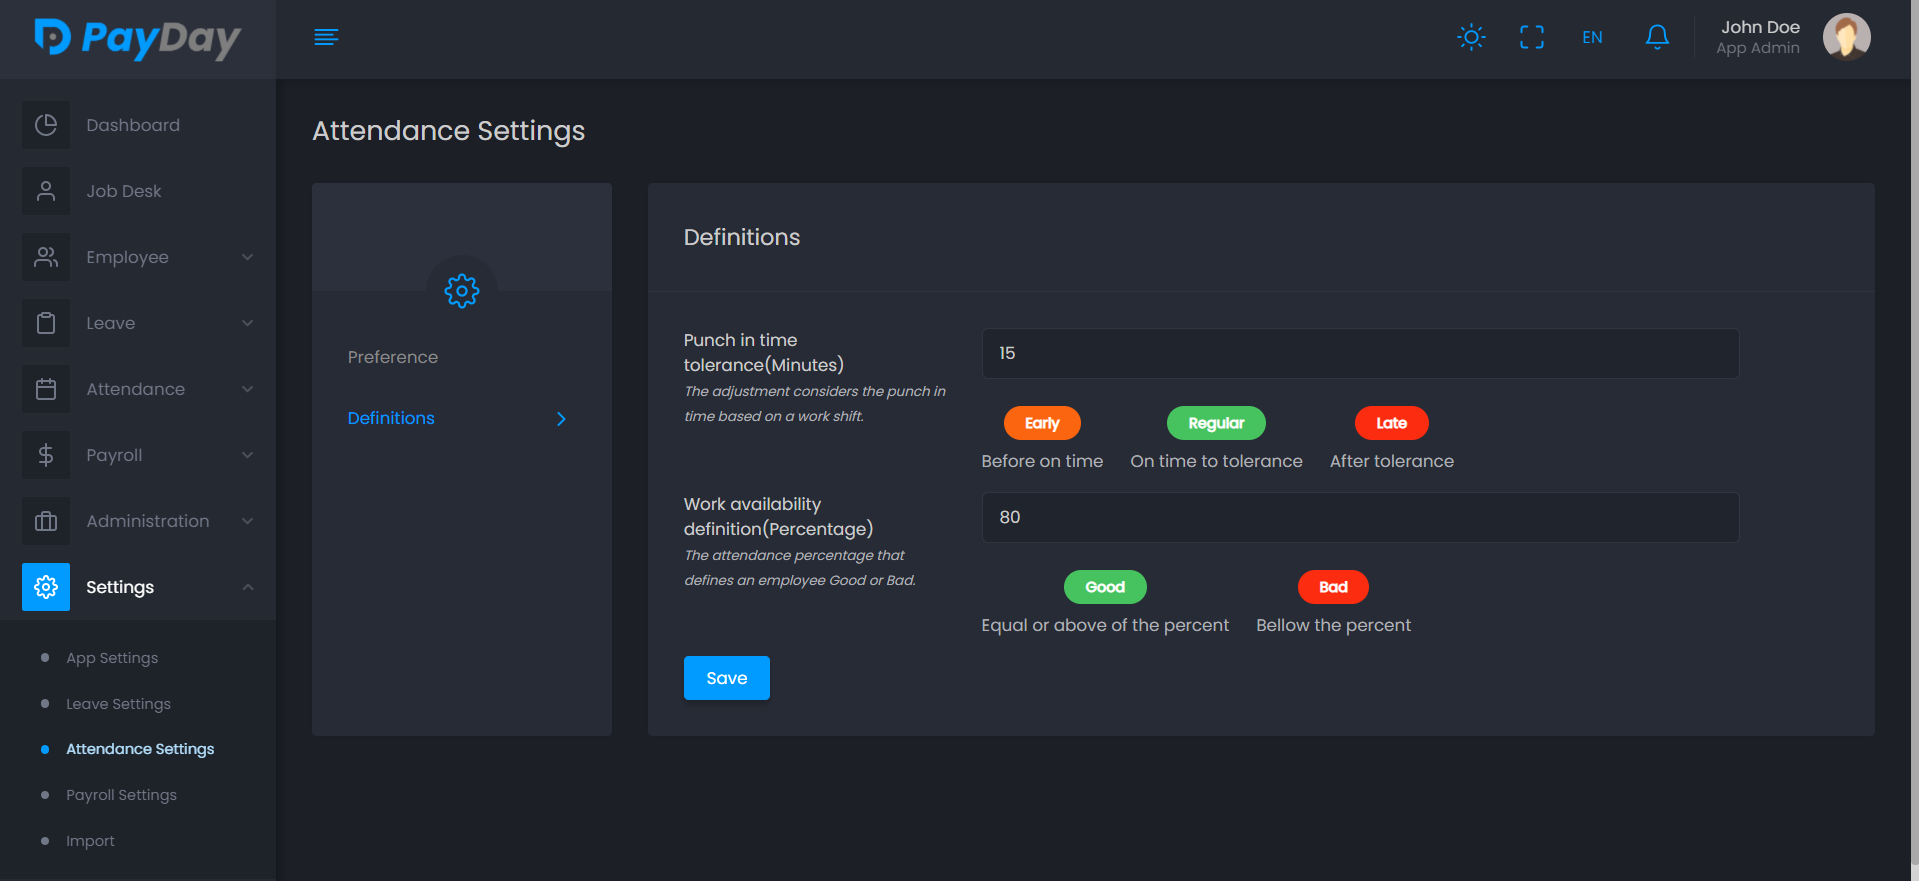
Definition
In this setting you can specify the punch in tolerance time and attendance behaviour.
-
Geolocation & IP
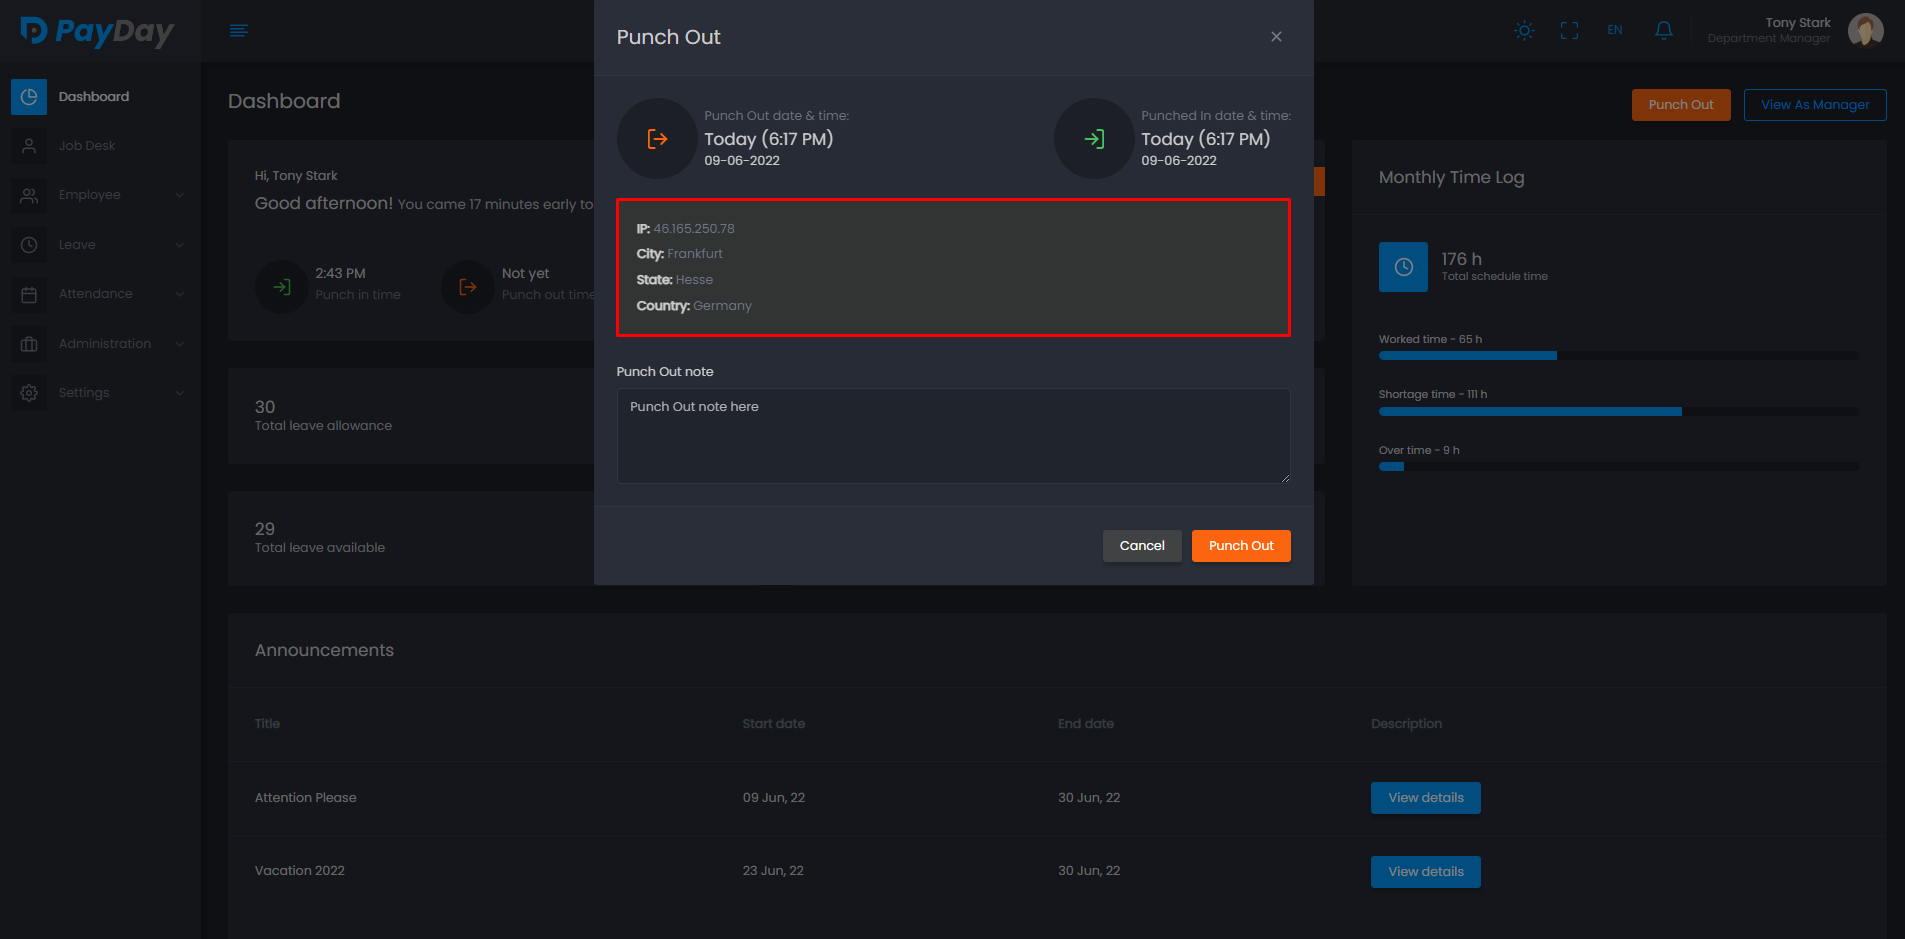
In this setting you can set Ip Geolocation api key to get the employee's ip and geolocation data when Punching In in the application.
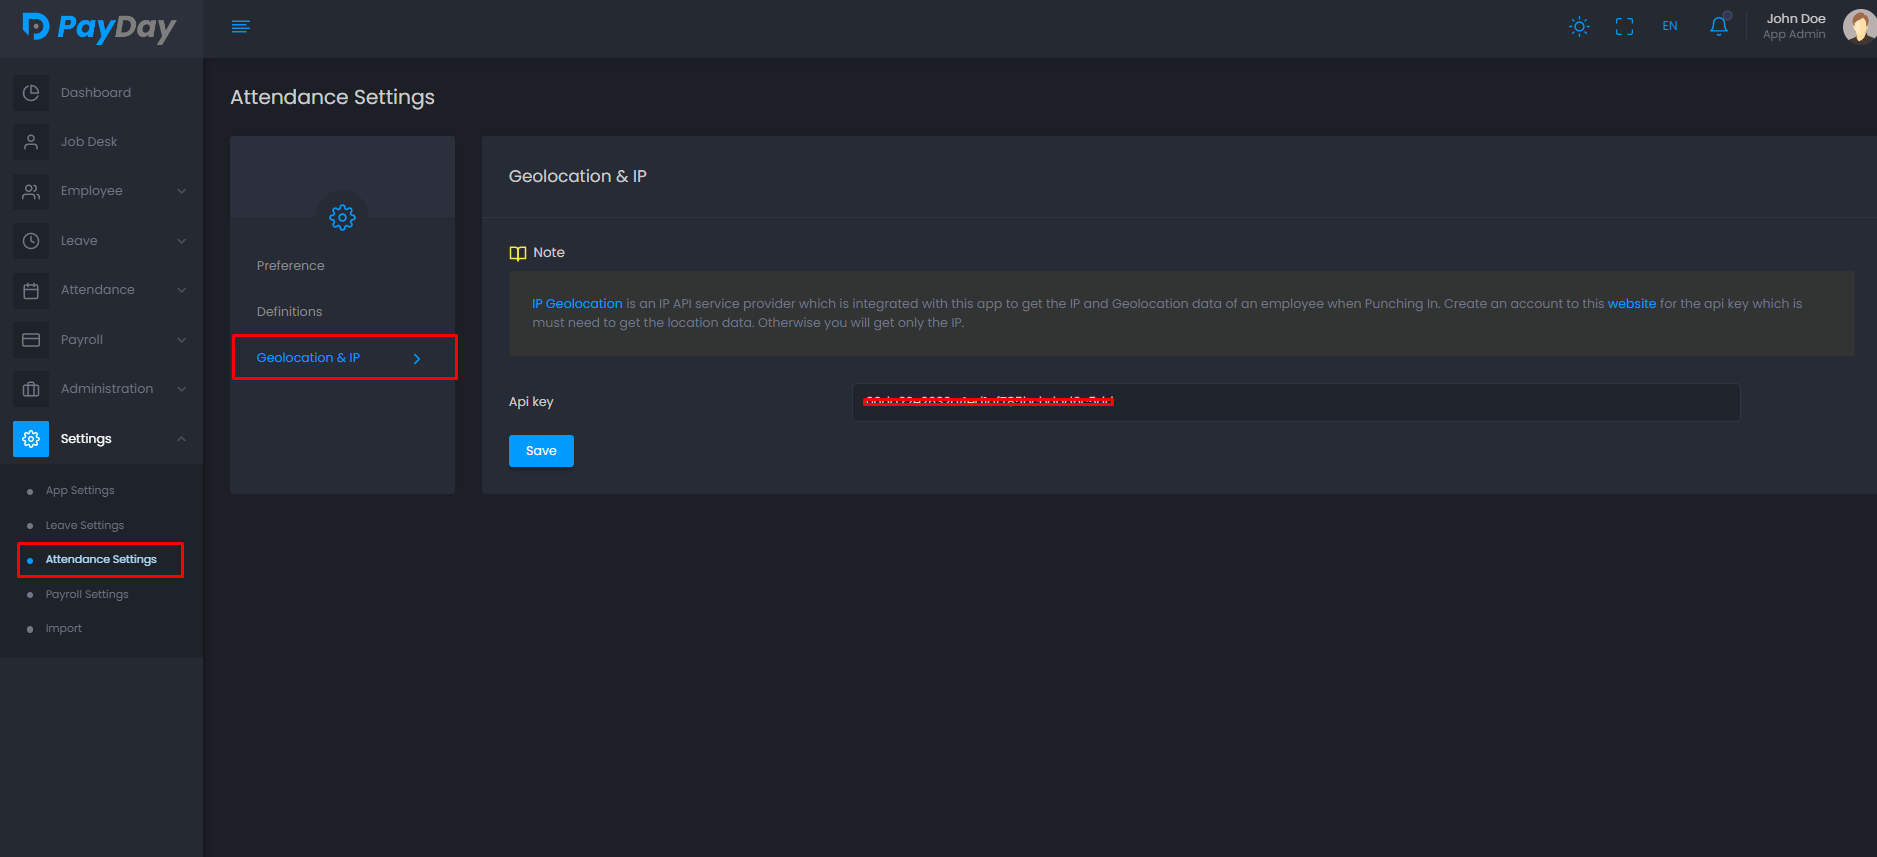
After setting the api key punch in modal looks like this,

Payroll settings
To simplify and speed up your payroll work we introduce some payroll settings that will help to boost your payroll related work.
-
Default Payrun
Here you can setup the payrun period and generate types which will be used to apply to all employees as default while generating payslip.
S: N: If any employee has its won payrun setting from his/her profile that will be preferred first.

-
Badge Value
Here you can setup some default beneficiaries for employees which will be attached to payslips while generating.
S: N: If any employee has its won beneficiary setting from his/her profile that will be preferred first.

-
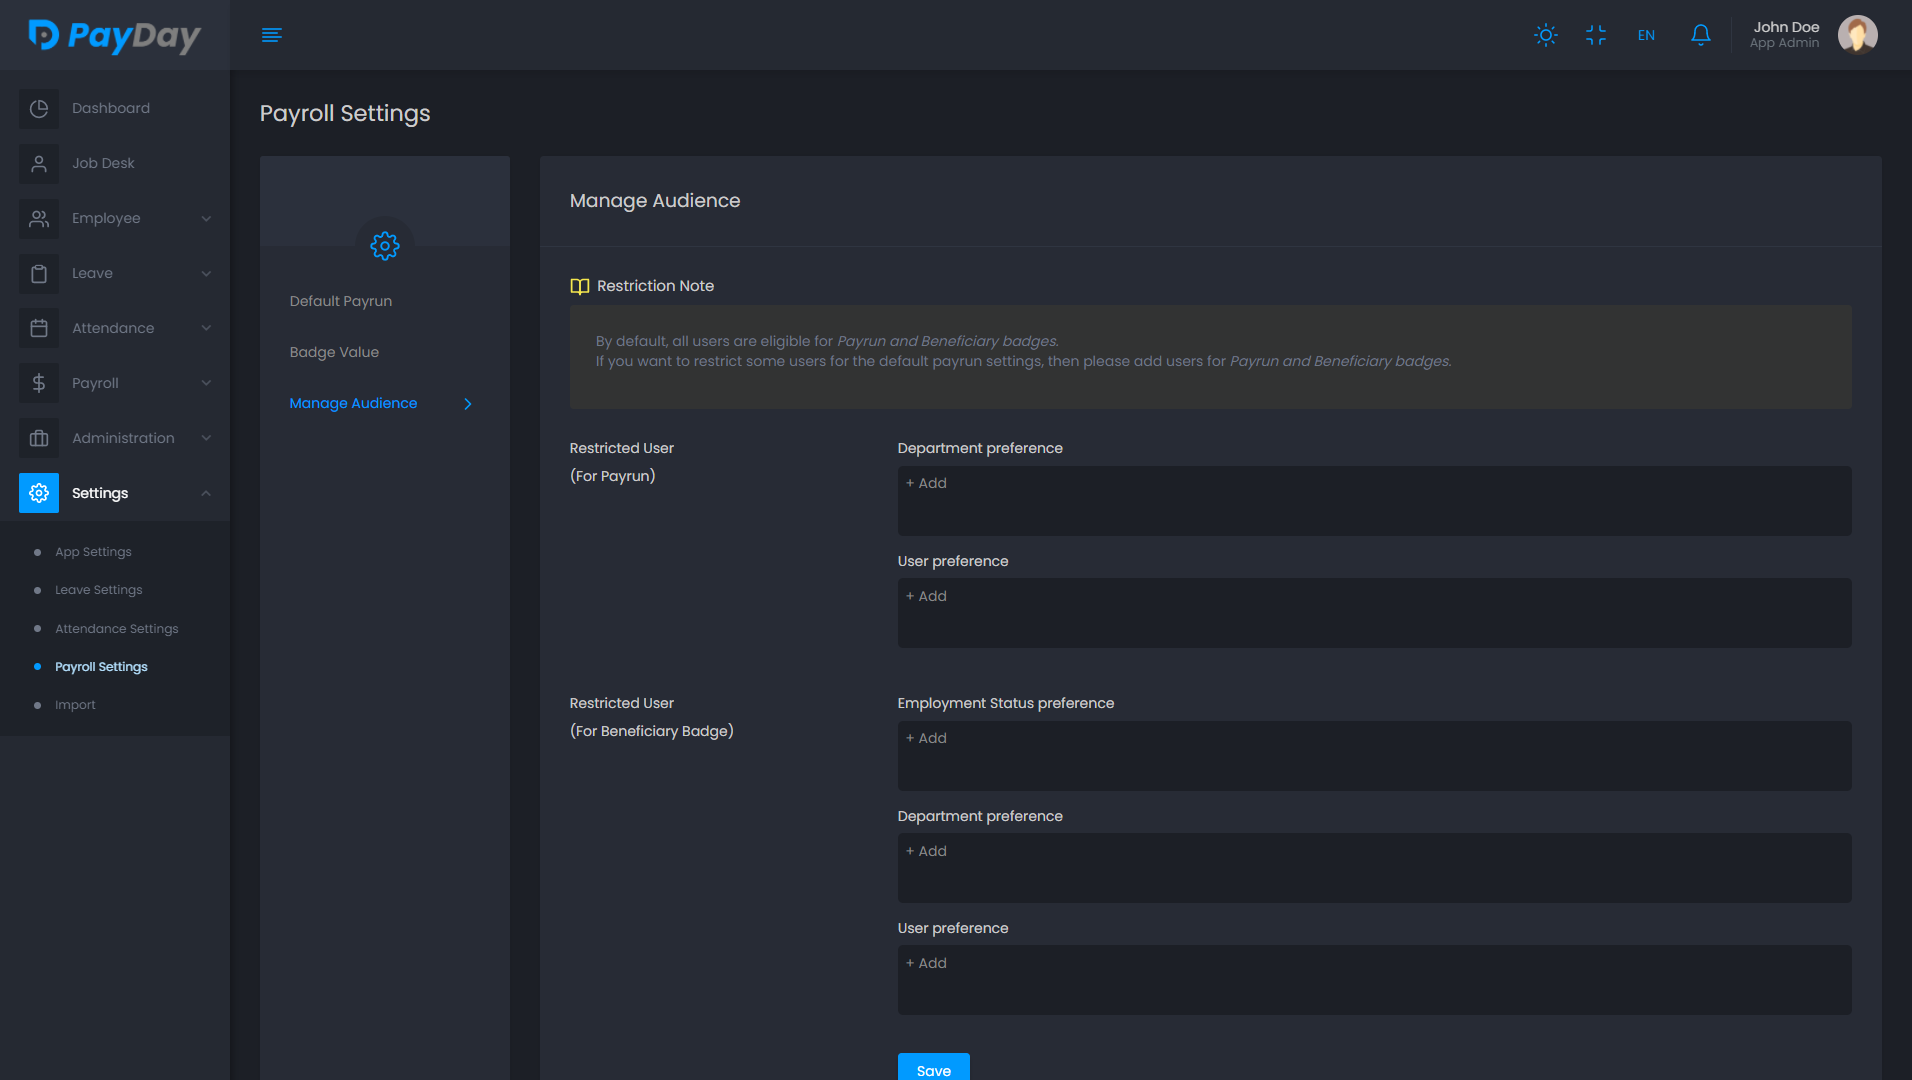
Manage Audience
In this setting you can restrict any employee from getting the default payrun or beneficiary settings.
Import Data
For getting quickstart with your existing data we introduce a import functionality.
-
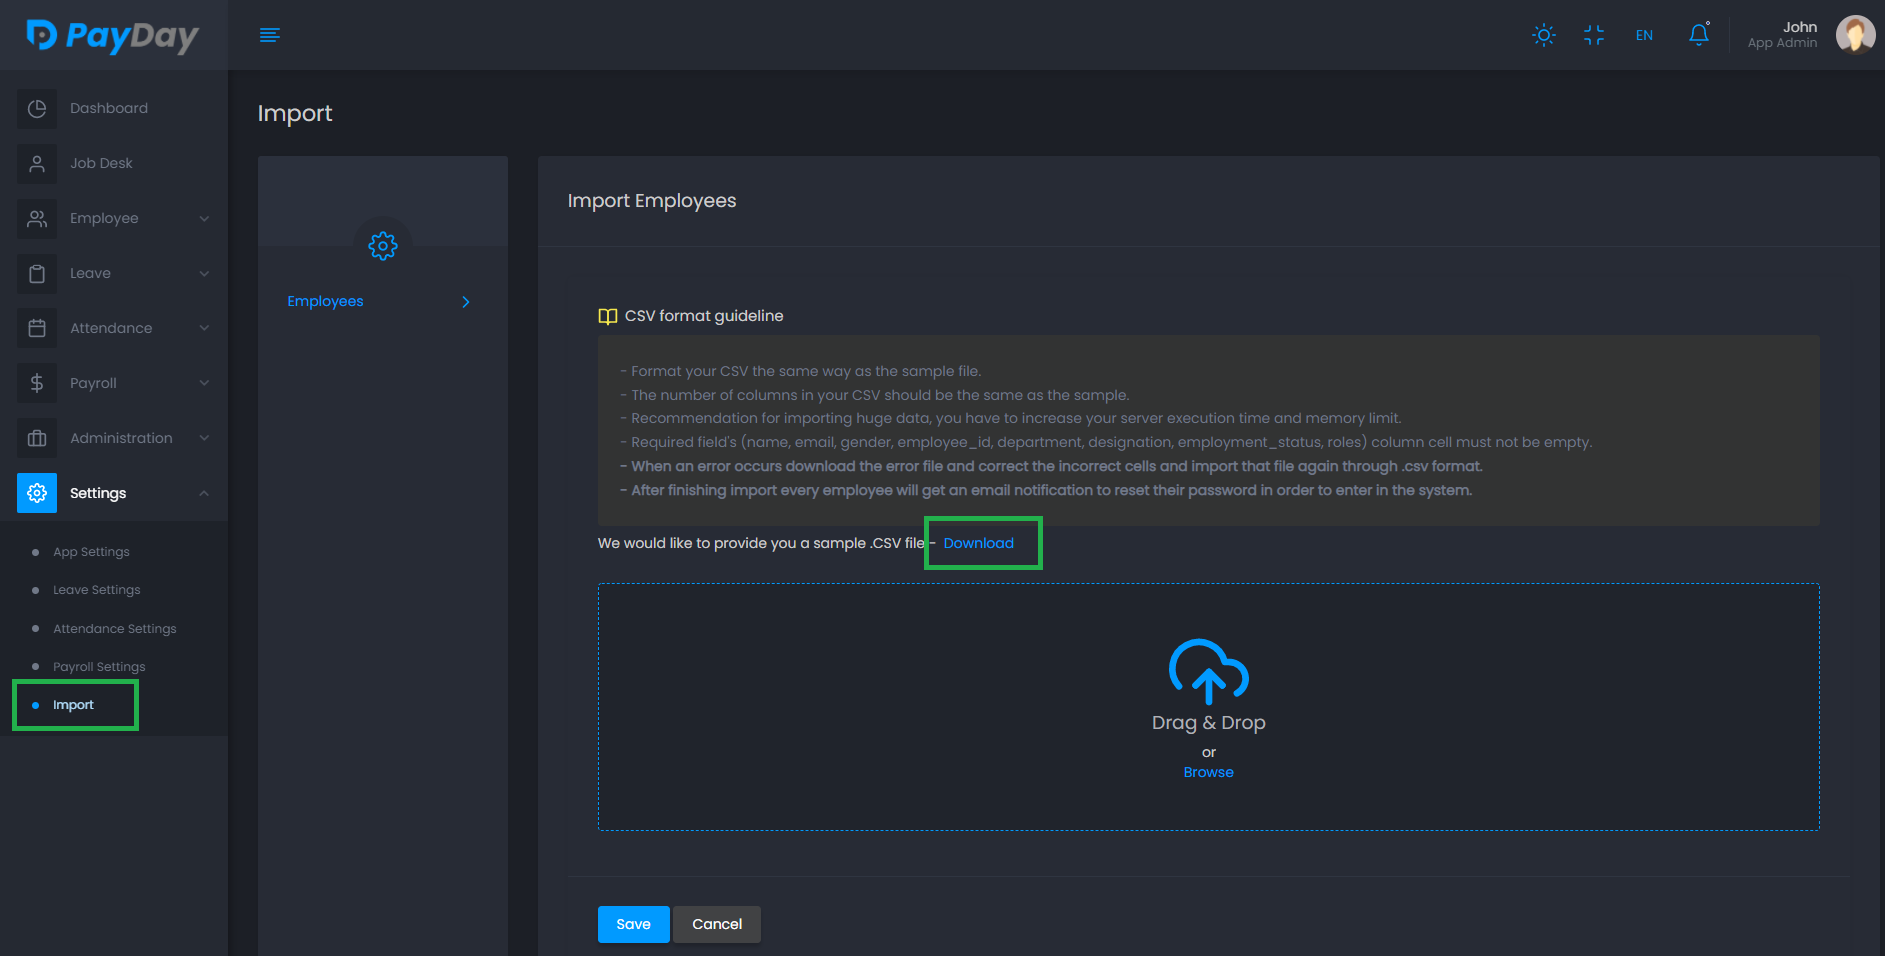
Employees Import
Here you can import your existing employees with a spreadsheet following the given instruction:
- Download the sample .CSV file from the employee import page.
- Format your CSV the same way as the sample file.
- Your CSV columns should be separated by commas, not semicolons or any other characters.
- The names and the number of the column in your CSV should be the same as the sample.
- Required field's (name, email, gender, employee_id, department, designation, employment_status, roles) column cell must not be empty.
- The columns : department, designation, employment_status and roles value must be the same value that exists on the application. For the gender column three option available [male, female, other], for multiple roles use only comma(,) to separate roles and the joining_date column must be the date format of YYYY-MM-DD
- When an error occurs download the error file and correct the incorrect cells and import that file again through .csv format.
- All imported employees will receive an email to reset their password in order to log in except the terminated employee.
- Recommended CSV file should not contain more than 500 rows with default server configuration. For any reason if the maximum execution time exceed then we highly recommend you to increase your server execution time.

-
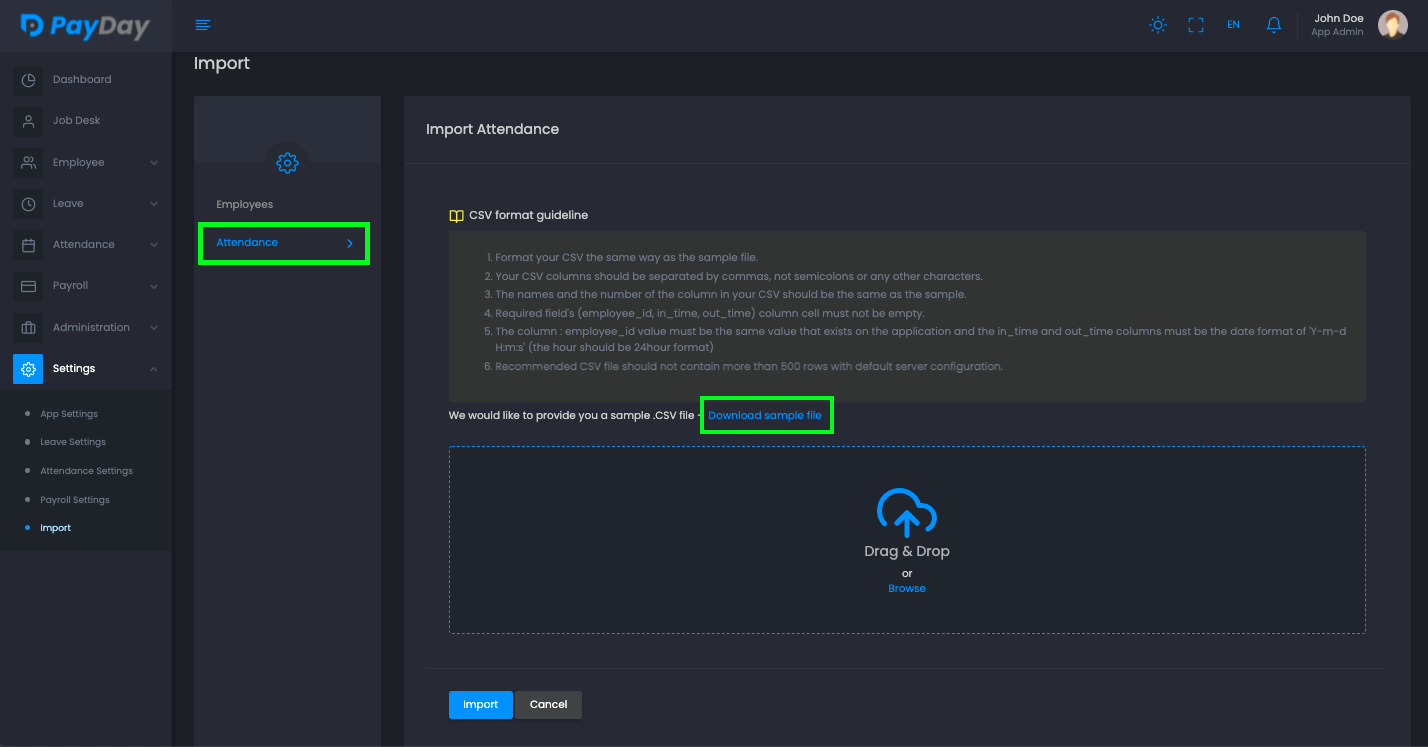
Attendance Import
Here you can import any employee's daily or monthly attendances with a spreadsheet following the given instruction:
- Download the sample .CSV file from the attendance import page.
- Format your CSV the same way as the sample file.
- Your CSV columns should be separated by commas, not semicolons or any other characters.
- The names and the number of the column in your CSV should be the same as the sample.
- Required field's (employee_id, in_time, out_time) column cell must not be empty.
- The column : employee_id value must be the same value that exists on the application and the in_time and out_time columns must be the date format of \'Y-m-d H:m:s\' (the hour should be 24hour format)
- When an error occurs download the error file and correct the incorrect cells and import that file again through .csv format.
- You will find all imported data in attendance module.
- Recommended CSV file should not contain more than 500 rows with default server configuration. For any reason if the maximum execution time exceed then we highly recommend you to increase your server execution time.

Export Data
For providing extra usability of data, we introduce export functionality in the application.
-
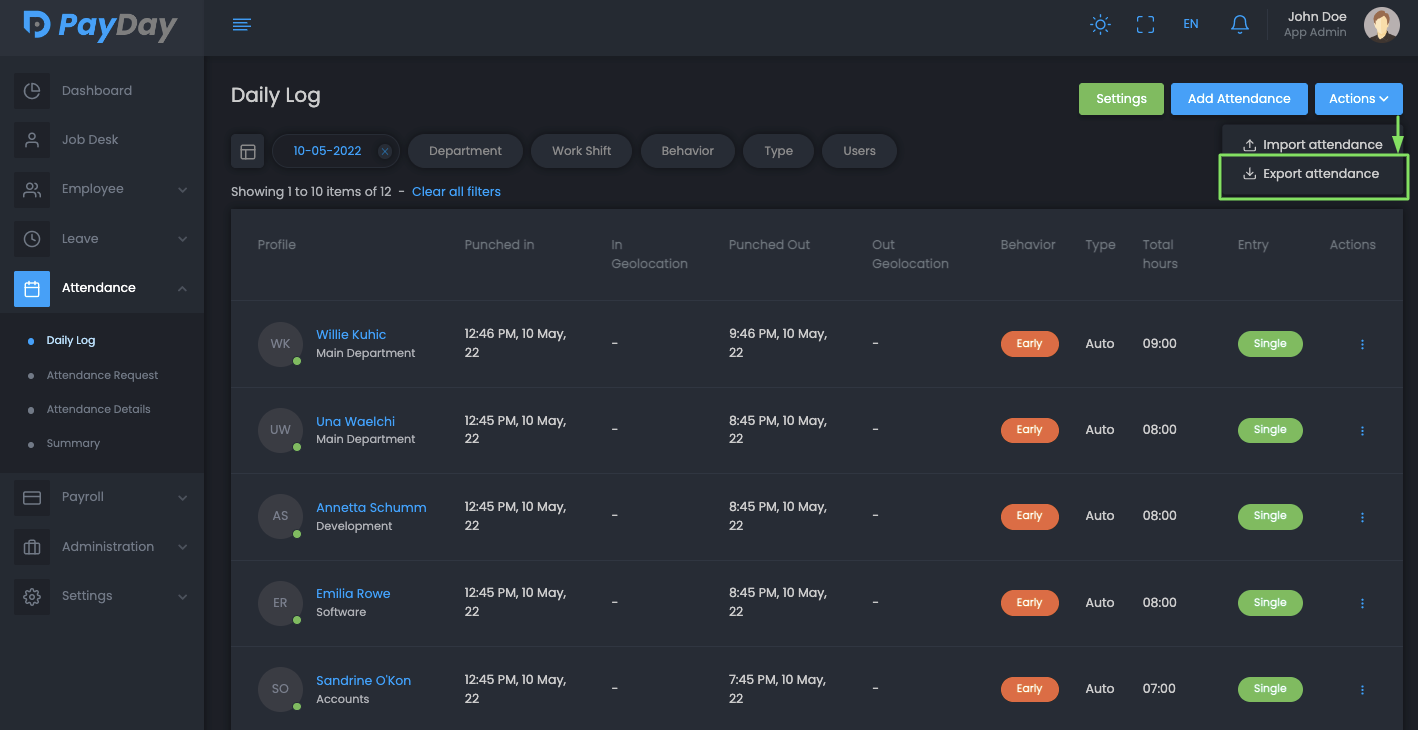
Export Attendance Daily Log
You can export daily or any specific day's attendance log in a spreadsheet from the attendance daily log option.
-
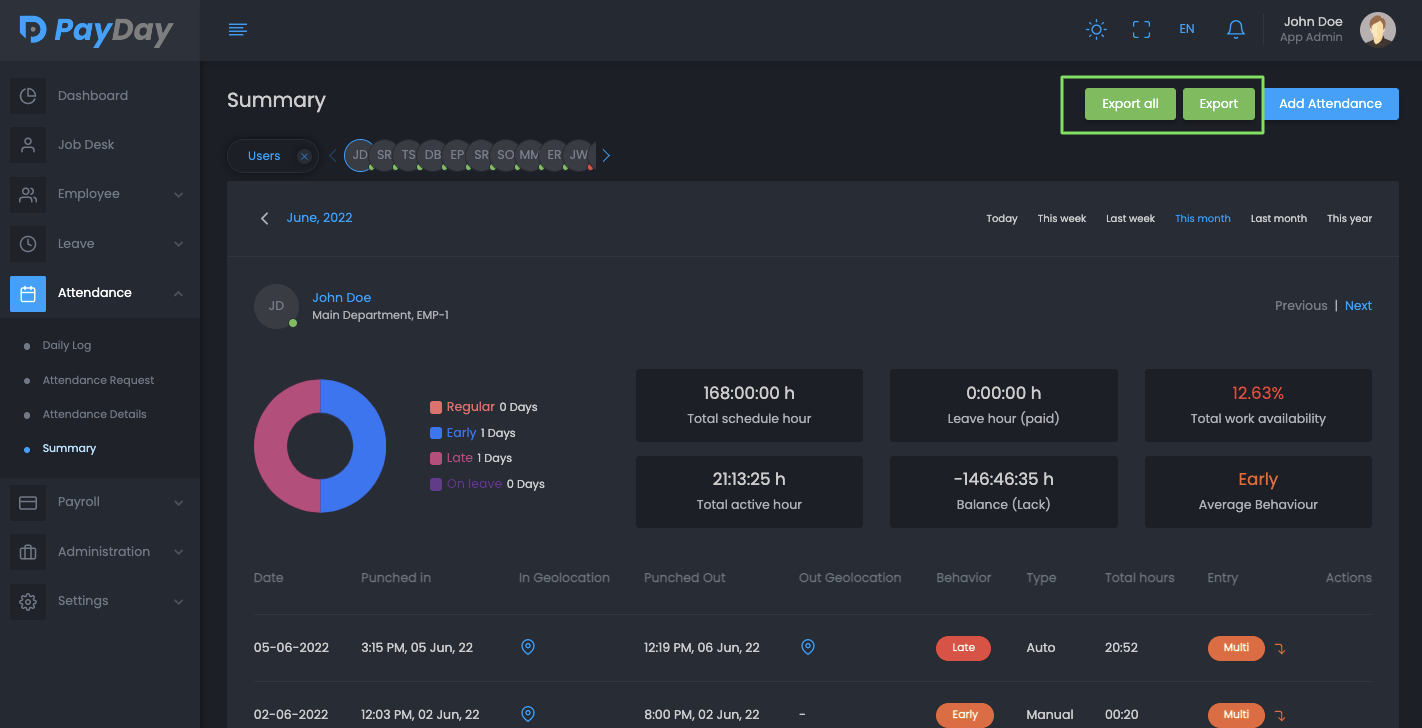
Export Attendance Summery
Here you can export any specific or all employees attendance summery by filtering the data.
